Lenovo M58p User Guide - Page 57
Enabling, disabling, device, Selecting, startup, temporary
 |
UPC - 884343322902
View all Lenovo M58p manuals
Add to My Manuals
Save this manual to your list of manuals |
Page 57 highlights
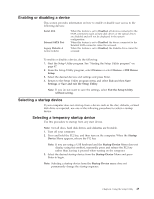
Enabling or disabling a device This section provides information on how to enable or disable user access to the following devices: Serial ATA External SATA Port Legacy Diskette A (some models) When this feature is set to Disabled, all devices connected to the SATA connectors (such as hard disk drives or the optical drive) are disabled and will not be displayed in the system configuration. When this feature is set to Disabled, the device connected to the External SATA connector cannot be accessed. When this feature is set to Disabled, the diskette drive cannot be accessed. To enable or disable a device, do the following: 1. Start the Setup Utility program. See "Starting the Setup Utility program" on page 47. 2. From the Setup Utility program, select Devices or select Devices → IDE Drives Setup. 3. Select the desired devices and settings and press Enter. 4. Return to the Setup Utility program menu and select Exit and then Save Settings or Save and exit the Setup Utility. Note: If you do not want to save the settings, select Exit the Setup Utility without saving. Selecting a startup device If your computer does not start up from a device such as the disc, diskette, or hard disk drive as expected, use one of the following procedures to select a startup device. Selecting a temporary startup device Use this procedure to startup from any start device. Note: Not all discs, hard disk drives, and diskettes are bootable. 1. Turn off your computer. 2. Press and hold the F12 key, and then turn on the computer. When the Startup Device Menu appears, release the F12 key. Note: If you are using a USB keyboard and the Startup Device Menu does not display using this method, repeatedly press and release the F12 key rather than leaving it pressed when turning on the computer. 3. Select the desired startup device from the Startup Device Menu and press Enter to begin. Note: Selecting a startup device from the Startup Device menu does not permanently change the startup sequence. Chapter 4. Using the Setup Utility 49
-
 1
1 -
2
-
3
-
4
-
5
-
6
-
7
-
8
-
9
-
10
-
11
-
12
-
13
-
14
-
15
-
16
-
17
-
18
-
19
-
20
-
21
-
22
-
23
-
24
-
25
-
26
-
27
-
28
-
29
-
30
-
31
-
32
-
33
-
34
-
35
-
36
-
37
-
38
-
39
-
40
-
41
-
42
-
43
-
44
-
45
-
46
-
47
-
48
-
49
-
50
-
51
-
 52
52 -
 53
53 -
 54
54 -
 55
55 -
 56
56 -
 57
57 -
 58
58 -
 59
59 -
 60
60 -
 61
61 -
 62
62 -
63
-
64
-
65
-
66
-
67
-
68
-
69
-
70
-
71
-
72
-
73
-
74
-
75
-
76
-
77
-
78
-
79
-
80
 |
 |
