Lenovo ThinkCentre E51 User Manual - Page 40
Connecting, first, drive, additional, drive, parallel, serial
 |
View all Lenovo ThinkCentre E51 manuals
Add to My Manuals
Save this manual to your list of manuals |
Page 40 highlights
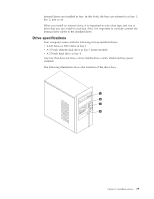
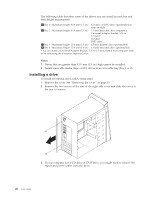
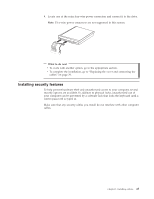
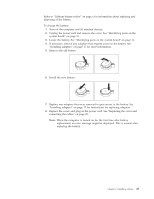
The steps to connect a drive are different depending on the type of drive you are connecting. Use one of the following procedures for your drive connection. Connecting the first CD drive or DVD drive 1. Locate the three-connector signal cable that comes with your computer or with the new drive. 2. Locate the secondary IDE connector on the system board. See "Identifying parts on the system board" on page 11. 3. Connect one end of the signal cable to the drive and the other to the secondary IDE connector on the system board. To reduce electronic noise, use the connectors at the end of the cable only. 4. Your computer has extra power connectors for additional drives. Connect a power connector to the drive. Connecting an additional CD drive, DVD drive, or parallel ATA hard disk drive An additional drive can be connected to either the primary IDE or secondary IDE connector. 1. Locate an available IDE connector on the three-connector signal cable attached to either the primary IDE or secondary IDE connector on the system board. See "Identifying parts on the system board" on page 11. 2. Connect the extra connector on the signal cable to the new drive. 3. Your computer has extra power connectors for additional drives. Connect a power connector to the drive. What to do next v To work with another option, go to the appropriate section. v To complete the installation, go to "Replacing the cover and connecting the cables" on page 29. Connecting a serial ATA hard disk drive A serial hard disk drive can be connected to any available SATA IDE connector. 1. Locate the signal cable that comes with the new drive. 2. Locate an available SATA IDE connector on the system board. See "Identifying parts on the system board" on page 11. 3. Connect one end of the signal cable to the drive and the other to an available SATA IDE connector on the system board. 24 User Guide
-
 1
1 -
2
-
3
-
4
-
5
-
6
-
7
-
8
-
9
-
10
-
11
-
12
-
13
-
14
-
15
-
16
-
17
-
18
-
19
-
20
-
21
-
22
-
23
-
24
-
25
-
26
-
27
-
28
-
29
-
30
-
31
-
32
-
33
-
34
-
 35
35 -
 36
36 -
 37
37 -
 38
38 -
 39
39 -
 40
40 -
 41
41 -
 42
42 -
 43
43 -
 44
44 -
 45
45 -
46
-
47
-
48
-
49
-
50
-
51
-
52
-
53
-
54
-
55
-
56
-
57
-
58
-
59
-
60
-
61
-
62
-
63
-
64
-
65
-
66
-
67
-
68
 |
 |