Lexmark X1270 User's Guide - Page 16
Scanning, copying, and faxing, troubleshooting, Removing and reinstalling the software - installation software
 |
UPC - 734646398305
View all Lexmark X1270 manuals
Add to My Manuals
Save this manual to your list of manuals |
Page 16 highlights
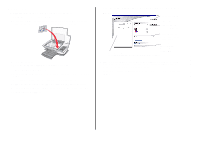
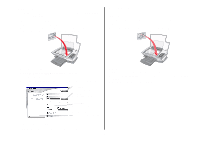
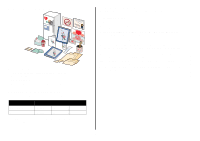
All-In-One has a paper jam 1 Follow the instructions on the screen for clearing the paper jam. 2 Make sure you are using paper designed for an inkjet printer. For a list of recommended papers, see page 9. 3 Make sure you are loading the paper correctly. For more information, see page 10. 4 Make sure the paper guide is against the left edge of the paper. For more information, see page 10. Scanning, copying, and faxing troubleshooting Scanning was not successful The software may not be installed properly. Follow the instructions for "All-In-One is not communicating with the computer" on page 15. Scanning or using a scanned image with a software program takes a long time or freezes the computer Lower the scanning resolution. Scanning resolution is much different than printing resolution and is generally set much lower. To change the scanning resolution: 1 Open the Lexmark All-In-One Center. For help, see page 5. 2 From the Scan section, click See More Scan Settings. 3 Click Display Advanced Scan Settings. 4 From the Scan tab of Advanced Scan Settings, enter a lower scan resolution. Edge of the copy does not print • Make sure the original item is properly oriented on the glass. For more information, see page 11. • Make sure the area you want to copy is not larger than the printable area of the page. Apply the Fit-to-page feature. To apply the Fit-to-page feature: 1 Open the Lexmark All-In-One Center (see page 5). 2 From the Copy section, click See More Copy Settings. 3 From the Reduce/Enlarge section, click the second button, and then select Fit to page from the corresponding drop-down menu. 4 Copy your document again. Copy button on the control panel does not work • Make sure the computer is on. The computer must be on in order for the AllIn-One to work. • Make sure you properly installed the software. For help, refer to the setup documentation. The software must be installed for the copier to work. Fax function does not work • Make sure the computer and the All-In-One are on. • Make sure the computer is connected to a phone line. A phone connection is required for faxing to function. • The memory may be full. Wait until the faxes in memory have been sent, and then send the current fax again. Removing and reinstalling the software If the All-In-One software is not functioning properly or a communications error message appears when you try to use the All-In-One, you may need to remove, and then reinstall the printer software. 1 From the desktop, click Start Programs Lexmark 1200 Series Uninstall Lexmark 1200 Series. Note: If Uninstall is not an option on the menu, see "All-In-One is not communicating with the computer" on page 15. 2 Follow the instructions on the computer screen to remove the All-In-One software. 3 Restart the computer before reinstalling the software. 4 Insert the CD and follow the instructions on the computer screen to install the software. For help, refer to the setup documentation. 16
-
 1
1 -
2
-
3
-
4
-
5
-
6
-
7
-
8
-
9
-
10
-
 11
11 -
 12
12 -
 13
13 -
 14
14 -
 15
15 -
 16
16 -
 17
17 -
 18
18 -
 19
19 -
 20
20 -
 21
21
 |
 |