Lexmark X443 Setup and User's Guide - Page 104
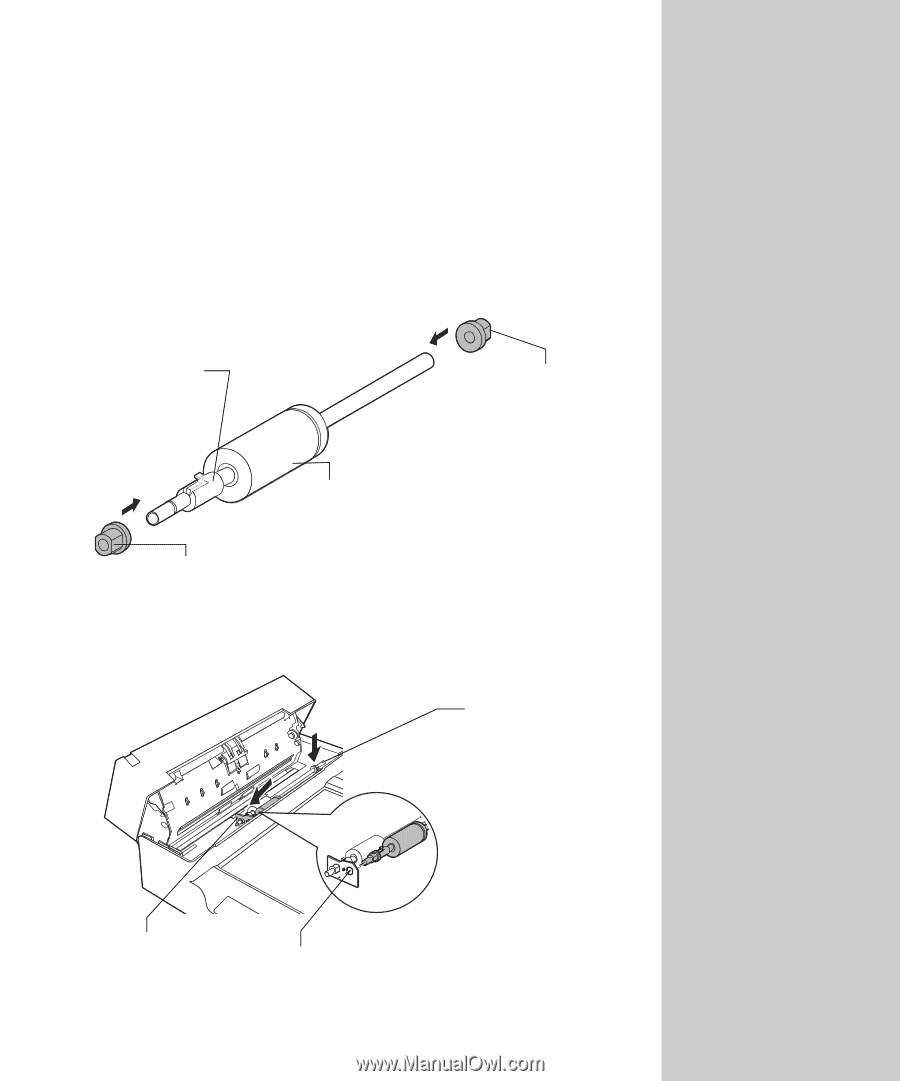
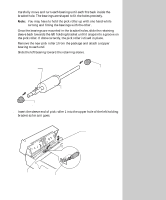
bearing to each end., Remove the new pick roller 1 from the package and attach a copper
 |
View all Lexmark X443 manuals
Add to My Manuals
Save this manual to your list of manuals |
Page 104 highlights
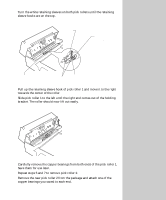
13 Carefully move and turn each bearing until each fits back inside the bracket hole. The bearings are shaped to fit the holes precisely. Note: You may have to hold the pick roller up with one hand while turning and fitting the bearings with the other. 14 Once the bearings are mounted in the bracket holes, slide the retaining sleeve back towards the left holding bracket until it snaps into a groove on the pick roller. If done correctly, the pick roller is fixed in place. 15 Remove the new pick roller 1 from the package and attach a copper bearing to each end. 16 Slide the left bearing toward the retaining sleeve. Retaining sleeve Right bearing Pick roller 1 Left bearing 17 Insert the sleeve end of pick roller 1 into the upper hole of the left holding bracket as far as it goes. Right holding bracket Left holding bracket Upper bracket hole 96
-
 1
1 -
2
-
3
-
4
-
5
-
6
-
7
-
8
-
9
-
10
-
11
-
12
-
13
-
14
-
15
-
16
-
17
-
18
-
19
-
20
-
21
-
22
-
23
-
24
-
25
-
26
-
27
-
28
-
29
-
30
-
31
-
32
-
33
-
34
-
35
-
36
-
37
-
38
-
39
-
40
-
41
-
42
-
43
-
44
-
45
-
46
-
47
-
48
-
49
-
50
-
51
-
52
-
53
-
54
-
55
-
56
-
57
-
58
-
59
-
60
-
61
-
62
-
63
-
64
-
65
-
66
-
67
-
68
-
69
-
70
-
71
-
72
-
73
-
74
-
75
-
76
-
77
-
78
-
79
-
80
-
81
-
82
-
83
-
84
-
85
-
86
-
87
-
88
-
89
-
90
-
91
-
92
-
93
-
94
-
95
-
96
-
97
-
98
-
 99
99 -
 100
100 -
 101
101 -
 102
102 -
 103
103 -
 104
104 -
 105
105 -
 106
106 -
 107
107 -
 108
108 -
 109
109 -
110
-
111
-
112
-
113
-
114
-
115
-
116
-
117
-
118
-
119
-
120
-
121
-
122
-
123
 |
 |