Lexmark X443 Setup and User's Guide - Page 30
Use the OptraImage control panel, Special tips for setting fax information
 |
View all Lexmark X443 manuals
Add to My Manuals
Save this manual to your list of manuals |
Page 30 highlights
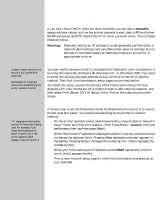
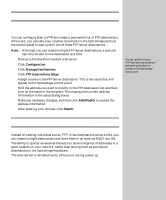
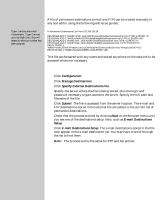
Use the OptraImage control panel If you have purchased a MarkNet N2501e print server, during power up a message displays in the control panel asking you to Please Set Time. This is the prompt to begin the required fax setup. Special tips for setting fax information: • When entering characters or numbers, repeatedly pressing each number on the numeric keypad changes it from a number, and then to the uppercase character, and then to the lowercase character, and then to the next character. • When entering a specific character or number, pressing Menu> or repeatedly until you see Fax Quick Setup, and then press Select. 2 When Country/Zone appears, use Menu> to find your country and time zone (for example, US/Can Eastern), and then press Select to save your choice. 3 Set the current date and time: • If the correct date and time appear on the display, press Return to go to the next menu item. • If the default date and time appear (1900-01-01 15:35) on the display, use the numeric keypad to change the numbers in each field. After the date and time are set, the next menu item appears. 4 When you see Station Name, enter your name or company name using the numeric keypad on the panel. 5 Press Return when you have finished entering your Station Name. SAVED briefly appears. 6 When you see Station Number, enter your fax phone number using the numeric keypad on the panel. 7 Press Return after entering your Station Number. SAVED briefly appears. After the last menu item has been entered, Setup Complete appears. For additional help in understanding the control panel, see the "Control panel guide" on page 4. 22
-
 1
1 -
2
-
3
-
4
-
5
-
6
-
7
-
8
-
9
-
10
-
11
-
12
-
13
-
14
-
15
-
16
-
17
-
18
-
19
-
20
-
21
-
22
-
23
-
24
-
 25
25 -
 26
26 -
 27
27 -
 28
28 -
 29
29 -
 30
30 -
 31
31 -
 32
32 -
 33
33 -
 34
34 -
 35
35 -
36
-
37
-
38
-
39
-
40
-
41
-
42
-
43
-
44
-
45
-
46
-
47
-
48
-
49
-
50
-
51
-
52
-
53
-
54
-
55
-
56
-
57
-
58
-
59
-
60
-
61
-
62
-
63
-
64
-
65
-
66
-
67
-
68
-
69
-
70
-
71
-
72
-
73
-
74
-
75
-
76
-
77
-
78
-
79
-
80
-
81
-
82
-
83
-
84
-
85
-
86
-
87
-
88
-
89
-
90
-
91
-
92
-
93
-
94
-
95
-
96
-
97
-
98
-
99
-
100
-
101
-
102
-
103
-
104
-
105
-
106
-
107
-
108
-
109
-
110
-
111
-
112
-
113
-
114
-
115
-
116
-
117
-
118
-
119
-
120
-
121
-
122
-
123
 |
 |