Lexmark X443 Setup and User's Guide - Page 29
Use the MarkNet resident web server IP only, Create a fax destination list
 |
View all Lexmark X443 manuals
Add to My Manuals
Save this manual to your list of manuals |
Page 29 highlights
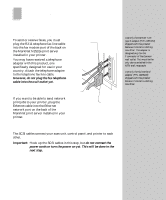
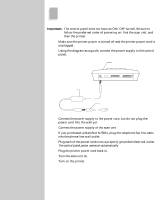
Use the MarkNet resident web server (IP only) Configuration is a task usually performed by a network administrator or other system support person. If you are prompted for a password, see your support person for help. During printer power up the MarkNet print server searches your network for a Network Time Protocol (NTP) time server. If it finds a NTP time server, and then the current date and time are provided by the time server. However, you must set the country and time zone to get the correct time. After the IP address is set (using any method), use your browser to set the required fax information. 1 Type the IP address of the MarkNet print server in the URL field of your browser (for example, http://192.168.236.24), and then press Enter. 2 Click Configuration. 3 Under the OptraImage heading, click FAX Setup. 4 Enter the required FCC information: • Date and Time (change to current date and time) • Station Name (your personal name or company name) • Station Number (your fax phone number) 5 Select the Country and Time Zone, such as USA/Can. Eastern (USA and Canada, Eastern Standard Time). This sets the required information. 6 Set or change any additional fax settings you want. For detailed information about these additional settings, see "Chapter 3: Faxing" on page 45. 7 After entering the information, click Submit. A list of these shortcuts can be viewed and printed. See "Print the shortcut list" on page 60. Create a fax destination list Instead of entering the entire phone number of a fax recipient on the control panel each time you want to send a fax, you can create a permanent fax destination and assign a shortcut. All you need to do to send a fax is press #, and then enter the assigned shortcut number on the numeric keypad of the OptraImage control panel. 1 Click Configuration. 2 Click Manage Destinations. 3 Click FAX Destinations Setup. 4 Enter a unique name for the fax recipient and specify their fax number. 5 Assign a shortcut number (1-89). If you enter a number already in use, you are prompted to select another number. 6 Click Submit. 21
-
 1
1 -
2
-
3
-
4
-
5
-
6
-
7
-
8
-
9
-
10
-
11
-
12
-
13
-
14
-
15
-
16
-
17
-
18
-
19
-
20
-
21
-
22
-
23
-
 24
24 -
 25
25 -
 26
26 -
 27
27 -
 28
28 -
 29
29 -
 30
30 -
 31
31 -
 32
32 -
 33
33 -
 34
34 -
35
-
36
-
37
-
38
-
39
-
40
-
41
-
42
-
43
-
44
-
45
-
46
-
47
-
48
-
49
-
50
-
51
-
52
-
53
-
54
-
55
-
56
-
57
-
58
-
59
-
60
-
61
-
62
-
63
-
64
-
65
-
66
-
67
-
68
-
69
-
70
-
71
-
72
-
73
-
74
-
75
-
76
-
77
-
78
-
79
-
80
-
81
-
82
-
83
-
84
-
85
-
86
-
87
-
88
-
89
-
90
-
91
-
92
-
93
-
94
-
95
-
96
-
97
-
98
-
99
-
100
-
101
-
102
-
103
-
104
-
105
-
106
-
107
-
108
-
109
-
110
-
111
-
112
-
113
-
114
-
115
-
116
-
117
-
118
-
119
-
120
-
121
-
122
-
123
 |
 |