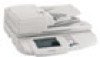
Lexmark X750e MFP X4500 Option Setup Guide - Page 13
Step 5: Con your MFP - manual
 |
View all Lexmark X750e manuals
Add to My Manuals
Save this manual to your list of manuals |
Page 13 highlights
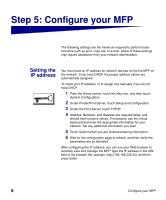
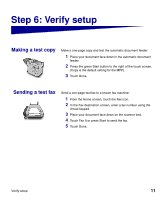
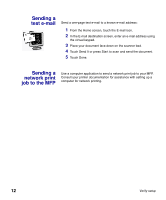
Step 5: Configure your MFP The following settings are the minimum required to perform basic functions such as print, copy, fax, or e-mail. Some of these settings may require assistance from your network administrator. Setting the IP address You must have an IP address for network devices to find the MFP on the network. If you have DHCP, the proper address values are automatically assigned. To check your IP address, or to assign one manually if you do not have DHCP: 1 From the Home screen, touch the Key icon, and then touch System Configuration. 2 Under Printer/Print Server, touch Setup and Configuration. 3 Under the Print Server, touch TCP/IP. 4 Address, Netmask, and Gateway are required fields, and should have nonzero values. If necessary, use the virtual keyboard and enter the appropriate information for your network. Set any additional information you want. 5 Touch Submit when you are finished entering information. 6 Wait for the configuration page to refresh, and then verify the parameters are as intended. After configuring the IP address, you can use your Web browser to remotely view and manage the MFP. Type the IP address in the URL field of the browser (for example, http://192.168.236.24), and then press Enter. 8 Configure your MFP
-
 1
1 -
2
-
3
-
4
-
5
-
6
-
7
-
 8
8 -
 9
9 -
 10
10 -
 11
11 -
 12
12 -
 13
13 -
 14
14 -
 15
15 -
 16
16 -
 17
17 -
 18
18 -
19
-
20
-
21
-
22
-
23
-
24
-
25
-
26
-
27
-
28
-
29
-
30
-
31
-
32
-
33
-
34
-
35
-
36
-
37
-
38
-
39
-
40
-
41
-
42
-
43
-
44
-
45
-
46
-
47
-
48
-
49
-
50
-
51
-
52
-
53
-
54
-
55
-
56
-
57
-
58
-
59
-
60
-
61
-
62
-
63
-
64
-
65
-
66
-
67
-
68
-
69
-
70
-
71
-
72
-
73
-
74
-
75
-
76
-
77
-
78
-
79
-
80
-
81
-
82
-
83
-
84
-
85
-
86
-
87
-
88
-
89
-
90
-
91
-
92
-
93
-
94
-
95
-
96
-
97
-
98
-
99
-
100
-
101
-
102
-
103
-
104
-
105
-
106
-
107
-
108
-
109
-
110
-
111
-
112
-
113
-
114
-
115
-
116
-
117
-
118
-
119
-
120
-
121
-
122
-
123
-
124
-
125
-
126
-
127
-
128
-
129
-
130
-
131
-
132
-
133
-
134
-
135
-
136
-
137
-
138
-
139
-
140
-
141
-
142
-
143
-
144
-
145
-
146
-
147
-
148
-
149
-
150
-
151
-
152
-
153
-
154
-
155
-
156
-
157
-
158
-
159
-
160
-
161
-
162
-
163
-
164
-
165
-
166
-
167
-
168
 |
 |