Linksys NSS2000 Cisco NSS2000 Series Network Storage System Getting Started Gu - Page 11
Step 3 - Install the Power, NSS-supported UPS Product Families
 |
UPC - 745883577088
View all Linksys NSS2000 manuals
Add to My Manuals
Save this manual to your list of manuals |
Page 11 highlights
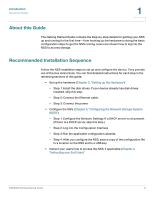
Setting up the Hardware Step 3 - Install the Power 2 Step 3 - Install the Power After you connect the Ethernet cable, you are ready to power up the NSS. There are several possible power configurations. We suggest that a UPS be used since a sudden loss of power can cause RAID corruption and possible data loss. The following procedure provides details for each of these options. To connect the power to the NSS: STEP 1 Depending on your power configuration, do one of the following: • UPS: Connect the power cable to the Power port on the NSS and to an available port on the UPS. You then need to connect the USB signal cable from the UPS to the UPS port on the NSS. For more information about choosing a UPS, refer to the list of supported UPS product families. • Mains: Connect the power cable to the Power port on the NSS and to the mains power. STEP 2 Press the Power button and confirm the Power LED on the front of the NSS chassis turns yellow. Congratulations! You have successfully set up the NSS hardware. You are now ready to configure the NSS for your unique business storage needs. NSS-supported UPS Product Families The NSS supports the following UPS product families: • APC Back-UPS Pro USB • APC Back-UPS RS USB • APC Back-UPS USB • APC Back-UPS LS USB • APC Back-UPS ES/CyberFort 350 • APC Smart-UPS USB NSS2000 Getting Started Guide 7
-
 1
1 -
2
-
3
-
4
-
5
-
 6
6 -
 7
7 -
 8
8 -
 9
9 -
 10
10 -
 11
11 -
 12
12 -
 13
13 -
 14
14 -
 15
15 -
 16
16 -
17
-
18
-
19
-
20
-
21
-
22
-
23
-
24
-
25
-
26
-
27
-
28
-
29
-
30
-
31
-
32
-
33
-
34
 |
 |
