Logitech Harmony Link User's Guide - Page 10
Teaching commands using your original remote - user manual
 |
View all Logitech Harmony Link manuals
Add to My Manuals
Save this manual to your list of manuals |
Page 10 highlights
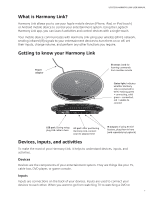
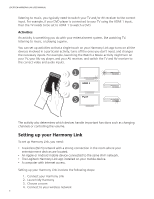
LOGITECH HARMONY LINK USER MANUAL 6. Adding devices After you have collected the model numbers for your entertainment devices, you can begin adding them to your Harmony account. You can use your Harmony Link app to control up to 8 devices. Note: If you add the wrong device, you can remove it once initial setup is complete. My Harmony will walk you through the process of setting up your devices. You'll be asked to provide the manufacturer name and model number for each entertainment devices you want to control with your Harmony Link app. You can use the Device worksheet on page 5 to gather the necessary information. For devices with multiple inputs (like TVs and AV receivers), you'll need to note which devices are connected to them, and with which inputs. Teaching commands using your original remote If My Harmony doesn't recognize the brand and model number of the device you're trying to add, you can use the original device remote to teach its commands so you can control the device. Your Harmony Link has an IR sensor so it can learn commands from your original remote. Before you can begin teaching, you must connect your Harmony Link to your computer using the USB cable provided, and plug your Harmony Link into a power supply. Note: Harmony Link may take up to a minute to fully power up before you can begin teaching. Follow the on-screen instructions to position the remote and your Harmony Link for teaching. Make sure you point the original remote at the Logitech logo on your Harmony Link at a 45 degree angle, about 4-5 inches (or 10-12 centimeters) away. You'll be asked to press one or more buttons on the original remote. Press and release the button as you normally would. Do not press and hold the button. If you can't find the 6
-
 1
1 -
2
-
3
-
4
-
 5
5 -
 6
6 -
 7
7 -
 8
8 -
 9
9 -
 10
10 -
 11
11 -
 12
12 -
 13
13 -
 14
14 -
 15
15 -
16
-
17
-
18
 |
 |
