Lowrance HDS-5 Gen2 Installation Manual - Page 26
Pod Transducer Installation Instructions, Pod Transducer shoot-thru-hull installation
 |
View all Lowrance HDS-5 Gen2 manuals
Add to My Manuals
Save this manual to your list of manuals |
Page 26 highlights
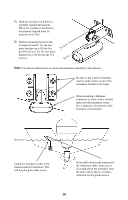
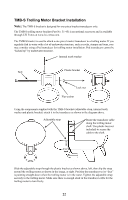
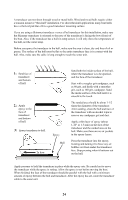
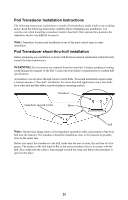
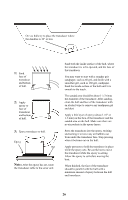
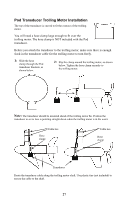
Pod Transducer Installation Instructions The following instructions explain how to install a Pod transducer inside a hull or on a trolling motor. Read the following instructions carefully before attempting any installation. Use extreme care when mounting a transducer inside a boat hull. Once epoxied into position, the transducer can be very difficult to remove. Note: Transducer location and installation is one of the most critical steps in sonar installation. Pod Transducer shoot-thru-hull installation Before attempting any installation on boats with flotation material sandwiched within the hull, consult the boat manufacturer. WARNING: Do not remove any material from the inner hull. Careless grinding or cutting could damage the integrity of the hull. Contact the boat dealer or manufacturer to confirm hull specifications. A transducer can not shoot through wood or metal hulls. Wood and metal hulls require either a transom mount or "thru-hull" installation. For shoot-thru-hull applications many boat hulls have a flat keel pad that offers a good transducer mounting surface. Transducer Transducer epoxied to hull. Epoxy Hull Note: The previous image shows a Pod transducer epoxied to a flat, solid portion of the boat hull near the transom. The transducer should be installed as close to the transom as possible, close to the center line. Before you epoxy the transducer to the hull, make sure the area is clean, dry and free of oil or grease. The surface of the hull must be flat so the entire transducer face is in contact with the hull. Also, make sure the cable is long enough to reach the sonar unit before the transducer is epoxied into place. 25
-
 1
1 -
2
-
3
-
4
-
5
-
6
-
7
-
8
-
9
-
10
-
11
-
12
-
13
-
14
-
15
-
16
-
17
-
18
-
19
-
20
-
 21
21 -
 22
22 -
 23
23 -
 24
24 -
 25
25 -
 26
26 -
 27
27 -
 28
28 -
 29
29 -
 30
30 -
 31
31 -
32
-
33
-
34
-
35
-
36
-
37
-
38
-
39
-
40
-
41
-
42
-
43
-
44
-
45
-
46
-
47
-
48
-
49
-
50
-
51
-
52
 |
 |
