MSI A55M User Guide - Page 15
Rear Panel, Hardware Setup
 |
View all MSI A55M manuals
Add to My Manuals
Save this manual to your list of manuals |
Page 15 highlights
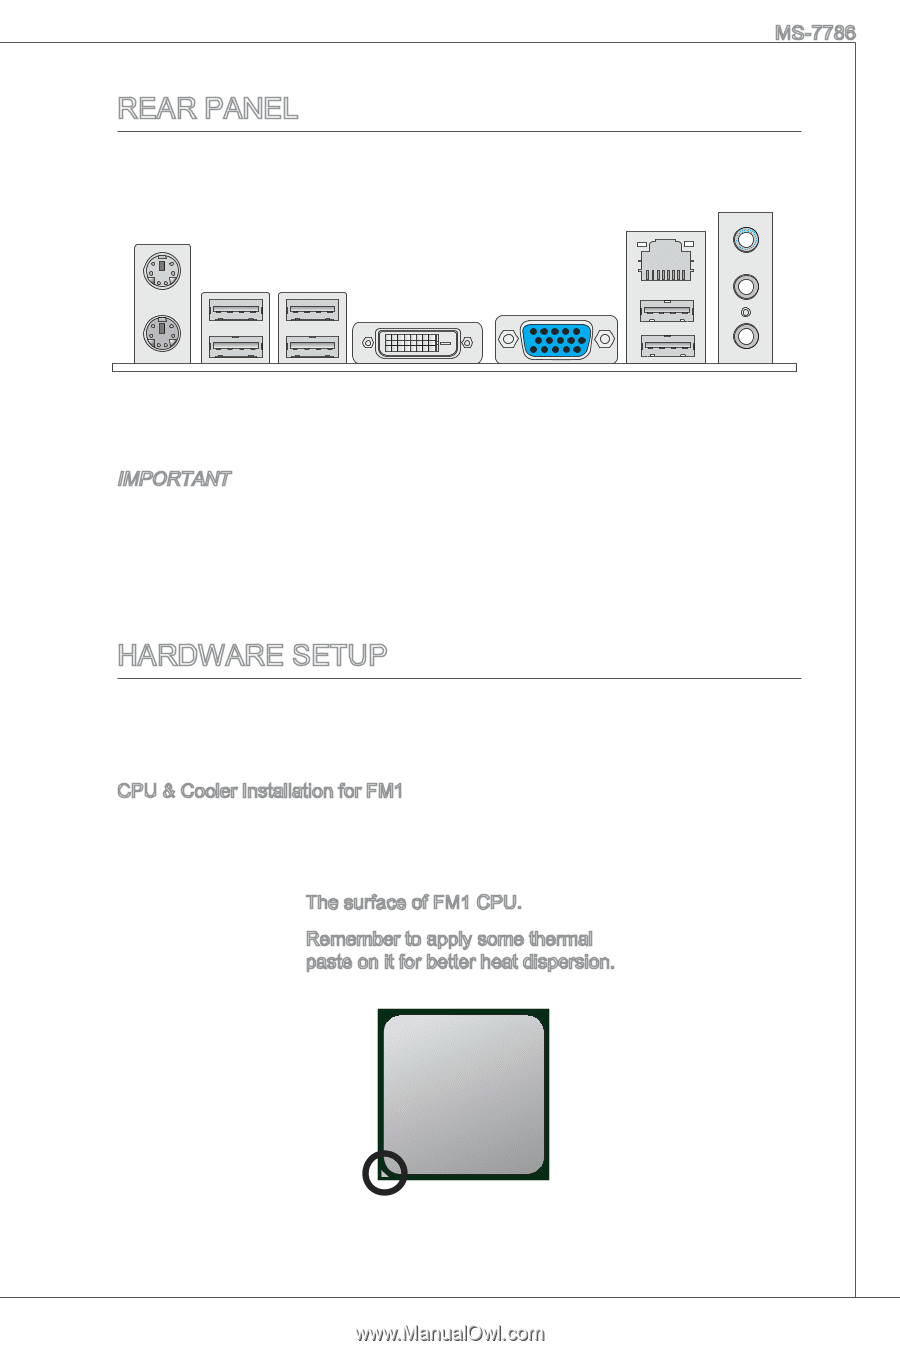
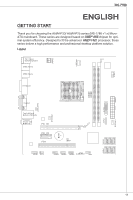
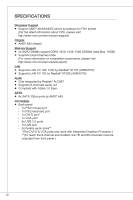
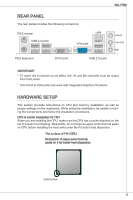
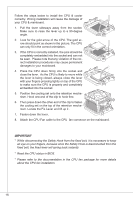
MS-7786 REAR PANEL The rear panel provides the following connectors: PS/2 mouse USB 2.0 ports LAN VGA port PS/2 keyboard DVI-D port USB 2.0 ports Line-In Line-Out MIC Important * To reach the 8-channel sound effect, the 7th and 8th channels must be output from front panel. * The DVI-D & VGA ports only work with Integrated Graphics Processor. HARDWARE SETUP This section provides instructions on CPU and memory installation, as well as jumper settings on the mainboard. While doing the installation, be careful in holding the components and follow the installation procedures. CPU & Cooler Installation for FM1 When you are installing the CPU, make sure the CPU has a cooler attached on the top to prevent overheating. Meanwhile, do not forget to apply some thermal paste on CPU before installing the heat sink/cooler fan for better heat dispersion. The surface of FM1 CPU. Remember to apply some thermal paste on it for better heat dispersion. Gold arrow 15
-
 1
1 -
2
-
3
-
4
-
5
-
6
-
7
-
8
-
9
-
 10
10 -
 11
11 -
 12
12 -
 13
13 -
 14
14 -
 15
15 -
 16
16 -
 17
17 -
 18
18 -
 19
19 -
 20
20 -
21
-
22
-
23
-
24
-
25
-
26
-
27
-
28
-
29
-
30
-
31
-
32
-
33
-
34
-
35
-
36
-
37
-
38
-
39
-
40
-
41
-
42
-
43
-
44
-
45
-
46
-
47
-
48
-
49
-
50
-
51
-
52
-
53
-
54
-
55
-
56
-
57
-
58
-
59
-
60
-
61
-
62
-
63
-
64
-
65
-
66
-
67
-
68
-
69
-
70
-
71
-
72
-
73
-
74
-
75
-
76
-
77
-
78
-
79
-
80
-
81
-
82
-
83
-
84
-
85
-
86
-
87
-
88
-
89
-
90
-
91
-
92
-
93
-
94
-
95
-
96
-
97
-
98
-
99
-
100
-
101
-
102
-
103
-
104
-
105
-
106
-
107
-
108
-
109
-
110
-
111
-
112
-
113
-
114
-
115
-
116
-
117
-
118
-
119
-
120
-
121
-
122
-
123
-
124
-
125
-
126
-
127
-
128
-
129
-
130
-
131
-
132
-
133
-
134
-
135
-
136
-
137
-
138
-
139
-
140
-
141
-
142
-
143
-
144
-
145
-
146
-
147
-
148
-
149
-
150
-
151
-
152
-
153
-
154
-
155
-
156
-
157
-
158
-
159
-
160
-
161
-
162
-
163
-
164
-
165
-
166
-
167
-
168
-
169
-
170
-
171
 |
 |