Makita EK7301 Owners Manual - Page 25
Replacing the starter cable, CAUTION
 |
View all Makita EK7301 manuals
Add to My Manuals
Save this manual to your list of manuals |
Page 25 highlights
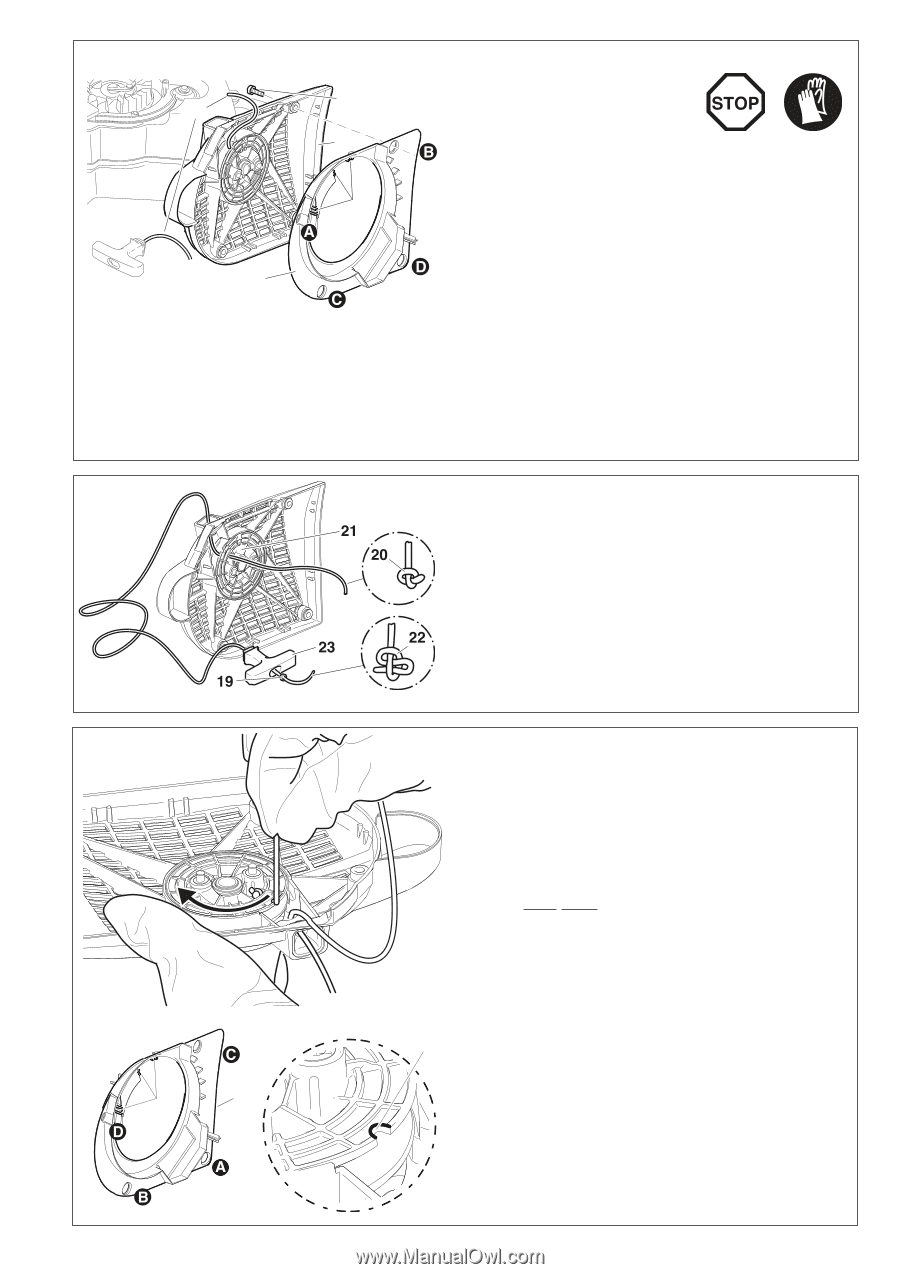
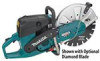
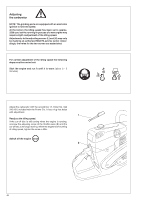
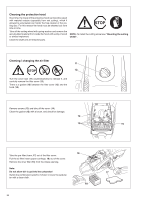
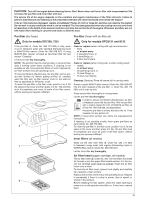
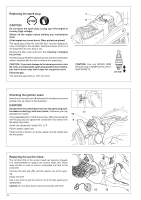
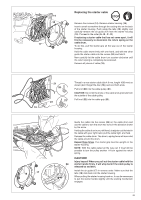
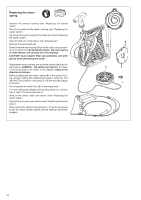
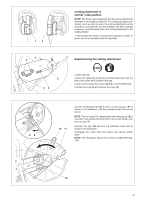
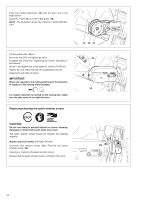
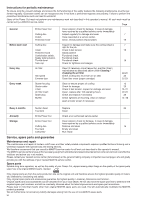
18 17 14 15 16 Replacing the starter cable Remove four screws (14). Remove starter housing (15). Insert a small screwdriver through the cooling slits on the back of the starter housing. Push aside the tabs (16) slightly and carefully remove the air guide (17) from the starter housing (15). Proceed in the order (A - B - C - D). If replacing a starter cable that has not come apart, it will first be necessary to de-tension the return spring on the cable drum. To do this, pull the starter grip all the way out of the starter housing. Hold the cable drum firmly with one hand, and with the other guide the starter cable into the recess (24) and hold it. Now carefully let the cable drum turn counter-clockwise until the return spring is completely de-tensioned. Remove all pieces of cable (18). Thread in a new starter cable (dia 4.0 mm, length 1000 mm) as shown (don't forget the disc (19)) and knot both ends. Pull knot (20) into the cable pulley (21). CAUTION: Do not let the knots or the cable ends protrude from the outside of the cable pulley. Pull knot (22) into the cable grip (23). 16 17 Guide the cable into the recess (24) on the cable drum and use the cable to turn the drum two turns in the direction shown by the arrow. Holding the cable drum in your left hand, straighten out the twist in the cable with your right hand, pull the cable tight, and hold. Release the cable drum. The drum´s spring force will now wind the cable around the drum. Repeat three times. The starter grip must be upright on the starter housing. NOTE: With the cable pulled all the way out, it must still be possible to turn the pulley another 1/4 turn against the return spring. CAUTION! Injury hazard! When you pull out the starter cable hold the 24 starter handle firmly. It will whip back if the cable pulley is released by accident. Install the air guide (17) in reverse order. Make sure that the tabs (16) click back into the starter housing. When putting the starter housing back on, it may be necessary to pull the starter handle slightly until the starting mechanism engages. 25
-
 1
1 -
2
-
3
-
4
-
5
-
6
-
7
-
8
-
9
-
10
-
11
-
12
-
13
-
14
-
15
-
16
-
17
-
18
-
19
-
 20
20 -
 21
21 -
 22
22 -
 23
23 -
 24
24 -
 25
25 -
 26
26 -
 27
27 -
 28
28 -
 29
29 -
 30
30 -
31
-
32
-
33
-
34
-
35
-
36
-
37
-
38
-
39
-
40
-
41
-
42
-
43
-
44
-
45
-
46
-
47
-
48
-
49
-
50
-
51
-
52
-
53
-
54
-
55
-
56
-
57
-
58
-
59
-
60
-
61
-
62
-
63
-
64
-
65
-
66
-
67
-
68
 |
 |