Makita EK7301 Owners Manual - Page 26
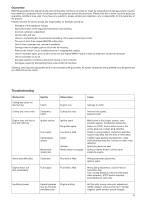
Replacing the return, spring - diagram
 |
View all Makita EK7301 manuals
Add to My Manuals
Save this manual to your list of manuals |
Page 26 highlights
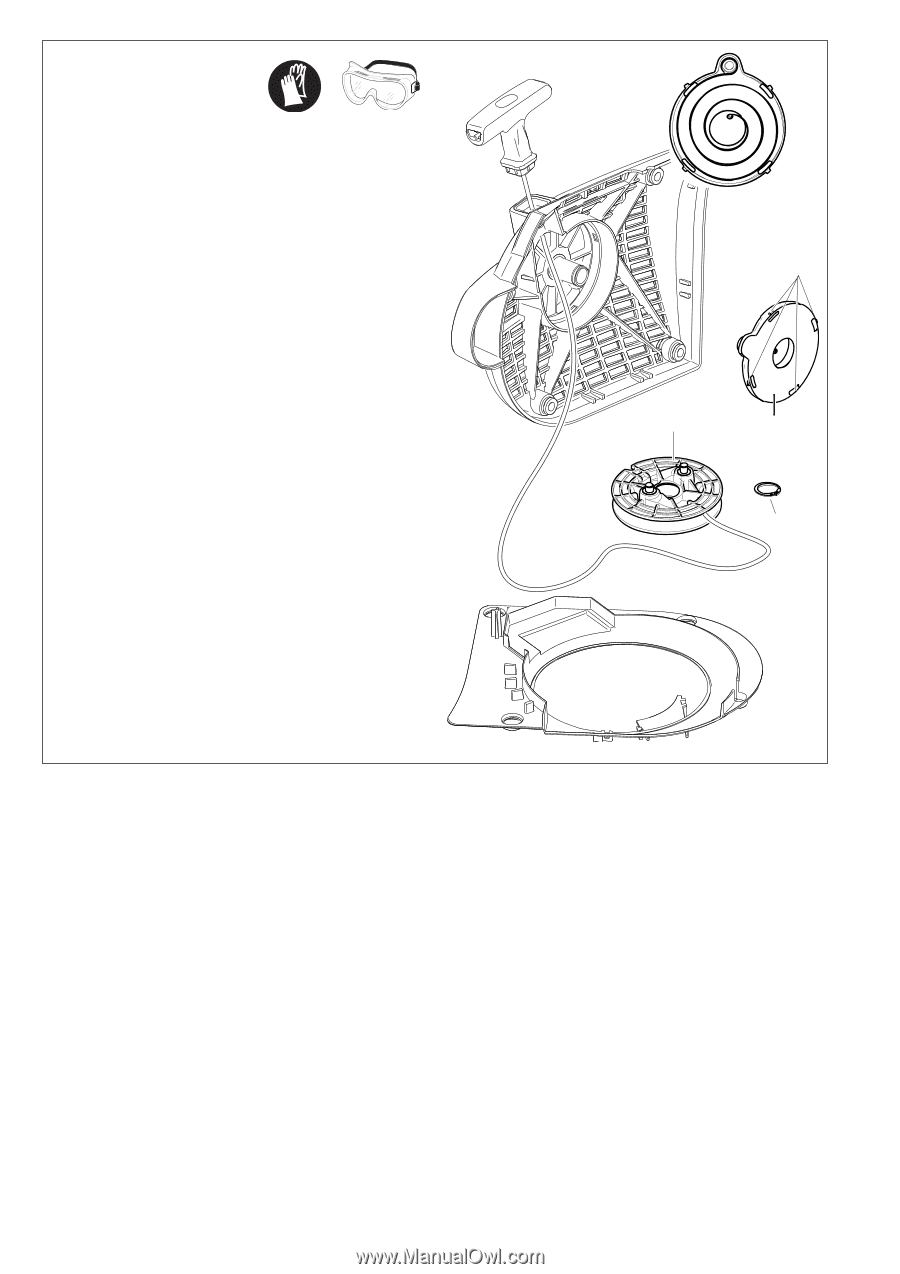
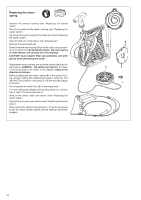
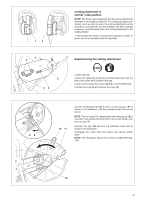
Replacing the return spring Remove the starter housing (see "Replacing the starter cable"). Take the air guide off the starter housing (see "Replacing the starter cable"). De-tension the return spring on the cable drum (see "Replacing the starter cable"). Take off circlip (1) (circlip pliers, see "Accessories"). Remove the cable pulley (2). Evenly lever the return spring (4) out of the catch using a screwdriver or similar tool. Be extremely careful - the return spring is under tension and can pop out of its housing! CAUTION! Injury hazard! Wear eye protection and work gloves when performing this work! Replacement return springs are delivered already tensioned in the housing. CAREFUL - the spring can pop out. If it does, it can be put back in as shown in the diagram (observe the direction of rotation). Before installing the new return spring (4) in the starter housing, grease it lightly with multipurpose grease, Order No. 944 360 000. Then position it and press it until the tabs (5) engage in the slots. Do not grease the cable drum (2) or bearing journal! Turn the cable pulley slightly when putting it back on, until you hear it catch. Put the circlip back on. Wind on the starter cable (see above under "Replacing the starter cable"). Reinstall the air guide (see above under "Replacing the starter cable") When putting the starter housing back on, it may be necessary to pull the starter handle slightly until the starting mechanism engages. 5 2 4 1 26
-
 1
1 -
2
-
3
-
4
-
5
-
6
-
7
-
8
-
9
-
10
-
11
-
12
-
13
-
14
-
15
-
16
-
17
-
18
-
19
-
20
-
 21
21 -
 22
22 -
 23
23 -
 24
24 -
 25
25 -
 26
26 -
 27
27 -
 28
28 -
 29
29 -
 30
30 -
 31
31 -
32
-
33
-
34
-
35
-
36
-
37
-
38
-
39
-
40
-
41
-
42
-
43
-
44
-
45
-
46
-
47
-
48
-
49
-
50
-
51
-
52
-
53
-
54
-
55
-
56
-
57
-
58
-
59
-
60
-
61
-
62
-
63
-
64
-
65
-
66
-
67
-
68
 |
 |