Makita RT0700C Owners Manual - Page 12
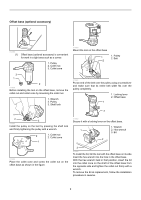
Straight guide when using as a router needed, to use with guide holder optional accessory, Straight - base
 |
View all Makita RT0700C manuals
Add to My Manuals
Save this manual to your list of manuals |
Page 12 highlights
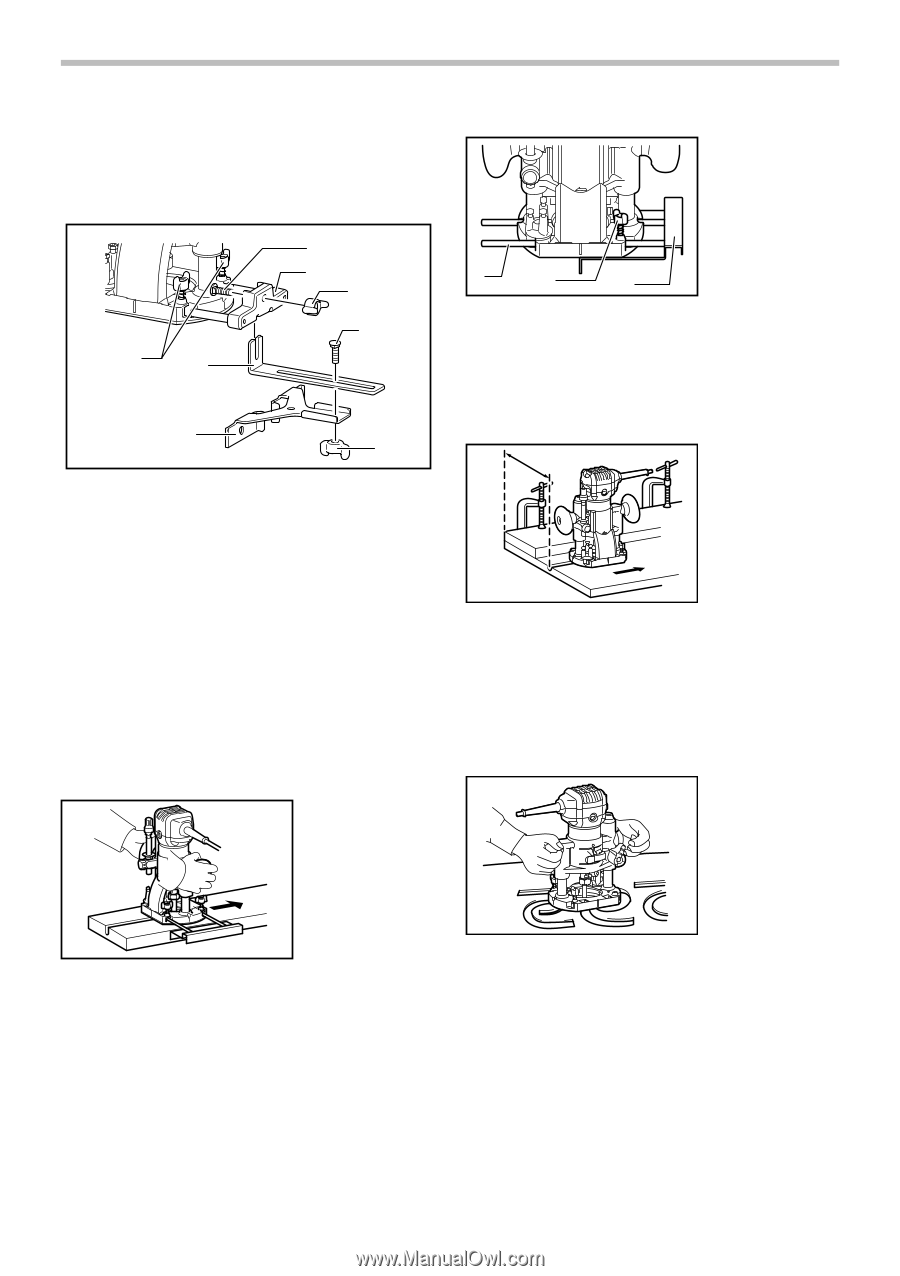
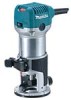
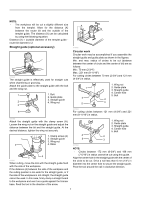
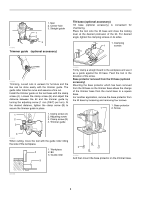
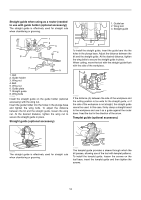
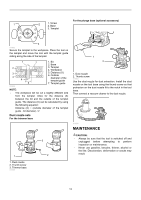
Straight guide when using as a router (needed to use with guide holder (optional accessory)) The straight guide is effectively used for straight cuts when chamfering or grooving. 1. Guide bar 2. Wing bolt 3. Straight guide 8 6 1 2 3 4 7 5 1. Bolt 2. Guide holder 3. Wing nut 4. Bolt 5. Wing nut 6. Guide plate 7. Straight guide 8. Wing bolts 011988 Install the straight guide on the guide holder (optional accessory) with the wing nut. Insert the guide holder into the holes in the plunge base and tighten the wing bolts. To adjust the distance between the bit and the straight guide, loosen the wing nut. At the desired distance, tighten the wing nut to secure the straight guide in place. Straight guide (optional accessory) 1 2 3 011849 To install the straight guide, insert the guide bars into the holes in the plunge base. Adjust the distance between the bit and the straight guide. At the desired distance, tighten the wing bolts to secure the straight guide in place. When cutting, move the tool with the straight guide flush with the side of the workpiece. A 011850 If the distance (A) between the side of the workpiece and the cutting position is too wide for the straight guide, or if the side of the workpiece is not straight, the straight guide cannot be used. In this case, firmly clamp a straight board to the workpiece and use it as a guide against the router base. Feed the tool in the direction of the arrow. Templet guide (optional accessory) 011848 The straight guide is effectively used for straight cuts when chamfering or grooving. 011851 The templet guide provides a sleeve through which the bit passes, allowing use of the tool with templet patterns. To install the templet guide, loosen the screws on the tool base, insert the templet guide and then tighten the screws. 12
-
 1
1 -
2
-
3
-
4
-
5
-
6
-
 7
7 -
 8
8 -
 9
9 -
 10
10 -
 11
11 -
 12
12 -
 13
13 -
 14
14 -
 15
15 -
 16
16 -
 17
17 -
18
-
19
-
20
-
21
-
22
-
23
-
24
-
25
-
26
-
27
-
28
-
29
-
30
-
31
-
32
-
33
-
34
-
35
-
36
-
37
-
38
-
39
-
40
-
41
-
42
-
43
-
44
-
45
-
46
-
47
-
48
 |
 |