Makita RT0700C Owners Manual - Page 5
Assembly, Operation - trimmer
 |
View all Makita RT0700C manuals
Add to My Manuals
Save this manual to your list of manuals |
Page 5 highlights
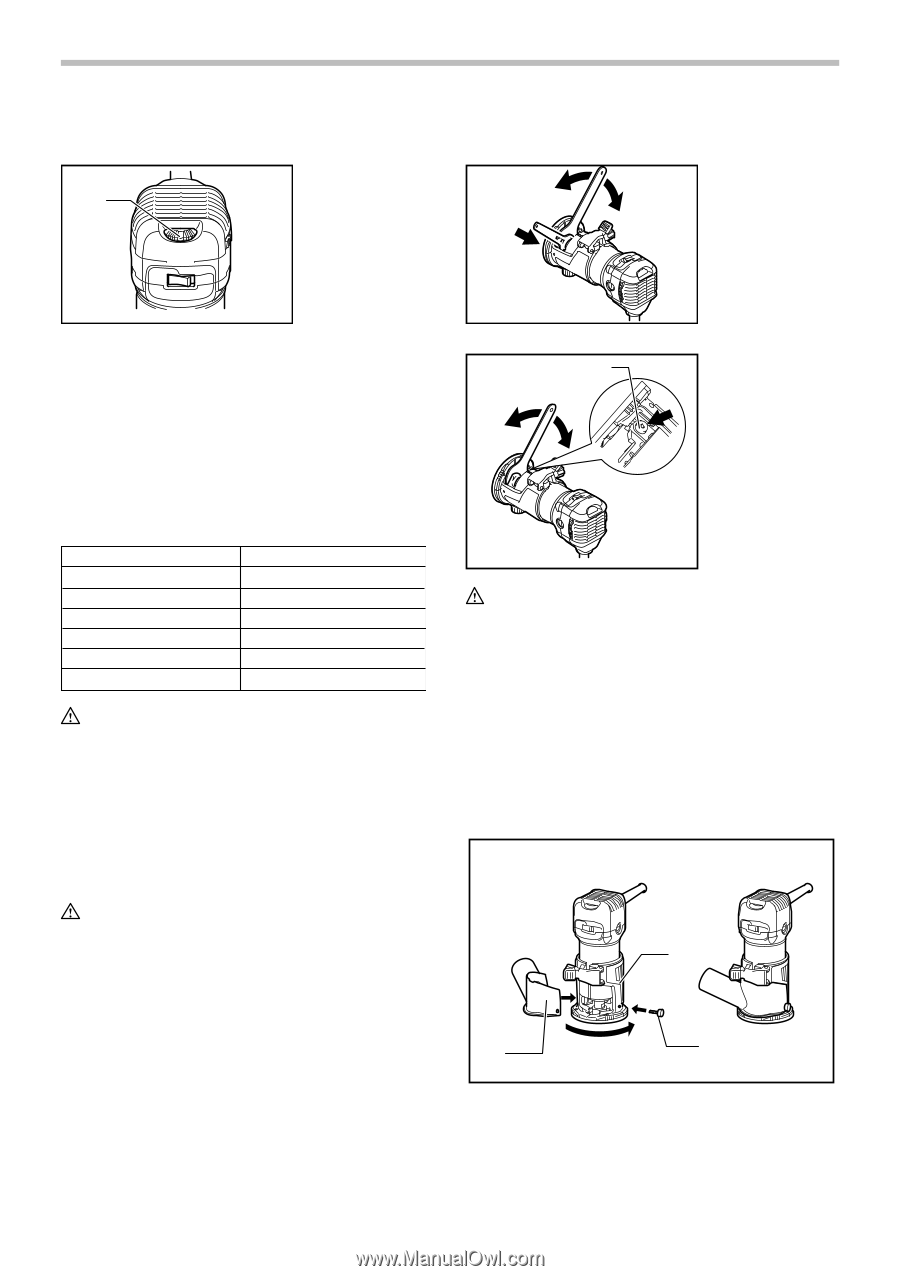
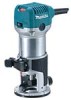
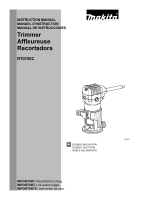
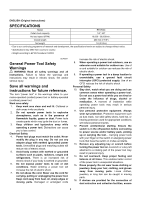
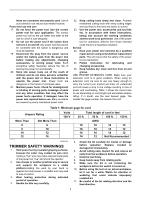
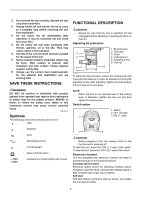
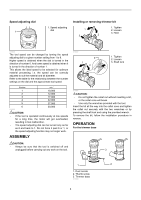
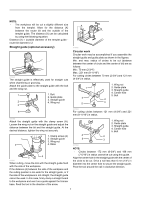
Speed adjusting dial 1 1. Speed adjusting dial Installing or removing trimmer bit 1. Tighten 1 2. Loosen 3. Hold 3 2 011835 The tool speed can be changed by turning the speed adjusting dial to a given number setting from 1 to 6. Higher speed is obtained when the dial is turned in the direction of number 6. And lower speed is obtained when it is turned in the direction of number 1. This allows the ideal speed to be selected for optimum material processing, i.e. the speed can be correctly adjusted to suit the material and bit diameter. Refer to the table for the relationship between the number settings on the dial and the approximate tool speed. Number min-1 1 10,000 2 12,000 3 17,000 4 22,000 5 27,000 6 011932 30,000 CAUTION: • If the tool is operated continuously at low speeds for a long time, the motor will get overloaded, resulting in tool malfunction. • The speed adjusting dial can be turned only as far as 6 and back to 1. Do not force it past 6 or 1, or the speed adjusting function may no longer work. ASSEMBLY 011837 1 3 2 1. Tighten 2. Loosen 3. Shaft lock 011987 CAUTION: • Do not tighten the collet nut without inserting a bit, or the collet cone will break. • Use only the wrenches provided with the tool. Insert the bit all the way into the collet cone and tighten the collet nut securely with the two wrenches or by pressing the shaft lock and using the provided wrench. To remove the bit, follow the installation procedure in reverse. OPERATION For the trimmer base CAUTION: • Always be sure that the tool is switched off and unplugged before carrying out any work on the tool. 3 1 2 1. Dust nozzle 2. Thumb screw 3. Trimmer base 011989 5
-
 1
1 -
 2
2 -
 3
3 -
 4
4 -
 5
5 -
 6
6 -
 7
7 -
 8
8 -
 9
9 -
 10
10 -
 11
11 -
12
-
13
-
14
-
15
-
16
-
17
-
18
-
19
-
20
-
21
-
22
-
23
-
24
-
25
-
26
-
27
-
28
-
29
-
30
-
31
-
32
-
33
-
34
-
35
-
36
-
37
-
38
-
39
-
40
-
41
-
42
-
43
-
44
-
45
-
46
-
47
-
48
 |
 |