Maytag MMMF8030PZ Owners Manual - Page 6
Clean The IR Sensor Lens: on some models, Clean/Replace Grease Filter
 |
View all Maytag MMMF8030PZ manuals
Add to My Manuals
Save this manual to your list of manuals |
Page 6 highlights
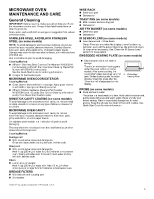
Clean The IR Sensor Lens: (on some models) The IR sensor is located on the right-side of the cavity top. Clean it when the display shows the cleaning reminder or manual clean if necessary. NOTE: Wait until the product becomes idle and cools down. To clean the IR sensor lens when reminder appearing: 1. Follow the instructions on display to clean. A 2. Use the lens cleaner and lint-free swab to clean. 3. After cleaning, the IR shelter will be closed. 4. press CONFIRM/MENU key back to idle. NOTE: Press BACK key to exit the reminder if you do not clean the lens at the moment, the B reminder will appear again in 7 days. Other functions will work as usual, except for the IR sensor cooking function. To clean the IR sensor lens daily: If you find the IR sensor cooking function performance is not good, you can clean the IR lens at any time. 1. Press Settings key and arrow key until Clean and Maintenance submenu. 2. Use the arrow key to select IR Cleaning and press CONFIRM/MENU key to select IR cleaning. 3. Use the lens cleaner and lint-free swab to clean the lens when the IR shelter is opened. 4. After cleaning, the IR shelter will be closed. 5. Press CONFIRM/MENU key back to idle. A. IR Sensor Lens B. lint-free swab with Lens Clean/Replace Grease Filter: The grease filter is on the underside of the microwave oven. Clean monthly. To clean the grease filter: Illustration 1 Disconnect power. Remove the grease filter by pushing finger grips back and then pull down from the bottom plate, see illustration 1. Clean the grease filter with a mild cleanser and scouring pad, or clean it with dishwasher. A B After cleaning, dry it up, put the grease filter back to the bottom plate, the springs toward back, pushing finger grips back, until the two tongues are in position, see illustration 2. To replace a new grease filter: Disconnect power. C A. Bottom Plate B. Grease Filter Remove the grease filter by pushing finger grips back and then pull down from the bottom plate, C. Finger Grips see illustration 1. Replace a new grease filter by putting the grease filter to the bottom plate, the springs toward back, pushing finger grips back, until the two tongues are in position, see illustration 2. 6
-
 1
1 -
 2
2 -
 3
3 -
 4
4 -
 5
5 -
 6
6 -
 7
7 -
 8
8 -
 9
9 -
 10
10 -
 11
11 -
 12
12 -
13
-
14
-
15
-
16
-
17
-
18
-
19
-
20
-
21
-
22
-
23
-
24
-
25
-
26
-
27
-
28
-
29
-
30
-
31
-
32
-
33
-
34
-
35
-
36
-
37
-
38
-
39
-
40
-
41
-
42
-
43
-
44
-
45
-
46
-
47
-
48
-
49
-
50
-
51
-
52
-
53
-
54
-
55
-
56
 |
 |
