Meade 12 inch Instruction Manual - Page 13
Library Object Keys, Star Alignment, Star with Known SITE, Star at Known SITE, Unknown SITE, Which
 |
View all Meade 12 inch manuals
Add to My Manuals
Save this manual to your list of manuals |
Page 13 highlights
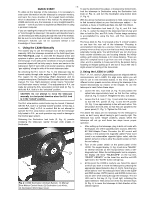
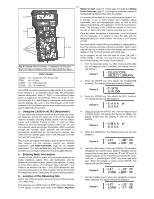
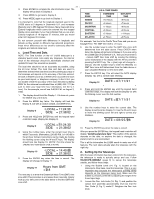
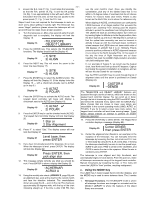
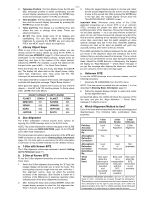
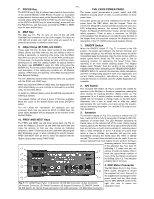
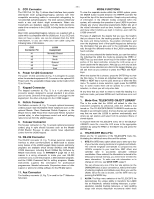
- 13 - 2. Telescope Position. The first display shows the RA and 3. Follow the keypad display prompts to choose and center DEC (telescope position in stellar coordinates) and the the the second alignment star. Be sure to use the keypad second display (accessed by pressing the ENTER key) to slew to the second star. After pressing the ENTER key shows the telescope position in ALTAZ coordinates. in the last step, the keypad display should show the 3. Time and Date. The first display shows local and Sidereal TELESCOPE/OBJECT LIBRARY screen. time and the second display (accessed by pressing the Important Note: Whenever using either of the 2-Star ENTER key) shows the date. alignment procedures (at a known SITE or at an unknown 4. Timer and Freq. This display is a countdown timer and SITE), choosing the proper two stars will determine the allows the user to change drive rates. These are pointing accuracy of the telescope. Choose two stars that are advanced features. not too close together - try to use stars that are at least 90° 5. All Off. This mode simply turns off all displays and backlighting. You can also adjust the backlighting brightness by pressing the ENTER key and using the PREV and NEXT keys to adjust the brightness. f. Library Object Keys apart. Do not use Polaris because RA changes very fast at the Pole and minor centering errors translate to large RA pointing errors. Also, avoid stars near the zenith (straight up) since azimuth changes very fast in this area. Generally speaking, choosing two stars as far apart as possible will yield very accurate pointing, often within a few arc minutes. While in any of the 5 main keypad display modes, you can directly access the library objects by using the M, STAR, or CNGC keys (see APPENDIX C, page 31, of this manual for more information on the 64,359 Object Library). Simply press an object key, and type in the number of the object desired, followed by ENTER. For example, a good first object for the first part of the year is M42 - the Great Orion Nebula. The LX200 calculates the distance between the two stars that you chose in the alignment steps and compares this to the distance that you actually slewed the telescope. This is a check to be sure you centered the correct stars during the alignment steps. Should the LX200 discover a discrepancy, the keypad will display an "Align Mismatch - Check Stars" message. If you get this message after aligning the telescope, check that Press the M key, the 4 key, the 2 key, and finally the ENTER you are using the correct stars and align again. key. The display will show data on the object (name, rating, object type, brightness, size). Now press GO TO. The c. Unknown SITE telescope will automatically slew to M42. To use the LX200 telescope at an unknown location, use the If the object entered is not above the horizon, the keypad hand following procedure: controller will display the message "Object Below Horizon." 1. Select site #5 (UNKNOWN) from the SITE menu. Other good first objects (if above the horizon) are any of the M objects - from M1 to M 110, and the planets. To find a planet enter: (NOTE: 903 is the Moon.) OBJECT LIBRARY PLANET LEGEND PLANET STAR # PLANET STAR# MERCURY 901 SATURN 906 NOTE: This site cannot be edited like site numbers 1 to 4 as described in Entering Basic Information, page 10. 2. Follow the keypad display prompts to select and center the two alignment stars. As described above, the LX200 will check the accuracy of the two stars and give the "Align Mismatch - Check Stars" message if it detects an error. VENUS 902 MARS 904 JUPITER 905 URANUS 907 NEPTUNE 908 PLUTO 909 4. Star Alignment The 2-Star initialization routines provide three options for aligning the LX200 telescope when in the ALTAZ mode. NOTE: The 2-Star initialization routines only apply to the ALTAZ alignment mode (see MODE FUNCTIONS, page 16, for POLAR and LAND mode initialization). The first and second options require that entry of the SITE and TIME information as described in Entering Basic Information (page 10). The third option is used when the SITE information is not known or has not been entered into the LX200's memory. a. 1-Star with Known SITE The 1-Star alignment routine was explained in detail in Setting Up the Telescope (page 11). b. 2-Star at Known SITE To use the 2-Star alignment procedure at a known site, follow these steps: 1. Select the 2-Star alignment (by pressing the "2" key); the keypad display will prompt you to level the base. This leveling step requires a rough level only and, unlike the 1Star alignment routine, does not affect the pointing accuracy of the telescope. (See Section d. below for a summary of the differences in telescope operation when selecting each of the three alignment procedures.) 2. After leveling the base and pressing ENTER, follow the keypad display prompts to select the first alignment star. Slew to that star using the N, S, E, and W keys. d. Which Alignment Method to Use? Each of the three method described above has advantages and disadvantages. The following table summarizes these properties. 1-Star Known 2-Star Known 2-Star Unknown Pointing Accuracy Determined By: Level of Telescope 2-Star 2-Star Alignment Alignment Atmospheric Yes Refraction Correction* Yes No Atmospheric Refraction Correction Determined By: Level of Telescope Level of Telescope Not Applicable When Best Used Best used when the telescope is permanently mounted and accurately leveled Best used on a transportable telescope with the SITE information available Best used when the SITE information is not available * Atmospheric Refraction Correction: Light from an astronomical object is "bent," (refracted) as it passes through the atmosphere. This bending is more pronounced near the horizon because there is more atmosphere for the light to pass through, and it shifts the apparent position of the star. The LX200 calculates this bending and compensates for it when slewing to objects near the horizon.
-
 1
1 -
2
-
3
-
4
-
5
-
6
-
7
-
 8
8 -
 9
9 -
 10
10 -
 11
11 -
 12
12 -
 13
13 -
 14
14 -
 15
15 -
 16
16 -
 17
17 -
 18
18 -
19
-
20
-
21
-
22
-
23
-
24
-
25
-
26
-
27
-
28
-
29
-
30
-
31
-
32
-
33
-
34
-
35
-
36
-
37
-
38
-
39
-
40
-
41
-
42
-
43
-
44
-
45
-
46
-
47
-
48
-
49
-
50
-
51
-
52
-
53
-
54
-
55
-
56
-
57
-
58
-
59
-
60
-
61
-
62
-
63
-
64
 |
 |
