Meade 12 inch Instruction Manual - Page 22
RA = 02:45.9, DEC = +22'54, ALT = +72'50, AZ = 158'10
 |
View all Meade 12 inch manuals
Add to My Manuals
Save this manual to your list of manuals |
Page 22 highlights
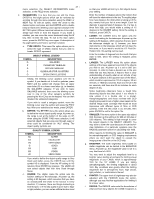
- 22 - in a given eyepiece while in the FIELD menu. At your LX200 knows no bounds, any celestial object, including power up the RADIUS menu file option is set to 15 comets, asteroids, etc. are easily found, provided you have arc minutes, the radius of 1/2 a degree (30 arc accurate coordinate data to refer to. minutes), which is about the proper setting for a 26mm eyepiece used in an 8" f/10 LX200. To enter a new pointing position in Right Ascension and Declination, press the GO TO key and a double beep will be To calculate the true field of an eyepiece in the heard followed by a blinking cursor that will appear over the RA telescope, first divide the focal length of the = coordinate numbers. At this point, type in the new Right telescope (e.g., 2000mm for an 8" f/10) by the focal Ascension coordinate numbers, then press the ENTER key. length of the eyepiece (the standard supplied You will then notice that the blinking cursor is over the DEC = eyepiece is a 26mm Super Plössl, 2000 divided by coordinate numbers. Enter the new Declination coordinate 26 equals 77X magnification). Then find the apparent numbers, then press the ENTER key and the LX200 will slew field of the eyepiece (which is 52 degrees for the to the new coordinate position. 26mm Super Plössl) and divide it by the magnification (52 divided by 77 equals 0.67 degrees, multiplied by 60 equals 40.2 arc minutes). To get the radius of the true field of view, divide the true field by 2. In the case of the above equation, 40.2 arc minutes divided by 2 equals 20.1 arc minutes. You can also slew to ALTAZ coordinates from the ALTAZ display as described above. If you need to enter a minus Declination setting, move the blinking cursor over the + symbol with the W key and then press the NEXT key to get the - (minus) symbol, then move the blinking cursor to the first number with the E key and enter the new coordinate numbers. If you are already at a minus (-) 2. Mode Two: COORDINATES/GO TO Declination setting and wish to enter a plus (+) declination Mode Two allows you to see where you have pointed the LX200 in two celestial coordinate formats, either R.A. and Dec. setting, follow the same instructions as above but press the PREV key instead to get the + symbol. or Altazimuth. Also in this mode you can enter new Right Ascension and Declination coordinates for any sky position, perhaps to locate objects not in the LX200 library such as comets or asteroids and have your telescope slew to the new coordinates. a. Coordinates Menu File 3. Mode Three: CLOCK/CALENDAR The continuously operating clock and calendar is the life pulse of your LX200. At power up, the telescope's sidereal clock automatically allows the system computer to make orbital calculations of the planets, and correct stellar precession for superior pointing ability. You will at first see the RA = and DEC = coordinates of where the telescope is pointing. If you move the LX200 with the N, S, W, or E keys, the coordinates display will immediately update the new position in Right Ascension and Declination. Your accurate initial input of local time and date, with its longlife lithium battery back-up, need not be re-entered every time you use the LX200, thus enhancing the user friendly aspects of the instrument. You can also display computed information of the Altazimuth coordinates (ALT = and AZ =) by pressing the ENTER key. To return to RA = and DEC =, press the ENTER key again. To set the local time and date and to enter the correct GMT offset (see QUICK START, page 9). Be sure to use your local hour setting appropriately in either 12 hour or 24 hour format as The RA = display is broken down into hours, minutes, and predetermined by the 12/24 HOUR TELESCOPE menu file tenths of a minute, and the DEC = display is broken down into option. + for North Declination and - for South Declination into degrees and minutes as shown in Display 32: The long-life lithium battery (Panasonic CR2032 3 vDC or Duracell DL2032B) is stored behind the power panel of the Display 32 RA = 02:45.9 DEC = +22'54 Drive Base (see Behind the Power Panel, page 53 for battery replacement information). If you have made an ALTAZ style of alignment, the ALT = and AZ = coordinate display is formatted so that 0 degrees azimuth (AZ =) is due South that increases to up to 359 degrees and 59 minutes moving clockwise, or from due South moving Westerly. altitude (ALT =) is formatted so that straight overhead is +90 degrees and 00 minutes, decreasing to +00 degrees, and 00 4. Mode Four: TIMER/FREQ a. TIMER = Menu Option The TIMER = menu option is for accurately timing different observing or imaging tasks for up to 12 hours long. Counting down to zero, in the hours, minutes, and seconds format, it will give a pleasant beeping tone to notify you that the time is up. minutes as you move the telescope level with the horizon, and To set the TIMER, move the arrow to TIMER = 00:00:00. Then then as the LX200 moves below +00.00 it will give minus press and hold the ENTER key to get the double beep tone and altitude readings. The Altazimuth coordinate display is shown in the blinking cursor. Enter the number of hours, minutes, and Display 33: seconds that you require. If you need to correct an error in Display 33 ALT = +72'50 AZ = 158'10 entry, use the E and W keys to move the blinking cursor and then type in the correct information. After entry, press the ENTER key again and the cursor will delete. When you are ready to start your time count-down, press the ENTER key While in ALTAZ, you will find during slewing in one direction, once more. To pause the count-down press ENTER again, and that both the RA = and DEC = display will change at the same then again to resume. time, while the ALT = and the AZ = display will only change in the direction that the telescope is being slewed. It is also important to note that only the Declination setting circle (3, Fig. If you want an automatic 12 hour countdown, press the ENTER key without holding. Then press ENTER to countdown. 1) will give a correct reading. The R.A. setting circle (10, Fig. 1) will only give correct readings in the POLAR setting (see APPENDIX B, page 29). b. FREQ = Menu File FREQ = (Frequency) allows you to adjust the tracking speed (not slew speed) of the LX200 digitally in tenths of a hertz from b. GO TO Menu Option 56.4 Hz to 60.1 Hz, so that you can match virtually every The GO TO menu option, allows you to enter new Right celestial motion in the sky. Some popular drive rate settings Ascension and Declination coordinates of any object in the sky, are: so that the LX200 will slew to the new position. With this ability,
-
 1
1 -
2
-
3
-
4
-
5
-
6
-
7
-
8
-
9
-
10
-
11
-
12
-
13
-
14
-
15
-
16
-
 17
17 -
 18
18 -
 19
19 -
 20
20 -
 21
21 -
 22
22 -
 23
23 -
 24
24 -
 25
25 -
 26
26 -
 27
27 -
28
-
29
-
30
-
31
-
32
-
33
-
34
-
35
-
36
-
37
-
38
-
39
-
40
-
41
-
42
-
43
-
44
-
45
-
46
-
47
-
48
-
49
-
50
-
51
-
52
-
53
-
54
-
55
-
56
-
57
-
58
-
59
-
60
-
61
-
62
-
63
-
64
 |
 |
