Meade 12 inch Instruction Manual - Page 19
HI-PRECISION, Searching.., Center STAR XXX, then press GO
 |
View all Meade 12 inch manuals
Add to My Manuals
Save this manual to your list of manuals |
Page 19 highlights
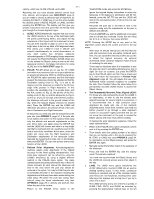
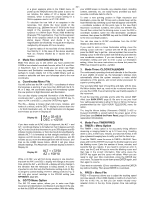
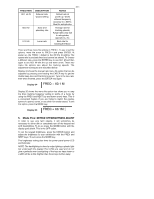
- 19 - 9. HI-PRECISION: The High-Precision Pointing feature of NOTE: If this star is not in the field of view or if it is obstructed LX200 allows for very precise pointing of the telescope. by a land object, the other two stars are available. Use the By incorporating the unique LX200 SYNC command, 0.3 PREV and NEXT keys to cycle through the three closest stars. arc-sec resolution encoders, and high-speed DC servo motors, observers can now place objects in the telescope's field of view with 1 arc-minute or better pointing accuracy. This makes critical image placement applications, such as CCD imaging, possible. Normal telescope pointing accuracy is better than 5 arcminutes when doing a casual alignment, which is more than accurate enough for most observing applications. (A "casual" alignment is one that uses the UNKNOWN SITE or one that is done without the use of a reticle eyepiece to exactly center the alignment stars.) This type of alignment will put objects into the field of view of most eyepieces and is more than adequate for almost any visual c. The telescope will slew to the selected object or position. 10. SLEW RATE: Option #10 in the TELESCOPE menu is for changing the slew rate of the LX200 telescope. Slowing down the slew rate will result in less noise as the telescope moves and will also use a little less power. To change the slew rate, follow these steps: a. Press the MODE key on the keypad until the TELESCOPE/OBJECT LIBRARY menu appears. The cursor should be next to the TELESCOPE option - if not, press the PREV key to move the cursor up one space. observing application. b. Press ENTER to select the TELESCOPE functions. A "critical" alignment will improve the pointing accuracy of the telescope to 2 arc-minutes or better. This type of alignment requires accurate SITE information, time, date, proper selection of the two alignment stars, and a reticle eyepiece to exactly center the alignment stars. These steps generally require only a few extra seconds to accomplish, and will improve the telescope's positioning by a substantial amount. Using the "critical" alignment will provide telescope positioning suitable for all but the most demanding pointing applications - including CCD imaging with larger chip cameras, like the Meade Pictor c. Press the PREV or NEXT keys to move the cursor to option #10: SLEW RATE. On the right hand part of the display, the number 4 is displayed. This represents the current slew rate in degrees per second. d. Press the ENTER key to change the slew rate. Each successive ENTER key press increments the slew rate by 1 degree per second. e. After setting the desired rate, press the MODE key to return to the TELESCOPE/OBJECT LIBRARY menu. 416 and Pictor 1616 CCD cameras. NOTE: The slew rate is NOT stored in permanent memory and The HI-PRECISION feature increases the pointing accuracy of the LX200 to 1 arc-minute or better and also needs to be reset each time the telescope is powered up. The default slew rate is 4 degrees per second. requires the "critical" alignment described above. This will yield the best pointing accuracy possible, placing objects onto the active area of the even the smallest CCD cameras available. It should be stressed that for most applications, using the HP feature is NOT required to get maximum enjoyment out of the telescope. For an evening of simple visual observations, the "casual" alignment is all that is required. Don't let the pointing precision of the telescope become more important than the fun of observing the night sky! 11. BACKLASH: The Backlash feature is only available in the POLAR mode. When taking long exposure astrophotographs, it is necessary to "guide" the photograph to make sure the telescope is tracking perfectly, otherwise stars will appear as ovals instead of pinpoints. This is done by setting the LX200 keypad to the GUIDE speed, monitoring the star location (e.g. with an off-axis guider), and making small corrections to the telescope position by using the N, S, E, and W keys. The High-Precision Pointing mode requires the "critical" alignment, described above, to maximize the telescope's pointing ability. The LX200 default condition is with HP disabled. To activate the HP mode, select the "hiprecision" option from the TELESCOPE menu (option #9). When selected, "HI-PRECISION" will change to upper case letters. When making these corrections, the R.A. motor will speed up or slow down (by pressing the "E" and "W" keys). The Declination motor, however, when activated (by pressing the "N" and "S" keys) will actually stop and reverse direction. Because of backlash in the Declination motor gearbox, there will be a few seconds delay before the telescope begins to move when reversing direction. When HP is active, the LX200 automatically does several things whenever a GO TO is initiated. The Dec. backlash feature compensates for the Dec. motor gearbox backlash and provides instant telescope a. HP will search the alignment star database and find movement when the motor is reversed. the three closest stars to the object (or position) entered. This process takes about 10 seconds and the keypad will show Display 26: Display 26 HI-PRECISION Searching. . . To program the Dec. backlash, use this procedure: a. Move to option #11 from the TELESCOPE menu. The keypad display will show: "'11) BACKLASH 00" The "00" in the display shows the number of arc- b. The telescope will slew to the nearest alignment star. These are all bright (brighter than 3rd seconds of backlash the LX200 is set to compensate for (the default setting is 0 arc-seconds). magnitude) stars and far enough apart to insure b. While observing a star at high power, time the that there will only be one in the field of view. Declination movement delay when reversing the The keypad display will show Display 27: motor directions (by pressing the "N" and "S" keys). Display 27 Center STAR XXX then press GO TO Typical values are 2 to 4 seconds. c. The GUIDE speed for the Declination motor is 15 arc-seconds per second. Therefore, multiply the Using a reticle eyepiece, center the star in the field of view. (Or center the star on the CCD chip if using a CCD camera.) Press GO TO when the star is centered. number of seconds delay by 15. d. Press and hold the ENTER key for 1 second. The keypad will beep and a blinking cursor will appear on the keypad display. Enter the number determined in
-
 1
1 -
2
-
3
-
4
-
5
-
6
-
7
-
8
-
9
-
10
-
11
-
12
-
13
-
 14
14 -
 15
15 -
 16
16 -
 17
17 -
 18
18 -
 19
19 -
 20
20 -
 21
21 -
 22
22 -
 23
23 -
 24
24 -
25
-
26
-
27
-
28
-
29
-
30
-
31
-
32
-
33
-
34
-
35
-
36
-
37
-
38
-
39
-
40
-
41
-
42
-
43
-
44
-
45
-
46
-
47
-
48
-
49
-
50
-
51
-
52
-
53
-
54
-
55
-
56
-
57
-
58
-
59
-
60
-
61
-
62
-
63
-
64
 |
 |
