Meade EclipseView 82mm Instruction Manual - Page 43
Primary Mirror Adjustments
 |
View all Meade EclipseView 82mm manuals
Add to My Manuals
Save this manual to your list of manuals |
Page 43 highlights
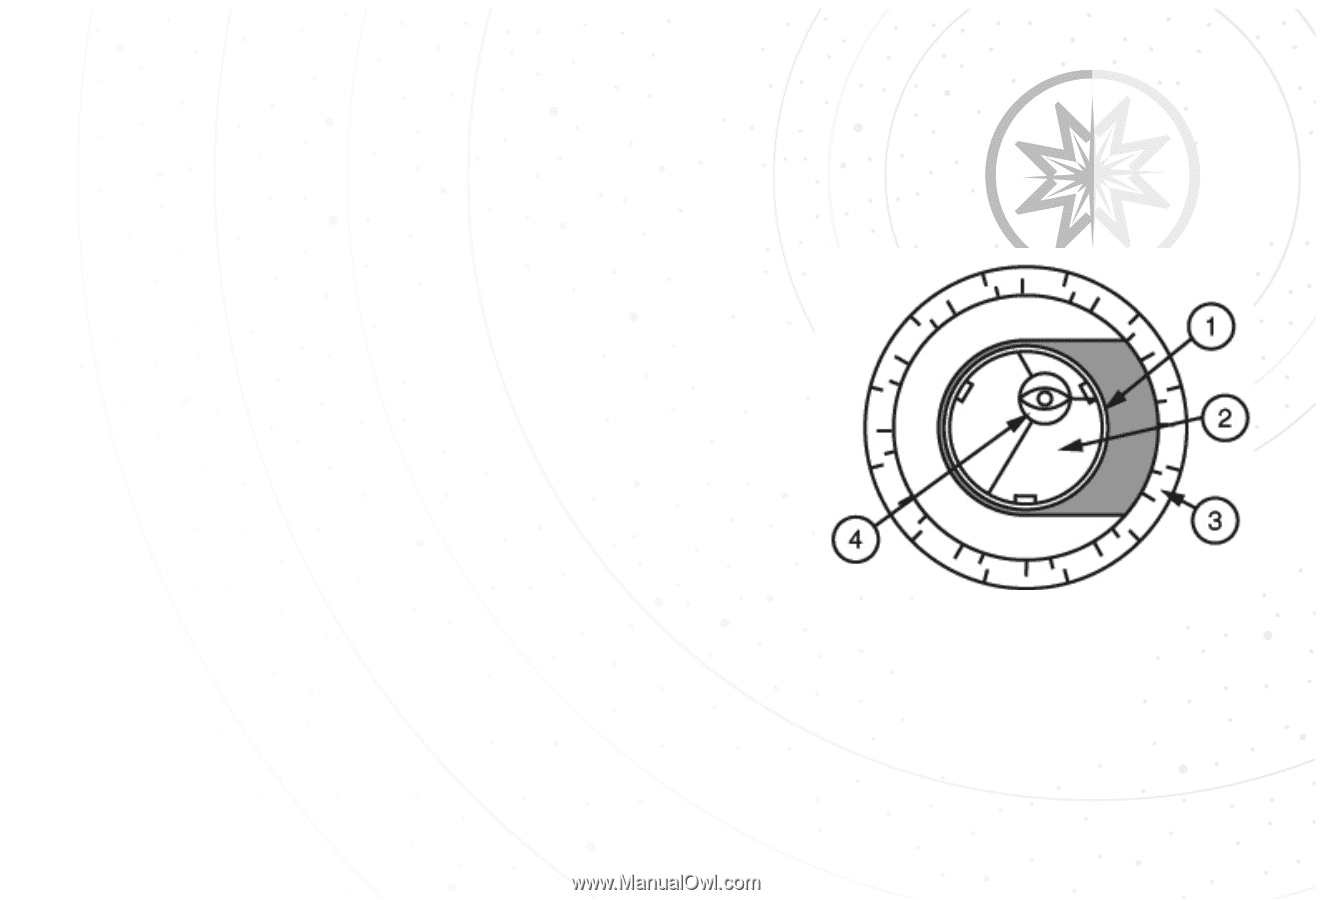
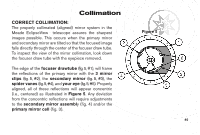
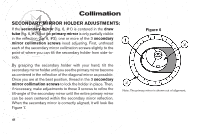
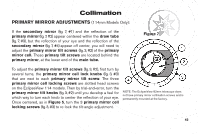
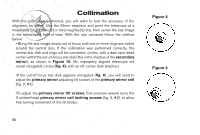
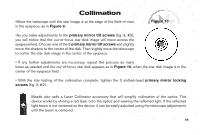
Collimation PRIMARY MIRROR ADJUSTMENTS (114mm Models Only): If the secondary mirror (fig. 7, #1) and the reflection of the primary mirror (fig. 7, #2) appear centered within the draw tube (fig. 7, #3), but the reflection of your eye and the reflection of the secondary mirror (fig. 7, #4) appear off center, you will need to adjust the primary mirror tilt screws (fig. 3, #2) of the primary mirror cell. These primary tilt screws are located behind the primary mirror, at the lower end of the main tube. Figure 7 To adjust the primary mirror tilt screws (fig. 3, #2), first turn by several turns, the primary mirror cell lock knobs (fig. 3, #3) that are next to each primary mirror tilt screw. The three primary mirror cell locking screws are slotted head screws on the EclipseView 114 models. Then by trial-and-error, turn the primary mirror tilt knobs (fig. 3, #2) until you develop a feel for which way to turn each knob to center the reflection of your eye. Once centered, as in Figure 5, turn the 3 primary mirror cell locking screws (fig. 3, #3) to re-lock the tilt-angle adjustment. NOTE: The EclipseView 82mm telescope does not have primary mirror collimation screws and is permanently mounted at the factory. 43 42
-
 1
1 -
2
-
3
-
4
-
5
-
6
-
7
-
8
-
9
-
10
-
11
-
12
-
13
-
14
-
15
-
16
-
17
-
18
-
19
-
20
-
21
-
22
-
23
-
24
-
25
-
26
-
27
-
28
-
29
-
30
-
31
-
32
-
33
-
34
-
35
-
36
-
37
-
 38
38 -
 39
39 -
 40
40 -
 41
41 -
 42
42 -
 43
43 -
 44
44 -
 45
45 -
 46
46 -
 47
47 -
 48
48 -
49
-
50
-
51
-
52
-
53
-
54
-
55
-
56
 |
 |