Meade EclipseView 82mm Instruction Manual - Page 45
Meade EclipseView 82mm Manual
 |
View all Meade EclipseView 82mm manuals
Add to My Manuals
Save this manual to your list of manuals |
Page 45 highlights
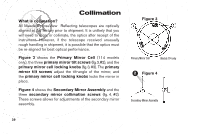
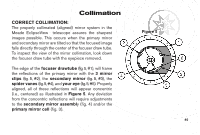
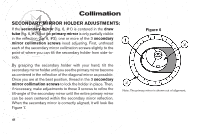
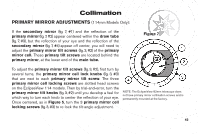
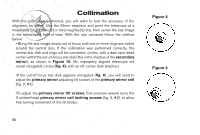
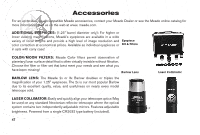
Collimation •Move the telescope until the star image is at the edge of the field-of-view in the eyepiece, as in Figure 9. Figure 10 •As you make adjustments to the primary mirror tilt screws (fig. 3, #3), you will notice that the out-of-focus star disk image will move across the eyepiece field. Choose one of the 3 primary mirror tilt screws and slightly move the shadow to the center of the disk. Then slightly move the telescope to center the star disk image in the center of the eyepiece. • If any further adjustments are necessary, repeat this process as many times as needed until the out-of-focus star disk appears as in Figure 10, when the star disk image is in the center of the eyepiece field. • With the star testing of the collimation complete, tighten the 3 slotted-head primary mirror locking screws (fig. 3, #2) Meade also sells a Laser Collimator accessory that will simplify collimation of the optics. This device works by shining a red laser onto the optics and viewing the reflected light. If the reflected light beam is not centered on the device, it can be easily adjusted using the telescope adjustments until the beam is centered. 45 44
-
 1
1 -
2
-
3
-
4
-
5
-
6
-
7
-
8
-
9
-
10
-
11
-
12
-
13
-
14
-
15
-
16
-
17
-
18
-
19
-
20
-
21
-
22
-
23
-
24
-
25
-
26
-
27
-
28
-
29
-
30
-
31
-
32
-
33
-
34
-
35
-
36
-
37
-
38
-
39
-
 40
40 -
 41
41 -
 42
42 -
 43
43 -
 44
44 -
 45
45 -
 46
46 -
 47
47 -
 48
48 -
 49
49 -
 50
50 -
51
-
52
-
53
-
54
-
55
-
56
 |
 |
