Metabo H 16-500 Operating Instructions 2 - Page 10
Overview
 |
View all Metabo H 16-500 manuals
Add to My Manuals
Save this manual to your list of manuals |
Page 10 highlights
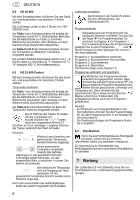
ENG ENGLISH Never leave the tool unattended when it is running. After long periods of use at maximum temperature, the temperature should be lowered before the tool is switched off. This lengthens the service life of the heater. Place the tool on the bases provided following use and wait until it has cooled down before placing in storage! Store your tools in a safe place. Unused tools should be stored in a dry, locked room inaccessible to children. Always take care where there are toxic gases and a risk of explosion. Toxic can be created when working on plastics, paints and similar materials. Risk of fire and combustion! Only use the hot air gun in well-ventilated rooms! Never inhale the vapours created! For your own safety, only use accessories and auxiliary devices specified in the Operating Instructions or recommended or specified by the tool manufacturer. The use tools or accessories other than those recommended in the Operating Instructions or in the catalogue can result in a risk of injury. 5 Overview See page 2. 1 Stainless steel outlet tube 2 Detachable protective tube (for areas that are difficult to access) 3 Air inlet with grid (keeps foreign bodies out) 4 Sliding switch (On-Off switch/stepping switch) 5 Anti-slip bases (for non-tilting and anti-slip stationary work applications) 6 Buttons for setting the temperature* 7 Buttons for setting the air volume* 8 Program selection button* 9 Display* (for temperature and speed) 10 Save button* (for saving changed programs) 11 Adjusting wheel for setting the temperature* * depending on the features / model 6 Use Before plugging in, check that the rated mains voltage and mains frequency, as stated on the rating label, match with your power supply. The distance to the object being processed depends on the material and intended processing type. Always first carry out an inspection of air volume and temperature! The attachable nozzles (see chapter 9) available as accessories can be used for precise hot air control to a specific point or a surface. Take care when changing hot nozzles! Danger of burns. 6.1 H 16-500 The sliding switch (4) can be used to switch the tool on and off and for selecting between 2 stages (for air volume and temperature). Stage 1: 300 °C, 240 l/min Stage 2: 500 °C, 450 l/min 6.2 HE 20-600 The sliding switch (4) can be used to switch the tool on and off and for selecting between 3 stages. The air volume is varied in the three stages from 150/300/500 l/min. At stage 1 of the sliding switch (4) the temperature is always 50 °C (cold-air stage). Use the cold-air stage to dry paint, cool workpieces or to cool down the nozzle before changing an accessory part. At stage 2 and 3 of the sliding switch (4) the temperature can be set steplessly at the adjusting wheel (11). The numbers 1 - 9 shown on the adjusting wheel are used for orientation. "1" means 50 °C. "9" means 600 °C (maximum temperature). 6.3 HE 23-650 Control The sliding switch (4) can be used to switch the tool on and off and for selecting between 2 stages. Setting temperature: At stage 1 of the sliding switch (4) the temperature is always 50 °C (cold-air stage). Use the cold-air stage to dry paint, cool workpieces or to cool down the nozzle before changing an accessory part. At stage 2 of the sliding switch (4) the temperature can be set steplessly. 10
-
 1
1 -
2
-
3
-
4
-
 5
5 -
 6
6 -
 7
7 -
 8
8 -
 9
9 -
 10
10 -
 11
11 -
 12
12 -
 13
13 -
 14
14 -
 15
15 -
16
-
17
-
18
-
19
-
20
-
21
-
22
-
23
-
24
-
25
-
26
-
27
-
28
-
29
-
30
-
31
-
32
-
33
-
34
-
35
-
36
-
37
-
38
-
39
-
40
-
41
-
42
-
43
-
44
-
45
-
46
-
47
-
48
-
49
-
50
-
51
-
52
-
53
-
54
-
55
-
56
-
57
-
58
-
59
-
60
-
61
-
62
-
63
-
64
-
65
-
66
-
67
-
68
-
69
-
70
-
71
-
72
-
73
-
74
-
75
-
76
-
77
-
78
-
79
-
80
 |
 |
