Miele Boost CX1 Operating instructions/Installation instructions - Page 40
Maintenance
 |
View all Miele Boost CX1 manuals
Add to My Manuals
Save this manual to your list of manuals |
Page 40 highlights
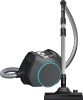
en-CA Maintenance Risk of electric shock from voltage. The supply voltage is applied to the appliance even if it is switched off. Before carrying out any maintenance work, unplug the appliance from the electrical socket. It is recommended to use only genuine Miele accessories bearing the "ORIGINAL Miele" logo on the packaging. Only these will guarantee the optimum performance of your vacuum cleaner and the best possible cleaning results. Please note that faults and damage caused by use of accessories which do not bear the "ORIGINAL Miele" logo on the packaging are not covered by the vacuum cleaner warranty. Emptying and cleaning the dust container (Figs. 25-28) Empty the dust container before the dust has reached the max marking on the dust container (Fig. 25). Unlatch the dust container by lifting the handle up (Fig. 26). Remove the dust container. The contents of the dust container can be disposed of with normal household trash, providing it contains general household dust only. Hold the dust container close to the trash can so that as little dust billows out as possible. 40 Press the release catch on the bottom of the dust container (Fig. 27). The flap will open and the dust will fall out. If you need to clean the dust container, use a slightly damp cloth and mild dish detergent. Dry the dust container carefully. Close the flap making sure it clicks into place. Insert the dry dust container back into the vacuum cleaner at an angle with the handle lifted up (Fig. 28). Latch the dust container into place by pushing the handle back down. Cleaning the fine dust filter (Figs. 29-36) The fine dust filter is located on the rear side of the dust container. It is equipped with a filter mat. Clean the filter when necessary and whenever you notice a reduction in suction power. Clean both filters with water once a month and allow a drying time of 24 hours. Remove the dust container (Fig. 26). The fine dust filter is located at the rear of the dust container. Remove the fine dust filter in the direction of the arrow (Fig. 29). Remove the filter mat from the fine dust filter (Fig. 30). Carefully knock the dust out of both filters over a trash can. Take the cleaning tool out of the side flap on the dust container (Fig. 31).
-
 1
1 -
2
-
3
-
4
-
5
-
6
-
7
-
8
-
9
-
10
-
11
-
12
-
13
-
14
-
15
-
16
-
17
-
18
-
19
-
20
-
21
-
22
-
23
-
24
-
25
-
26
-
27
-
28
-
29
-
30
-
31
-
32
-
33
-
34
-
 35
35 -
 36
36 -
 37
37 -
 38
38 -
 39
39 -
 40
40 -
 41
41 -
 42
42 -
 43
43 -
 44
44 -
 45
45 -
46
-
47
-
48
-
49
-
50
-
51
-
52
-
53
-
54
-
55
-
56
-
57
-
58
-
59
-
60
-
61
-
62
-
63
-
64
-
65
-
66
-
67
-
68
-
69
-
70
-
71
-
72
-
73
-
74
-
75
-
76
-
77
-
78
-
79
-
80
 |
 |
