Motorola SB6120 User Guide - Page 15
Cabling and Startup for the SB6120, CABLE, 12VDC - configuration page
 |
UPC - 612572169292
View all Motorola SB6120 manuals
Add to My Manuals
Save this manual to your list of manuals |
Page 15 highlights
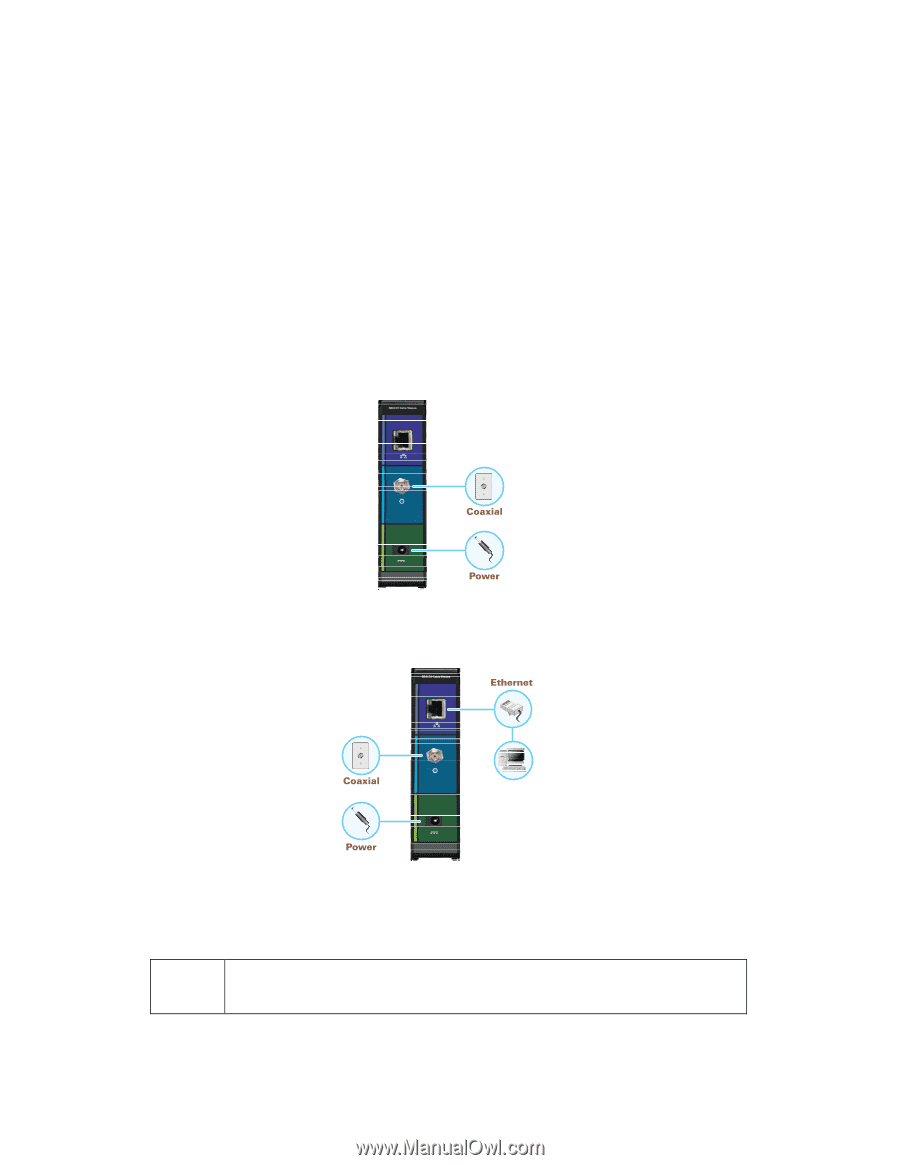
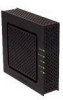
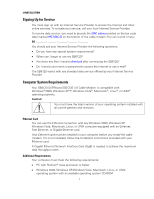
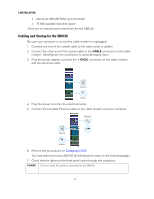
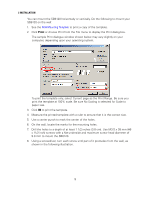
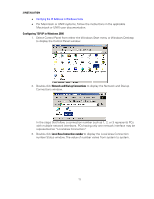
2 INSTALLATION • Minimum 256 MB RAM recommended • 10 MB available hard disk space There are no web browser restrictions for the SB6120. Cabling and Startup for the SB6120 Be sure your computer is on and the cable modem is unplugged. 1. Connect one end of the coaxial cable to the cable outlet or splitter. 2. Connect the other end of the coaxial cable to the CABLE connector on the cable modem. Hand-tighten the connectors to avoid damaging them. 3. Plug the power adapter cord into the +12VDC connector on the cable modem and the electrical outlet. 4. Plug the power cord into the electrical outlet. 5. Connect the provided Ethernet cable to the cable modem and your computer. 6. Perform the procedures for Configuring TCP/IP. You may wall-mount your SB6120 by following the steps on the following pages. 7. Check that the lights on the front panel cycle through this sequence: POWER Turns on when AC power is connected to the SB6120. 8
-
 1
1 -
2
-
3
-
4
-
5
-
6
-
7
-
8
-
9
-
 10
10 -
 11
11 -
 12
12 -
 13
13 -
 14
14 -
 15
15 -
 16
16 -
 17
17 -
 18
18 -
 19
19 -
 20
20 -
21
-
22
-
23
-
24
-
25
-
26
-
27
-
28
-
29
-
30
-
31
-
32
-
33
-
34
-
35
-
36
-
37
-
38
-
39
-
40
 |
 |