Motorola SB6120 User Guide - Page 18
Wall Mounting Template, outlet. Route the cables so that they are not a safety problem. - problems
 |
UPC - 612572169292
View all Motorola SB6120 manuals
Add to My Manuals
Save this manual to your list of manuals |
Page 18 highlights
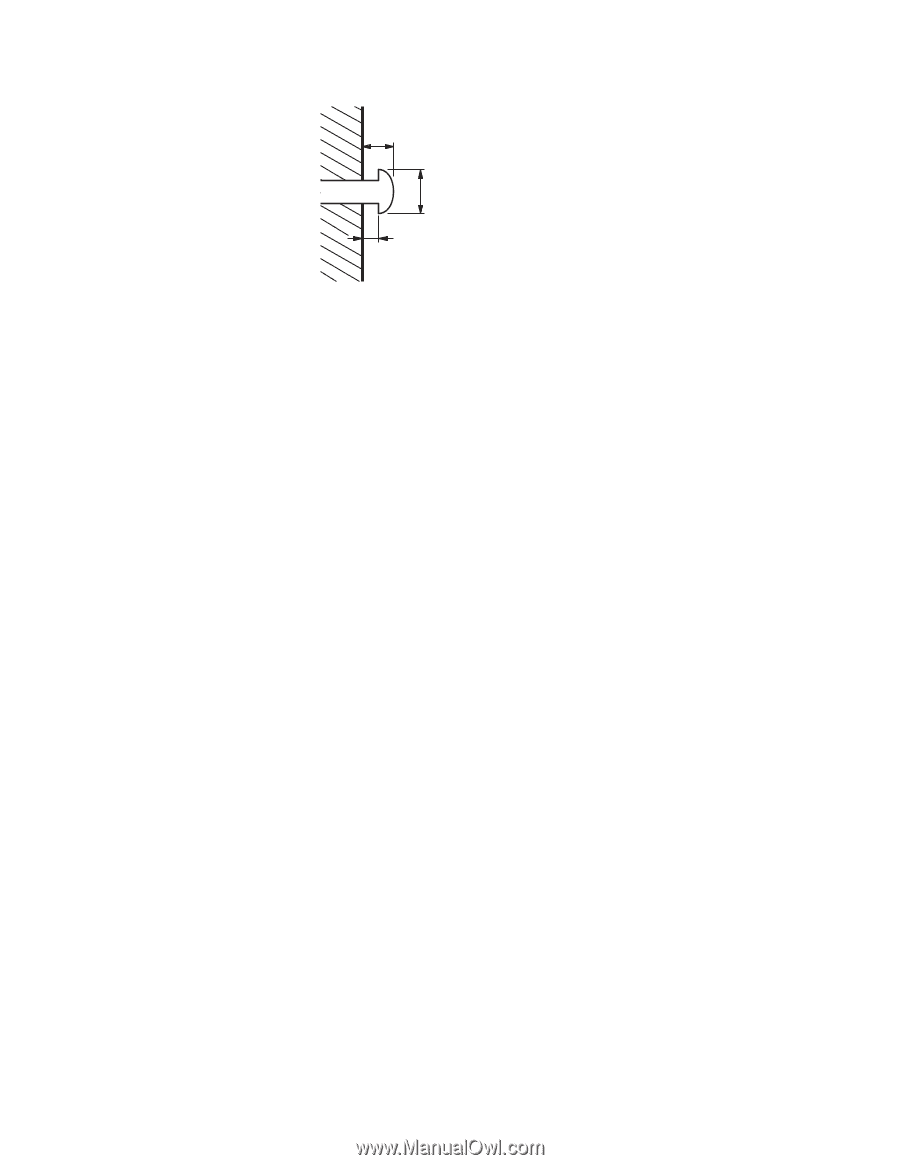
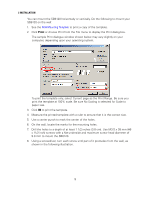
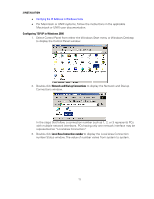
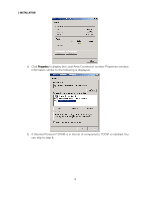
2 INSTALLATION 6.0 mm (.24 inches) maximum 9.0 mm (.35 inches) maximum 2.5 mm (.10 inches). There must be .10 inches (2.5 mm) between the wall and the underside of the screw head. 9. Place the SB6120 so the keyholes on the back of the unit are aligned above the mounting screws. 10. Slide the SB6120 down until it stops against the top of the keyhole opening. After mounting, reconnect the coaxial cable input and Ethernet connection. Plug the power cord into the +12VDC connector on the cable modem and the electrical outlet. Route the cables so that they are not a safety problem. Wall Mounting Template You can print the following page to use as a wall mounting template. Be sure you print it at 100% scale. In the Print dialogue window, be sure that Fit To Page is not selected in the Print dialog box. Measure the printed template with a ruler to ensure that it is the correct size. 11
-
 1
1 -
2
-
3
-
4
-
5
-
6
-
7
-
8
-
9
-
10
-
11
-
12
-
 13
13 -
 14
14 -
 15
15 -
 16
16 -
 17
17 -
 18
18 -
 19
19 -
 20
20 -
 21
21 -
 22
22 -
 23
23 -
24
-
25
-
26
-
27
-
28
-
29
-
30
-
31
-
32
-
33
-
34
-
35
-
36
-
37
-
38
-
39
-
40
 |
 |