NEC LT170 LT170 user's manual - Page 18
Projecting An Image Basic Operation
 |
UPC - 050927243561
View all NEC LT170 manuals
Add to My Manuals
Save this manual to your list of manuals |
Page 18 highlights
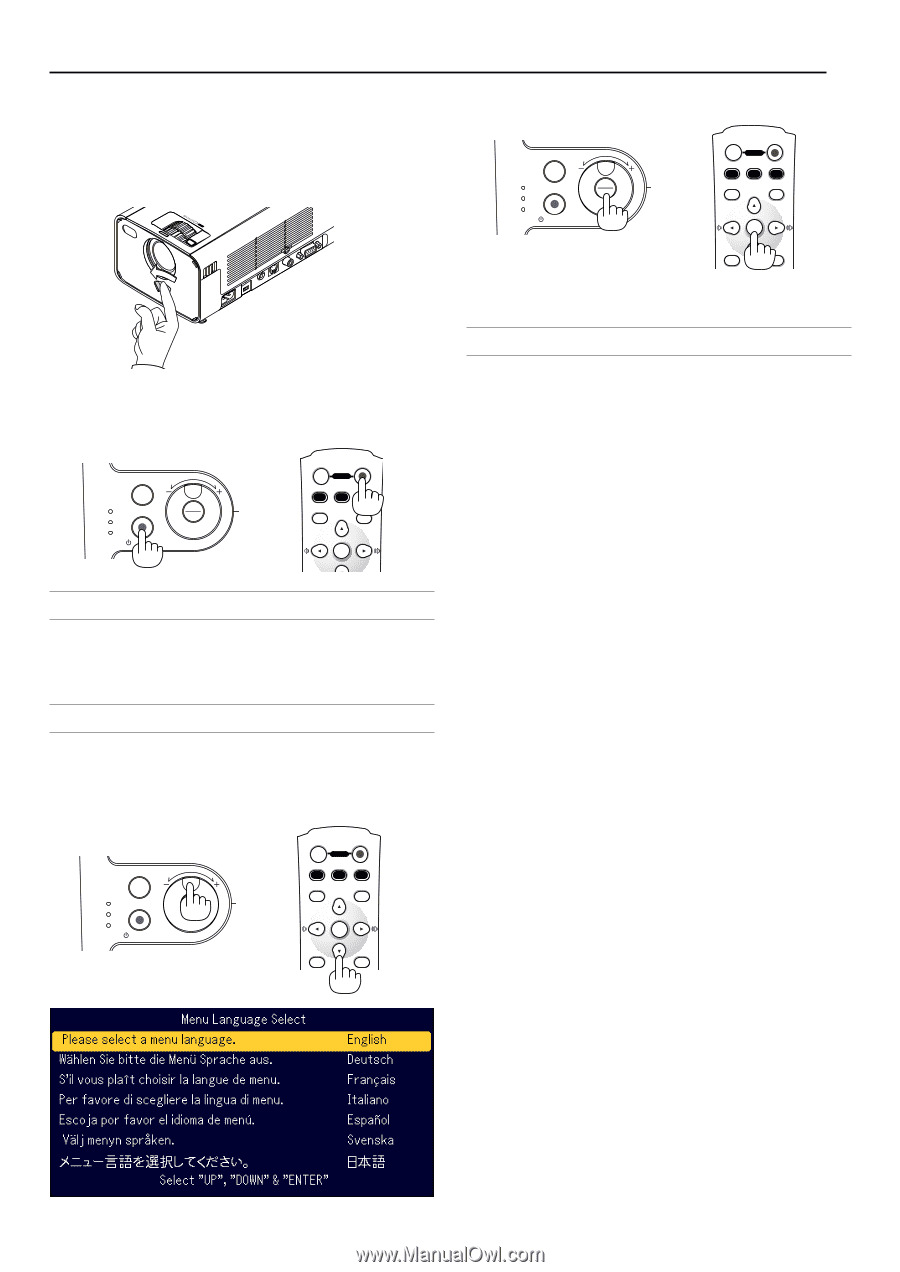
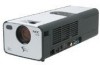
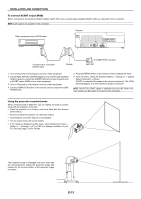
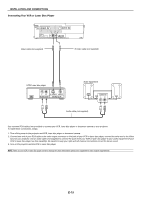
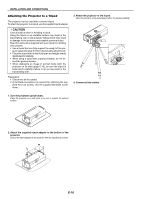
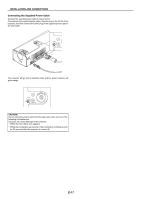
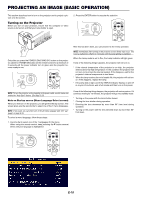
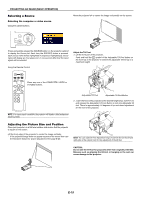
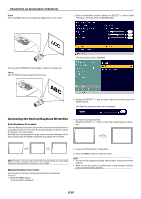
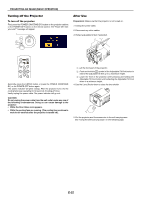
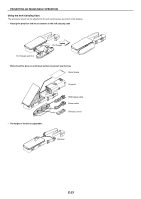
PROJECTING AN IMAGE (BASIC OPERATION) This section describes how to turn on the projector and to project a picture onto the screen. Turning on the Projector Before you turn on your projector, ensure that the computer or video source is turned on and that your lens shutter is open. PUSH ZOOM FOCUS CLOSE AUDIO IN S-VIDEO IN VIDEO IN COMPUTER Only after you press the POWER (ON/STAND BY) button on the projector cabinet or POWER ON button on the remote control for a minimum of 2 seconds will the power indicator turn to green and the projector become ready to use. MENU LAMP STATUS POWER ON/STAND BY SELECT SOURCE ENTER OFF P0WER ON VIDEO S-VIDEO COMPUTER COMP. AUTO ADJ. AUTO ASPECT ENTER NOTE: To turn the projector on by plugging in the power cable, use the menu and enable the "Auto Start" feature. (See page E-33) Note on Startup screen (Menu Language Select screen) When you first turn on the projector, you will get the Startup screen. This screen gives you the opportunity to select one of the 7 menu languages. NOTE: If you want, you can select one of the 20 menu language later. See "Language" on page E-33. To select a menu language, follow these steps: 1. Use the dial to select one of the 7 languages for the menu. When using the remote control, keep pressing the ̄ button several times until your language is highlighted. 2. Press the ENTER button to execute the selection. MENU LAMP STATUS POWER ON/STAND BY SELECT SOURCE ENTER OFF P0WER ON VIDEO S-VIDEO COMPUTER COMP. AUTO ADJ. AUTO ASPECT ENTER MENU CANCEL After this has been done, you can proceed to the menu operation. NOTE: Immediately after turning on the projector, screen flicker may occur. This is not a malfunction. Wait 3 to 5 minutes until the lamp lighting is stabilized. When the Lamp mode is set to Eco, the Lamp indicator will light green. If one of the following things happens, the projector will not turn on. * If the internal temperature of the projector is too high, the projector detects abnormal high temperature. In this condition the projector will not turn on to protect the internal system. If this happens, wait for the projector's internal components to cool down. * When the lamp reaches its end of usable life, the projector will not turn on. If this happens, replace the lamp. * If the lamp fails to light, and if the STATUS indicator flashes on and off in a cycle of six times, wait a full minute and then turn on the power. If one of the following things happen, the projector will mute a picture. If it continues muting for 15 minutes, the projector will go into standby mode. * Turning on the power with the lens shutter closed. * Closing the lens shutter during operation. * Directing the lens downward by more than 60° from level during operation. * Turning on the power with the lens directed down by more than 60° from level. MENU LAMP STATUS POWER ON/STAND BY SELECT SOURCE ENTER OFF P0WER ON VIDEO S-VIDEO COMPUTER COMP. AUTO ADJ. AUTO ASPECT ENTER MENU CANCEL E-18
-
 1
1 -
2
-
3
-
4
-
5
-
6
-
7
-
8
-
9
-
10
-
11
-
12
-
 13
13 -
 14
14 -
 15
15 -
 16
16 -
 17
17 -
 18
18 -
 19
19 -
 20
20 -
 21
21 -
 22
22 -
 23
23 -
24
-
25
-
26
-
27
-
28
-
29
-
30
-
31
-
32
-
33
-
34
-
35
-
36
-
37
-
38
-
39
-
40
-
41
-
42
-
43
-
44
-
45
 |
 |