NEC LT80 User Manual - Page 33
Replacing The Lamp - performance
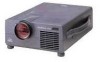 |
View all NEC LT80 manuals
Add to My Manuals
Save this manual to your list of manuals |
Page 33 highlights
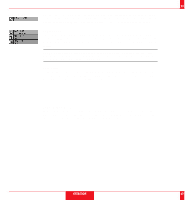
4 MAINTENANCE This section describes the simple maintenance procedures you should follow to replace the lamp and replace the batteries in the remote control. Replacing The Lamp After your lamp has been operating for 1000 hours or longer, the "status" light in the cabinet will turn red. Even though the lamp may still be working, replace it at 1000 hours to maintain optimal projector performance. CAUTION • DO NOT TOUCH THE LAMP immediately after it has been used. It will be extremely hot. Allow at least one hour for the lamp to cool before handling. • DO NOT REMOVE ANY SCREWS except the lamp cover set screw and two lamp case screws. You could receive an electric shock. • Turn off the main power to the projector and disconnect the power cord. Allow at least one hour for the lamp to cool. • The projector will turn off and go into stand by mode after 1100 hours of service. If this happens, be sure to replace the lamp. If you continue to use the lamp after 1000 hours of use, the lamp bulb may shatter, and pieces of glass may be scattered in the lamp case. Do not touch them as the pieces of glass may cause injury. If this happens, contact your NEC dealer for lamp replacement. Lamp cover Lamp housing Lamp replacement procedure 1. Switch off the main power and unplug the power cord. 2. Turn the main unit so that the bottom is up. 3. Remove the lamp cover fastening screws. 4. Slide the lamp cover in the direction of the arrow and remove it. CAUTION: Do not use a lamp other than the NEC replacement lamp. Order this from your NEC dealer using your projector's model number. 5. Remove the three screws for the lamp housing. (There is an interlock on the lamp housing to prevent the risk of electrical shock. Do not attempt to circumvent this interlock.) 6. Holding the handle, pull the lamp housing forward and take it off. 7. Install the new lamp housing and fasten with the three screws. 8. Fasten the three screws for the lamp housing. 9. Install the lamp cover back in its original position and fasten with the fastening screw. 10. Reset the lamp time. Select the lamp usage time menu, then press the ON button on the remote controller and hold it down for at least ten seconds. NOTE: If resetting the lamp clock back to zero after 1100 hours of service, press the "Power Off" (not "Power On") button on the remote control for ten seconds . MAINTENANCE 63 Step 3 Step 4 Step 5 Step 6 Step 7,8 Step 9 64
-
 1
1 -
2
-
3
-
4
-
5
-
6
-
7
-
8
-
9
-
10
-
11
-
12
-
13
-
14
-
15
-
16
-
17
-
18
-
19
-
20
-
21
-
22
-
23
-
24
-
25
-
26
-
27
-
 28
28 -
 29
29 -
 30
30 -
 31
31 -
 32
32 -
 33
33 -
 34
34 -
 35
35 -
 36
36 -
 37
37 -
 38
38 -
39
-
40
-
41
-
42
-
43
-
44
-
45
 |
 |
