Netgear DG834G DG834Gv5 Setup Manual - Page 23
Configuring Your Wireless Network, Specifying Wireless Settings - wps
 |
UPC - 606449029918
View all Netgear DG834G manuals
Add to My Manuals
Save this manual to your list of manuals |
Page 23 highlights
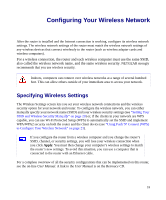
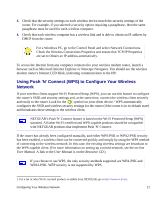
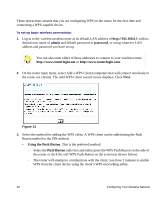
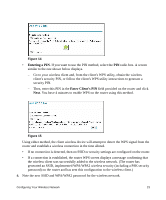
Configuring Your Wireless Network After the router is installed and the Internet connection is working, configure its wireless network settings. The wireless network settings of the router must match the wireless network settings of any wireless devices that connect wirelessly to the router (such as wireless adapter cards and wireless computers). For a wireless connection, the router and each wireless computer must use the same SSID, also called the wireless network name, and the same wireless security. NETGEAR strongly recommends that you use wireless security. Indoors, computers can connect over wireless networks at a range of several hundred feet. This can allow others outside of your immediate area to access your network. Specifying Wireless Settings The Wireless Settings screen lets you set your wireless network connections and the wireless security option for your network and router. To configure the wireless network, you can either manually specify your network name (SSID) and your wireless security settings (see "Setting Your SSID and Wireless Security Manually" on page 20) or, if the clients in your network are WPS capable, you can use Wi-Fi Protected Setup (WPS) to automatically set the SSID and implement WPA/WPA2 security on both the router and the client device (see "Using Push 'N' Connect (WPS) to Configure Your Wireless Network" on page 21). If you configure the router from a wireless computer and you change the router's SSID, channel, or security settings, you will lose your wireless connection when you click Apply. You must then change your computer's wireless settings to match the router's new settings. To avoid this situation, you can use a computer that is connected to the router with an Ethernet cable. For a complete overview of all the security configurations that can be implemented on this router, see the on-line User Manual. A link to the User Manual is on the Resrouce CD. 19
-
 1
1 -
2
-
3
-
4
-
5
-
6
-
7
-
8
-
9
-
10
-
11
-
12
-
13
-
14
-
15
-
16
-
17
-
 18
18 -
 19
19 -
 20
20 -
 21
21 -
 22
22 -
 23
23 -
 24
24 -
 25
25 -
 26
26 -
 27
27 -
 28
28 -
29
-
30
-
31
-
32
-
33
-
34
-
35
-
36
-
37
-
38
-
39
-
40
-
41
-
42
-
43
-
44
 |
 |