Netgear WAC104 User Manual - Page 45
Use the Reset Button, Erase the Settings, To reset the access point to factory default settings
 |
View all Netgear WAC104 manuals
Add to My Manuals
Save this manual to your list of manuals |
Page 45 highlights
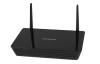
802.11ac Wireless Access Use the Reset Button CAUTION: This process erases all settings that you configured in the access point. To reset the access point to factory default settings: 1. On the back of the access point, locate the recessed Reset button to the left of the Power On/Off button. 2. Using a straightened paper clip, press and hold the Reset button for at least 10 seconds. 3. Release the Reset button. The configuration is reset to factory default settings. When the reset is complete, the access point reboots. This process takes about two minutes. WARNING: To avoid the risk of corrupting the firmware, do not interrupt the reset. For example, if you are connected to the access point web management interface, do not close the browser, click a link, or load a new page. Do not turn off the access point. Wait until the access point finishes restarting and the Power LED remains solid green. Erase the Settings CAUTION: This process erases all settings that you configured in the access point. To erase the settings: 1. Open a web browser from a computer that is connected to the same network as the access point or to the access point directly through an Ethernet cable or WiFi connection. 2. Enter the IP address that is assigned to the access point. If you did not enable the DHCP client on the access point or did not assign a static IP address, enter the default access point IP address 192.168.0.100. A login window opens. Manage the Access Point and Monitor the Traffic 45
-
 1
1 -
2
-
3
-
4
-
5
-
6
-
7
-
8
-
9
-
10
-
11
-
12
-
13
-
14
-
15
-
16
-
17
-
18
-
19
-
20
-
21
-
22
-
23
-
24
-
25
-
26
-
27
-
28
-
29
-
30
-
31
-
32
-
33
-
34
-
35
-
36
-
37
-
38
-
39
-
 40
40 -
 41
41 -
 42
42 -
 43
43 -
 44
44 -
 45
45 -
 46
46 -
 47
47 -
 48
48 -
 49
49 -
 50
50 -
51
-
52
-
53
-
54
-
55
-
56
-
57
-
58
-
59
-
60
-
61
-
62
-
63
-
64
-
65
-
66
-
67
-
68
-
69
-
70
-
71
-
72
-
73
-
74
-
75
-
76
-
77
-
78
-
79
 |
 |
