Netgear WN511T WN511T User Manual - Page 27
Profiles, Adding Profiles, Setting up a Profile to Connect to an Access Point or Router - review
 |
UPC - 606449047332
View all Netgear WN511T manuals
Add to My Manuals
Save this manual to your list of manuals |
Page 27 highlights
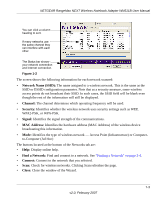
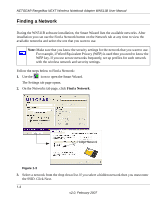
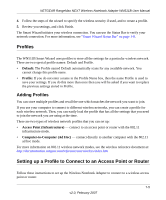
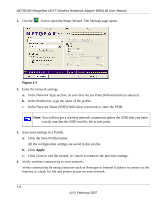
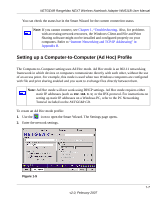
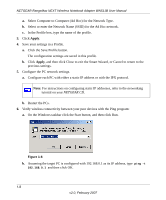
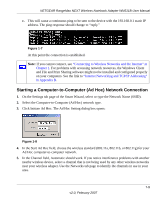
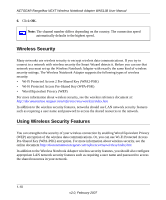
NETGEAR RangeMax NEXT Wireless Notebook Adapter WN511B User Manual 4. Follow the steps of the wizard to specify the wireless security if used, and to create a profile. 5. Review you settings, and click Finish. The Smart Wizard initiates your wireless connection. You can use the Status Bar to verify your network connection. For more information, see "Smart Wizard Status Bar" on page 1-8. Profiles The WN511B Smart Wizard uses profiles to store all the settings for a particular wireless network. There are two special profile names: Default and Profile. • Default: The Profile named Default automatically scans for any available network. You cannot change this profile name. • Profile: If you do not enter a name in the Profile Name box, then the name Profile is used to save your settings. If you do this more than once then you will be asked if you want to replace the previous settings stored in Profile. Adding Profiles You can store multiple profiles and recall the one which matches the network you want to join. If you use your computer to connect to different wireless networks, you can create a profile for each wireless network. Then, you can easily load the profile that has all the settings that you need to join the network you are using at the time. There are two types of wireless network profiles that you can set up: • Access Point (Infrastructure) - connect to an access point or router with the 802.11 infrastructure mode. • Computer-to-Computer (Ad Hoc) - connect directly to another computer with the 802.11 ad hoc mode. For more information on 802.11 wireless network modes, see the wireless reference document at: http://documentation.netgear.com/reference/enu/wireless/index.htm Setting up a Profile to Connect to an Access Point or Router Follow these instructions to set up the Wireless Notebook Adapter to connect to a wireless access point or router. 1-5 v2.0, February 2007
-
 1
1 -
2
-
3
-
4
-
5
-
6
-
7
-
8
-
9
-
10
-
11
-
12
-
13
-
14
-
15
-
16
-
17
-
18
-
19
-
20
-
21
-
 22
22 -
 23
23 -
 24
24 -
 25
25 -
 26
26 -
 27
27 -
 28
28 -
 29
29 -
 30
30 -
 31
31 -
 32
32 -
33
-
34
-
35
-
36
-
37
-
38
-
39
-
40
-
41
-
42
-
43
-
44
-
45
-
46
-
47
-
48
-
49
-
50
-
51
-
52
 |
 |
