Netgear XSM7224S XSM7224S Hardware Installation Guide - Page 16
Command Line Interface Reference for, the ProSafe 7200S Series Layer-2+ Stackable Switches
 |
UPC - 606449073706
View all Netgear XSM7224S manuals
Add to My Manuals
Save this manual to your list of manuals |
Page 16 highlights
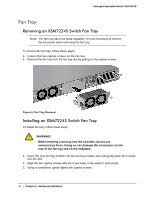
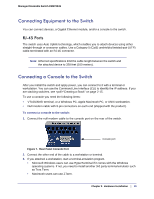
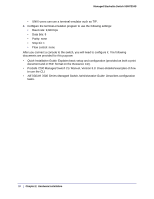
Managed Stackable Switch XSM7224S 3. Connect each switch to the next in a cascade to build the backplane of the stack. Finally, connect the last switch in the stack to the first switch, to close the ring and provide redundancy and resiliency to the stack. The switches automatically select the master switch in the stack. 4. To use the console and Command Line Interface (CLI), use a serial cable to connect the console to the master switch. This single console connection lets you manage all the switches in the stack. For information about working with the CLI, see the Command Line Interface Reference for the ProSafe 7200S Series Layer-2+ Stackable Switches on the Resource CD that shipped with your product. 16 | Chapter 2. Hardware Installation
-
 1
1 -
2
-
3
-
4
-
5
-
6
-
7
-
8
-
9
-
10
-
 11
11 -
 12
12 -
 13
13 -
 14
14 -
 15
15 -
 16
16 -
 17
17 -
 18
18 -
 19
19 -
 20
20 -
 21
21 -
22
-
23
-
24
-
25
-
26
-
27
-
28
-
29
-
30
 |
 |
