Nikon 4543 Instruction Manual - Page 10
Attach, flash, camera's, accessory, shoe.
 |
View all Nikon 4543 manuals
Add to My Manuals
Save this manual to your list of manuals |
Page 10 highlights
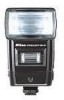
-BASIC OPERATION-confinued---------- 8 Attach the flash unit to . the camera's accessory shoe. Notes: 1) If you are using an F3-series camera, make sure that the ASAIISO film speed is already set on the camera before attaching the flash unit, as the camera's ASAIISO dial cannot be changed after the flash is attached to the accessory shoe. 2) For the Nikonos- Vcamera, an optional V- Type Sync Cord is required. For details about flash unit attachment to the Nikonos-V, refer to the Sync Cord's instruction manual. With the 5B·16A, turn the locking ring @ around the mounting foot @ counterclockwise until the AS-8 's foot is uncovered (fig. 1). Then slide the mounting foot onto the camera 's accessory shoe as far as it will go (fig. 2). Finally, tighten the locking ring to prevent the unit from acci dentally slipping off (fig . 3). With the 5B·16B, turn the locking nut @) on the mounting foot ® coun- terclockwise until it reaches its upper limit (fig. 1). Then slide the mounting foot forward into the shoe as far as it wil l go (fig. 2). Finally, tighten the locking nut to prevent the unit from accidentally slipping off (fig . 3). 10
-
 1
1 -
2
-
3
-
4
-
 5
5 -
 6
6 -
 7
7 -
 8
8 -
 9
9 -
 10
10 -
 11
11 -
 12
12 -
 13
13 -
 14
14 -
 15
15 -
16
-
17
-
18
-
19
-
20
-
21
-
22
-
23
-
24
-
25
-
26
-
27
-
28
-
29
-
30
-
31
-
32
-
33
-
34
-
35
-
36
-
37
-
38
-
39
-
40
-
41
-
42
-
43
-
44
-
45
-
46
-
47
-
48
-
49
-
50
-
51
-
52
-
53
-
54
-
55
-
56
-
57
-
58
-
59
-
60
-
61
-
62
-
63
-
64
-
65
-
66
-
67
-
68
-
69
-
70
-
71
-
72
 |
 |
