Olympus STYLUS TOUGH-8000 STYLUS TOUGH-8000 Instruction Manual (English) - Page 36
Selecting movie shooting mode, MOVIE], Restoring the shooting functions to the, default settings, - reset
 |
View all Olympus STYLUS TOUGH-8000 manuals
Add to My Manuals
Save this manual to your list of manuals |
Page 36 highlights
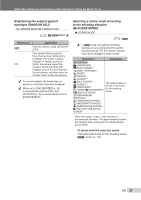
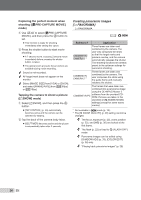
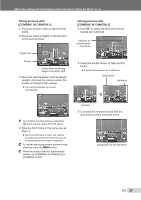
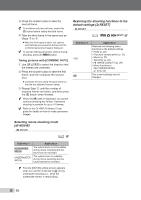
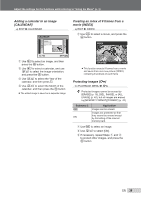
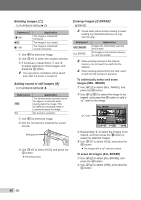
4 Press the shutter button to take the second frame. To combine only two pictures, press the o button before taking the third frame. 5 Take the third frame in the same way as Steps 3 to 4. ● After the third frame is taken, the camera automatically processes the frames and the combined panorama image is displayed. To cancel making panoramic picture during shooting, press the m button. Taking pictures with [COMBINE IN PC] 1 Use EFGH to select the direction that the frames are combined. 2 Press the shutter button to take the first frame, and then compose the second shot. ● Compose the shot using the guide frame so that the two adjacent frames overlap. 3 Repeat Step 2 until the number of required frames are taken, and then press the o button when finished. When the g mark is displayed, you cannot continue shooting any further. Panorama shooting is possible for up to 10 frames. Refer to the OLYMPUS Master 2 help guide for details on how to make panorama images. Restoring the shooting functions to the default settings [D RESET] D RESET : A K s b A Submenu 1 YES NO Application Restores the following menu functions to the default settings. • Flash (p. 22) • Exposure compensation (p. 23) • Macro (p. 23) • Self-timer (p. 24) • [A IMAGE QUALITY] (p. 29) • Menu functions in [B CAMERA MENU] (p. 30 to 33) The current settings are not changed. Selecting movie shooting mode [P MOVIE] P MOVIE : A Submenu 1 NON-WATER MOVIE UNDERWATER MOVIE Application The optical zoom is not available during movie recording but the sound can be recorded. The optical zoom is available during movie recording but the sound cannot be recorded. First the [MOVIE] setting screen appears when you set the mode dial to A during underwater shooting (i.e., while the underwater sensor is responding). 36 EN
-
 1
1 -
2
-
3
-
4
-
5
-
6
-
7
-
8
-
9
-
10
-
11
-
12
-
13
-
14
-
15
-
16
-
17
-
18
-
19
-
20
-
21
-
22
-
23
-
24
-
25
-
26
-
27
-
28
-
29
-
30
-
 31
31 -
 32
32 -
 33
33 -
 34
34 -
 35
35 -
 36
36 -
 37
37 -
 38
38 -
 39
39 -
 40
40 -
 41
41 -
42
-
43
-
44
-
45
-
46
-
47
-
48
-
49
-
50
-
51
-
52
-
53
-
54
-
55
-
56
-
57
-
58
-
59
-
60
-
61
-
62
-
63
-
64
-
65
-
66
-
67
-
68
-
69
-
70
-
71
-
72
-
73
-
74
-
75
-
76
-
77
-
78
-
79
-
80
-
81
-
82
-
83
-
84
-
85
-
86
 |
 |
