Onkyo TX-SR343 User Manual - Page 3
Front Panel - remote
 |
View all Onkyo TX-SR343 manuals
Add to My Manuals
Save this manual to your list of manuals |
Page 3 highlights
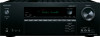
1 2 34 5 6 7 8 9 F G H I (European, Australian and Asian models) J K L Front Panel 1 zON/STANDBY button: Turns the unit on or into standby mode. 2 BLUETOOTH indicator: Flashes while pairing with a Bluetooth-enabled device is in progress and stays lit when pairing is completed. 3 SUBWOOFER Level buttons: Adjust the volume of the Subwoofer. 4 Remote control sensor: Receives signals from the remote controller. 5 DIMMER button (North American and Taiwanese models): Switches the brightness of the display. RT/PTY/TP button (European, Australian and Asian models): Can be used when receiving the station transmitting text information. 6 Display: Refer to page 12 for details. 7 SETUP button: Used when making settings. 8 Cursor buttons, lTUNINGj button, dPRESETc button and ENTER button: Move the cursor and confirms the selection. When listening to AM/FM broadcasting, tune in to the station with lTUNINGj or select the registered station with dPRESETc. 9 RETURN button: Returns the display to the previous state. F MASTER VOLUME: Allows you to adjust the volume. G MUSIC OPTIMIZER button: Turns on/off the MUSIC OPTIMIZER function that improves the quality of the compressed audio. H PHONES jack: Stereo headphones with a standard plug are connected. I TONE and Tone Level buttons: Adjust the high tone and low tone. J Input selector buttons: Switch the input to be played. K LISTENING MODE buttons: Allow you to select the listening mode. L AUX INPUT VIDEO/AUDIO jacks: A video camera or such other device is connected. En-3
-
 1
1 -
 2
2 -
 3
3 -
 4
4 -
 5
5 -
 6
6 -
 7
7 -
 8
8 -
 9
9 -
10
-
11
-
12
-
13
-
14
-
15
-
16
-
17
-
18
-
19
-
20
-
21
-
22
-
23
-
24
-
25
-
26
-
27
-
28
-
29
-
30
-
31
-
32
-
33
-
34
-
35
-
36
-
37
-
38
-
39
-
40
-
41
-
42
-
43
-
44
-
45
-
46
-
47
-
48
-
49
-
50
-
51
-
52
-
53
-
54
-
55
-
56
-
57
-
58
-
59
-
60
-
61
-
62
-
63
-
64
-
65
-
66
-
67
-
68
-
69
-
70
-
71
-
72
-
73
-
74
-
75
-
76
-
77
-
78
-
79
-
80
-
81
-
82
-
83
-
84
-
85
-
86
 |
 |
