Palsonic PAB3600 Owners Manual - Page 10
Unplug The Unit When Finished.
 |
View all Palsonic PAB3600 manuals
Add to My Manuals
Save this manual to your list of manuals |
Page 10 highlights
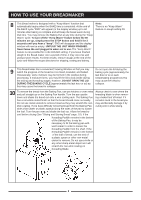
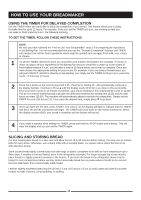
HOW TO USE YOUR BREADMAKER 8 This Bread maker is designed with a "Keep Warm" function that automatically begins when the BAKE time is completed. At the end of Note: There is no "Keep Warm" the BAKE cycle "END" will appear (in the display window) up to 60 feature on dough setting #9. minutes after baking is complete and will keep the bread warm during that time. You may remove the Baking Pan at any time during the "Keep Warm" cycle. To turn off the "Keep Warm" feature before the 60 minutes are up, simply press the STOP button and hold it for 3 seconds until you hear a "beep". END will disappear and the display window will now be empty. UNPLUG THE UNIT WHEN FINISHED. Never leave the unit plugged in when not in use. The "Keep Warm" feature is not provided for in the DOUGH setting. If you leave finished dough in the Bread maker over a period of time, it may over-rise and produce poor results. For best results, remove dough at the end of the cycle and follow the recipe directions for shaping, resting and baking. 9 This Breadmaker has a convenient Viewing Window so that you may watch the progress of the bread as it is mixed, kneaded, and baked. Occasionally, some moisture may be formed in the window during processing. If moisture forms, you may lift the lid to look inside during the mixing and kneading stages, however, DO NOT OPEN THE LID DURING THE BAKING CYCLE (approximately the last hour or so) as this may cause the bread to collapse. Do not open the lid during the baking cycle (approximately the last hour or so in each breadmaking program) as this may cause the bread to collapse. 10 To remove the bread from the Baking Pan, use pot holders or oven mitts and pull straight up on the Baking Pan handle. Turn the pan upside down and shake the bread out onto a wire cooling rack. The Baking Pan has a non-stick coated finish so that the bread should come out easily. Do not use metal utensils to remove bread as they may scratch the nonstick coating. If you have difficulty removing bread from the Baking Pan, slide a flat rubber or plastic spatula along the sides of the pan to loosen the loaf. Turn the pan over and shake the loaf out. Allow the bread to cool before slicing (See "Slicing and Storing Bread" page. 10). If the Kneading Paddle remains in the bottom of the Baking Pan, it may be necessary to fill the baking pan with warm water in order to loosen the Kneading Paddle from the shaft. If the Kneading Paddle remains in the bottom of the loaf of bread, use the end of a plastic spoon or other non-metal utensil to remove. Do not use a knife or any other sharp metal object as it will scratch the non-stick coating on Kneading Blade. Always check to see where the kneading blade is when removing a baked leaf of bread. If it remains stuck in the bread you may accidentally damage it by cutting into it while slicing. 9
-
 1
1 -
2
-
3
-
4
-
 5
5 -
 6
6 -
 7
7 -
 8
8 -
 9
9 -
 10
10 -
 11
11 -
 12
12 -
 13
13 -
 14
14 -
 15
15 -
16
-
17
-
18
-
19
-
20
-
21
-
22
-
23
-
24
-
25
-
26
-
27
-
28
-
29
-
30
-
31
-
32
-
33
-
34
-
35
-
36
 |
 |
