Panasonic KX-TGB85 Operating Instructions - Page 8
Setting up
 |
View all Panasonic KX-TGB85 manuals
Add to My Manuals
Save this manual to your list of manuals |
Page 8 highlights
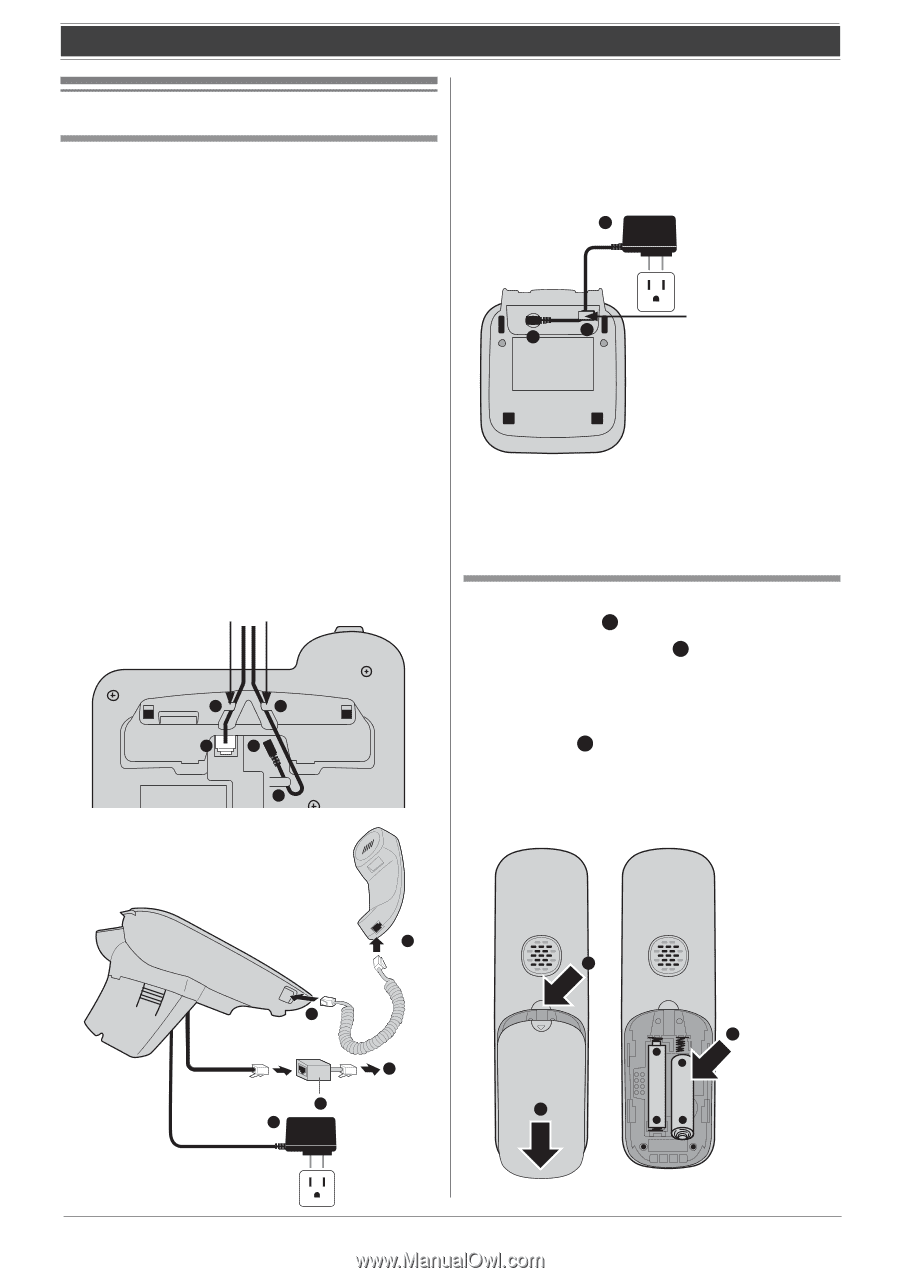
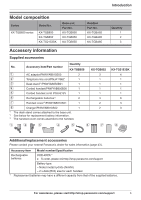
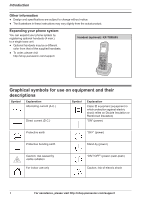
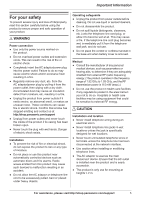
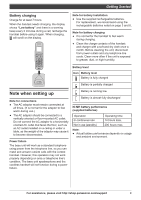
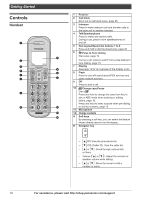
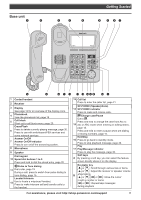
Getting Started Setting up Connections Base unit 1 Connect the AC adaptor to the unit by pressing the plug firmly. 2 Connect the telephone line cord to the unit until you hear a click. 3 Fasten the AC adaptor cord and the telephone line cord by hooking it. 4 Connect the AC adaptor to the power outlet. 5 Connect the telephone line cord to the single-line telephone jack (RJ11C) until you hear a click. 6 A DSL/ADSL filter (not supplied) is required if you have a DSL/ADSL service. 7 Connect the corded handset cord to the corded handset and the base unit until you hear a click. Note: Use only the supplied AC adaptor MN0063-L060040. Hook 3 3 DESK STAND 2 LINE 1 6V DC USE SPECIFIED ADAPTOR ONLY 3 Charger 1 Connect the AC adaptor to the unit by pressing the plug firmly. 2 Fasten the cord by hooking it. 3 Connect the AC adaptor to the power outlet. 3 USE SPECIFIED AC ADAPTOR ONLY 6 V DC 1 2 Hook Note: Use only the supplied AC adaptor MN0063-L060040. Battery installation 1 Press down at 1 . 2 Slide the handset cover 2 . 3 Insert the batteries, then close the handset cover. ● USE ONLY rechargeable Ni-MH batteries AAA (R03) size ( A ). ● Do NOT use alkaline/manganese/Ni-Cd batteries. ● Confirm correct polarities. SERIAL NO. 7 7 5 6 4 1 A + - 2 - + 8 For assistance, please visit http://shop.panasonic.com/support
-
 1
1 -
2
-
 3
3 -
 4
4 -
 5
5 -
 6
6 -
 7
7 -
 8
8 -
 9
9 -
 10
10 -
 11
11 -
 12
12 -
 13
13 -
14
-
15
-
16
-
17
-
18
-
19
-
20
-
21
-
22
-
23
-
24
-
25
-
26
-
27
-
28
-
29
-
30
-
31
-
32
-
33
-
34
-
35
-
36
-
37
-
38
-
39
-
40
-
41
-
42
-
43
-
44
-
45
-
46
-
47
-
48
 |
 |