Panasonic SAPM91D SAPM91 User Guide - Page 27
Convenient Functions, Auto-off Function / Dimming The Display / Muting The Volume / The Sleep Timer
 |
View all Panasonic SAPM91D manuals
Add to My Manuals
Save this manual to your list of manuals |
Page 27 highlights
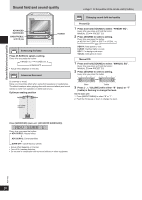
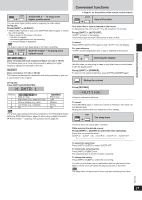
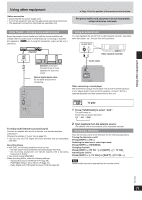
Convenient functions AUDIO ONLY - To enjoy even higher quality sound You can enjoy higher quality audio by stopping the video output. During play Press [SHIFT] + [A.ONLY]. • AUDIO ONLY cancels if you press [SHIFT]+[A.ONLY] again or switch the unit to standby. • There is output to the screen only when: - the disc is stopped. - performing operations such as searching. - on screen display is displayed. Note The feature may not work depending on the discs' recording. Multi Re-master - Enjoying more natural sound RAM DVD-A DVD-V CD Discs recorded with multi channels LPCM at 44.1 kHz or 48 kHz This feature gives you a more natural sound by adding the higher frequency signals not recorded on the disc. WMA MP3 Discs recorded at 44.1 kHz or 48 kHz This feature reproduces the frequencies lost during recording to give you a sound closer to the original. During play Press [SHIFT]+[M.RE-MASTER]. Convenient functions ➡ Page 11 for the position of the remote control buttons. AUTO OFF Auto-off function Only when disc or tape is selected as the source To save power, the unit turns off if it is left unused for 10 minutes. Press [SHIFT] + [AUTO OFF]. "A.OFF" is shown on the display. This function does not work if the source is tuner or AUX. To cancel Press [SHIFT]+[AUTO OFF] again to clear "A.OFF" from the display. For your reference "A.OFF" remains displayed if disc or tape is selected as the source. Dimming the display Use this when you are going to sleep or any other time you would prefer to dim the display panel. Press [SHIFT] + [DIMMER]. To return to the original brightness, press [SHIFT]+[DIMMER] again. Muting the volume Press [MUTING]. Setting 1 2 3 Off RAM DVD-A DVD-V CD Type of music High tempo (e.g., pops and rock) Various tempos (e.g., jazz) Low tempo (e.g., classical) Off WMA MP3 Effect level Light Medium Strong Off Note The actual output sampling frequency depends on the PCM Digital Output setting (➡ PCM Digital Output, page 22) when using a digital connection (➡ Home Theater - Enjoying more powerful sound, page 29). Volume is reduced to minimum. To cancel Press [MUTING] again or reduce the volume to minimum, then raise it to the required level. Muting also cancels when you switch the unit to standby. The sleep timer This timer turns the unit off after a set time. While enjoying the desired source: Press [SHIFT] + [SLEEP] to select the time (minutes). Every time you press the button: SLEEP 30 → SLEEP → 60 → SLEEP 90 → SLEEP 120 → SLEEP OFF To cancel the sleep timer Press [SHIFT]+[SLEEP] to select "SLEEP OFF". To confirm the remaining time Press [SHIFT]+[SLEEP] once. The remaining time is shown for about 5 seconds. To change the setting Press [SHIFT]+[SLEEP] to select the new setting. You can use the sleep timer in combination with the play/record timer. Make sure the unit is off before the play/record timer's start time. Note The sleep timer will be turned off when you start recording from a disc. RQT7932 27
-
 1
1 -
2
-
3
-
4
-
5
-
6
-
7
-
8
-
9
-
10
-
11
-
12
-
13
-
14
-
15
-
16
-
17
-
18
-
19
-
20
-
21
-
 22
22 -
 23
23 -
 24
24 -
 25
25 -
 26
26 -
 27
27 -
 28
28 -
 29
29 -
 30
30 -
 31
31 -
 32
32 -
33
-
34
-
35
-
36
 |
 |
