Panasonic WJHD316A WJHD309A User Guide - Page 52
COPYING (Duplicate - wj hd316a user manual
 |
View all Panasonic WJHD316A manuals
Add to My Manuals
Save this manual to your list of manuals |
Page 52 highlights
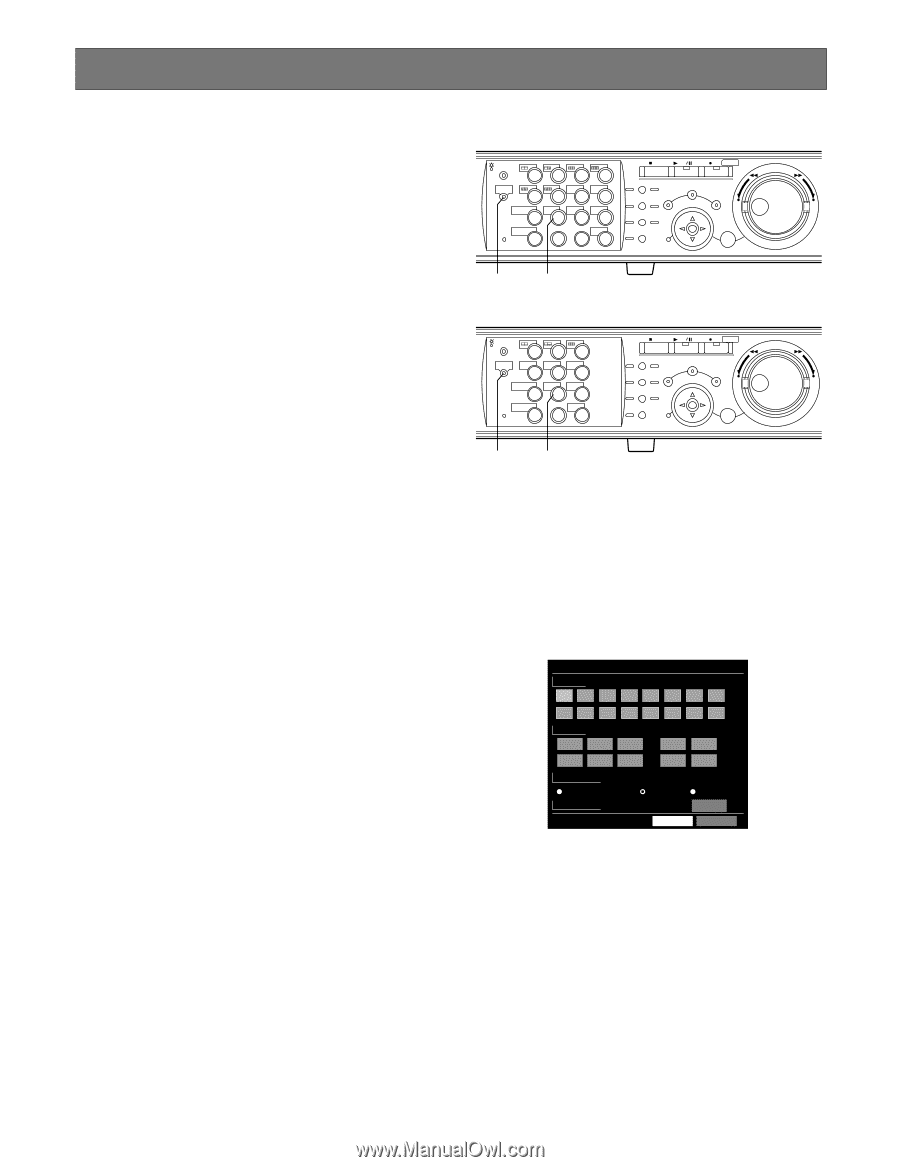
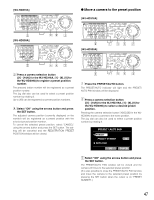
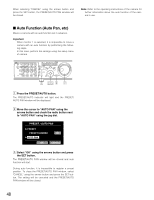
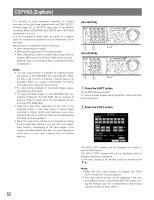
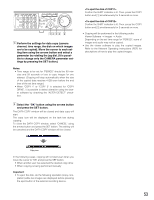
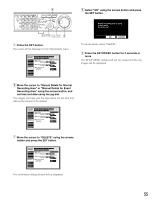
COPYING (Duplicate) It is possible to copy (duplicate) manually the images recorded on the disk area selected with the DISK SELECT window (page 25) to the HDD copy area or the external recording device (DVD-RAM disk, DVD-R disk, CD-R disk) connected to the unit. It is recommended to make back-up copies on a regular basis for unexpected situations such as malfunction of the hard disk. Manual copy is available during the following. • While displaying live images • While pausing playback of recorded images • When displaying a search window (Recording event list window, VMD search list window, Marking list window) (Manual copy is not available when a thumbnail window is displayed.) Notes: • The auto copy function is available for copying recorded images to the DVD-RAM disk automatically. When the auto copy function is enabled, manual copy is not available. Refer to a system administrator for further information about the auto copy function. • To copy during playback of recorded images, pause the playback temporarily. • To copy recorded images on the DVD-RAM disk, formatting (initializing) the DVD-RAM disk is required in advance. Refer to page 56 for the descriptions of how to format DVD-RAM disks. • Copy time may differ depending on the size of the recorded image. It may take longer to copy images recorded in higher quality and resolution even when selecting the same number of cameras and designating the same recording duration. • When the clock of the unit has been changed by editing the time and date settings or by the auto time adjustment function, overlapping of the time ranges of the images recorded before and after the time adjustment could occur. In this case, copying may not function properly. 52 [WJ-HD316A] MONITOR1 MONITOR2 R 1234 STOP PLAY PAUSE REC - REC STOP REV FWD R SHIFT SEQ OSD PAN/ GOTO TILT LAST SEARCH 5 6 7 8 ZOOM/ PAN/TILT A-B SLOW SETUP /ESC FOCUS REPEAT - + DISK SELECT COPY TEXT MARK 9 10/0 11 12 IRIS LISTED EL-ZOOM LOGOUT PRESET 2 13 14 15 16 /AUTO SET BUSY zx [WJ-HD309A] MONITOR1 MONITOR2 R 123 R SHIFT SEQ TEXT OSD 456 DISK SELECT COPY MARK 789 EL-ZOOM LOGOUT 2 0 STOP PLAY PAUSE REC - REC STOP REV FWD PAN/ GOTO TILT LAST SEARCH PAN/TILT SETUP ZOOM/ A-B SLOW /ESC FOCUS REPEAT - + IRIS LISTED PRESET /AUTO SET BUSY zx z Press the SHIFT button. The SHIFT indicator will light. To copy recorded images during playback, pause the playback temporarily. x Press the COPY button. DATA COPY CAMERA 12 345 678 9 10 11 12 13 14 15 16 PERIOD AUG . 20 . 04 AUG . 20 . 04 COPY DRIVE HDD COPY AREA Alter Detect 3 3 COPY1 : 00 PM : 30 PM COPY2 OFF OK CANCEL The DATA COPY window will be displayed on monitor 2 and the VGA monitor. The DATA COPY window will not be displayed when a thumbnail window is displayed. In this case, display a list window using the arrows button (C D). Notes: • When the auto copy function is enabled, the DATA COPY window will not be displayed. • The copy cancel window will be displayed if the user who started manual copy presses the COPY button during the manual copy. (It is impossible to stop manual copy performed by other users.)
-
 1
1 -
2
-
3
-
4
-
5
-
6
-
7
-
8
-
9
-
10
-
11
-
12
-
13
-
14
-
15
-
16
-
17
-
18
-
19
-
20
-
21
-
22
-
23
-
24
-
25
-
26
-
27
-
28
-
29
-
30
-
31
-
32
-
33
-
34
-
35
-
36
-
37
-
38
-
39
-
40
-
41
-
42
-
43
-
44
-
45
-
46
-
 47
47 -
 48
48 -
 49
49 -
 50
50 -
 51
51 -
 52
52 -
 53
53 -
 54
54 -
 55
55 -
 56
56 -
 57
57 -
58
-
59
-
60
-
61
-
62
-
63
-
64
-
65
-
66
-
67
-
68
-
69
-
70
-
71
-
72
-
73
-
74
-
75
-
76
-
77
-
78
-
79
-
80
-
81
-
82
-
83
-
84
-
85
-
86
-
87
-
88
-
89
-
90
-
91
-
92
-
93
-
94
-
95
-
96
-
97
-
98
-
99
-
100
-
101
-
102
-
103
-
104
-
105
-
106
-
107
-
108
-
109
-
110
-
111
-
112
-
113
-
114
-
115
-
116
-
117
-
118
-
119
-
120
-
121
-
122
-
123
-
124
-
125
-
126
-
127
-
128
-
129
-
130
-
131
-
132
-
133
-
134
-
135
-
136
-
137
-
138
-
139
-
140
-
141
-
142
-
143
-
144
-
145
-
146
-
147
-
148
-
149
-
150
-
151
-
152
-
153
-
154
-
155
-
156
-
157
-
158
-
159
-
160
-
161
-
162
-
163
-
164
-
165
-
166
-
167
-
168
-
169
-
170
-
171
-
172
-
173
-
174
-
175
-
176
-
177
-
178
-
179
-
180
-
181
-
182
 |
 |