Panasonic WJHDE300 WJHDE300 User Guide - Page 10
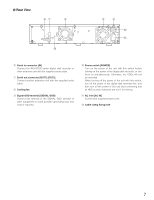
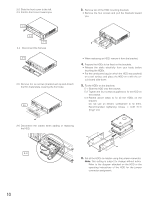
Slide the HDD onto the bracket., Tighten the four screws supplied to fix the HDD
 |
View all Panasonic WJHDE300 manuals
Add to My Manuals
Save this manual to your list of manuals |
Page 10 highlights
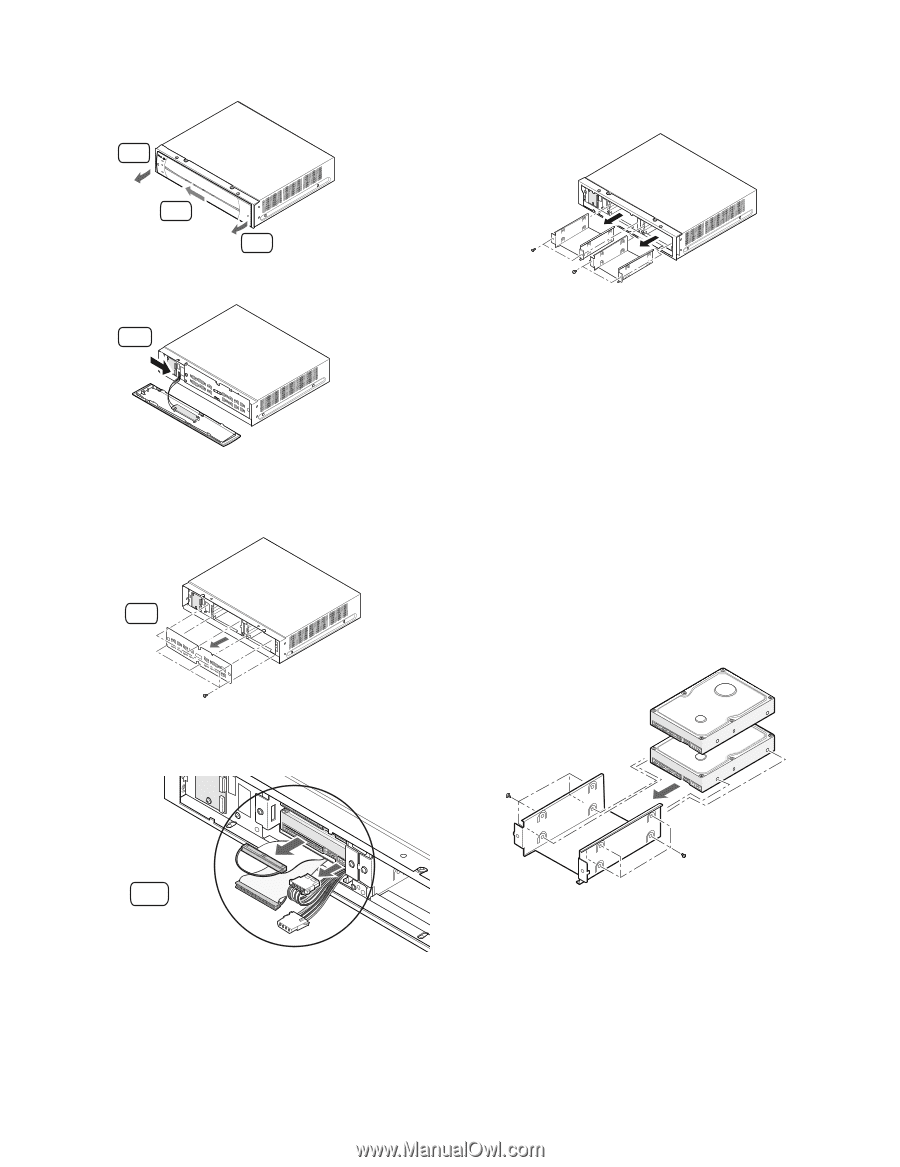
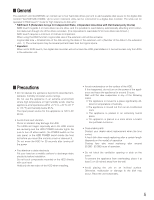
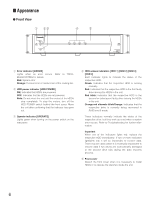
2-2 Slide the front cover to the left. 2-3 Pull the front cover toward you. 3. Remove two of the HDD mounting brackets. • Remove the four screws and pull the brackets toward you. 2 - 3 2 - 2 2 - 3 2-4 Disconnect the harness. 2 - 4 2-5 Remove the six screws (marked with ∆) and detach the thin metal plate covering the front side. 2 -5 • When replacing an HDD, remove it from the bracket. 4. Prepare the HDDs to be fixed on the brackets. • Release the static electricity from your body before touching the HDDs. • Put the conductive bag (in which the HDD was packed) on a soft surface and place the HDD on it with the circuit board side down. 5. Fix the HDDs on the brackets. 5-1 Slide the HDD onto the bracket. 5-2 Tighten the four screws (supplied) to fix the HDD on the bracket. 5-3 Repeat above steps to fix all the HDDs on the bracket. Do not use an electric screwdriver to fix them. Recommended tightening torque = 0.49 N · m {5 kgf · cm} 2-6 Disconnect the cables when adding or replacing the HDD. 2 - 6 10 6. Set all the HDDs as master using the jumper connector. Note: This setting is subject to change without notice. Refer to the diagram attached on the HDD or the operating instructions of the HDD for the jumper connector assignment.
-
 1
1 -
2
-
3
-
4
-
 5
5 -
 6
6 -
 7
7 -
 8
8 -
 9
9 -
 10
10 -
 11
11 -
 12
12 -
 13
13 -
 14
14 -
 15
15 -
16
-
17
-
18
-
19
-
20
 |
 |