Panasonic WJHDE300 WJHDE300 User Guide - Page 11
Case A, Important, Extension units already con d in SINGLE
 |
View all Panasonic WJHDE300 manuals
Add to My Manuals
Save this manual to your list of manuals |
Page 11 highlights
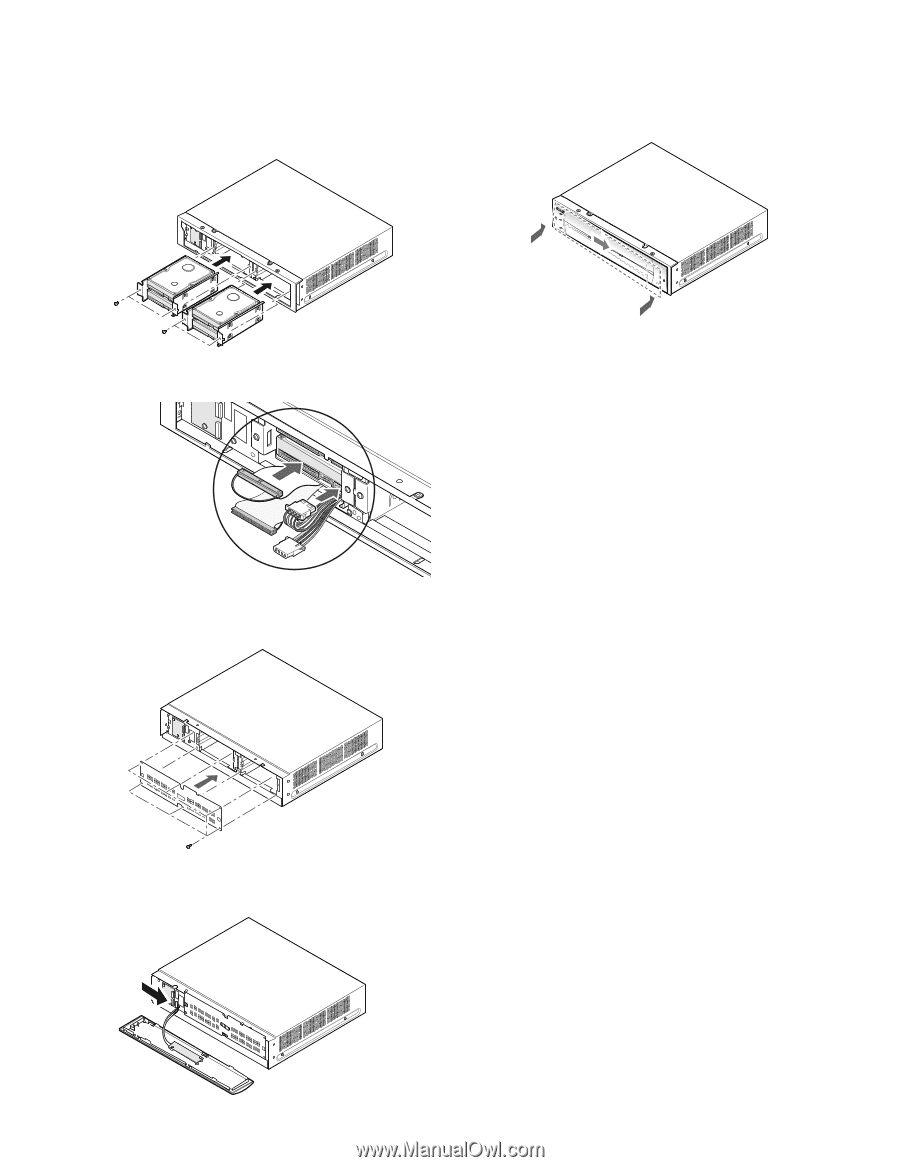
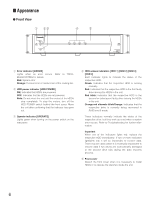
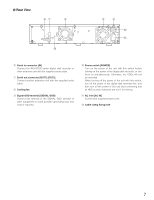
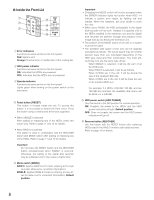
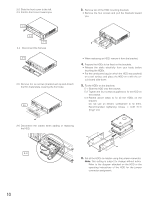
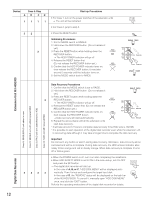
7. Place the brackets with the fixed HDDs into the unit and fix them using the four screws removed in step 3. • Do not use an electric screwdriver to fix them. Recommended tightening torque = 0.784 N · m {8 kgf · cm} 11. Attach the front cover as it was. 11-1 Align both the left edges of the front cover and the unit, and then push the front cover onto the unit. 11-2 Slide the front cover to the right. 8. Connect the cables. Note: The front cover may be attached and detached as necessary in the next step 12. Be careful not to damage the harness. 9. Attach the metal plate removed in step 2 with the six screws (marked with ∆) previously removed. 10. Connect the detached harness as it was. 12. Turn on the power of the system to reconstruct the sys- tem. See the table on the next page to perform start-up procedures. Note that step 1 in the next page depends on how you have cut the motor power in case 1 or 2 mentioned in page 9. Take the steps in order depending on the cases A, B, C, and D. Case A: Extension units not configured yet and newly installed or added to be run in SINGLE or RAID5 mode. Case B: Extension units already configured in SINGLE mode and having HDD added, removed, or replaced. Case C: Extension units already configured in RAID5 mode having HDD added or removed. Case D: Extension units already configured in RAID5 mode having replaced HDD. Important: Turn the units on in the following order. The extension units need to be turned on first and the digital disk recorder is the last. Note: The digital disk recorder will need about three to five minutes to complete the system check that is started as it is turned on. The time length depends on the connections and number of the extension units. 11
-
 1
1 -
2
-
3
-
4
-
5
-
 6
6 -
 7
7 -
 8
8 -
 9
9 -
 10
10 -
 11
11 -
 12
12 -
 13
13 -
 14
14 -
 15
15 -
 16
16 -
17
-
18
-
19
-
20
 |
 |