Pfaff ambition 620 Manual - Page 29
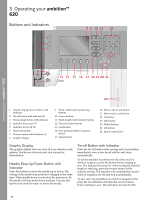
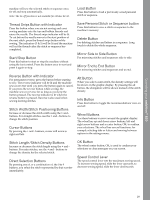
Thread Snips Button with Indicator, Start/Stop Button, Stitch Width/Stitch Positioning Buttons
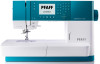 |
View all Pfaff ambition 620 manuals
Add to My Manuals
Save this manual to your list of manuals |
Page 29 highlights
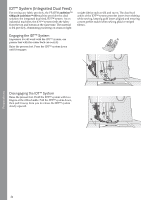
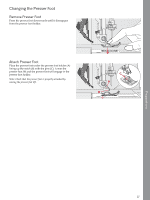
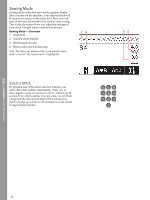
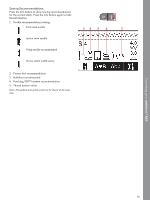
Operating your ambition™ 620 machine will sew the selected stitch or sequence once, tie-off and stop automatically. Note: The tie-off function is not available for stitches 22-32. Load Button Press this button to load a previously saved personal stitch or sequence. Thread Snips Button with Indicator Press the button when you are not sewing and your sewing machine cuts the top and bobbin threads and raises the needle. The thread snips indicator will be lit. To cut before the needle moves to the start position of the next stitch, press the thread snips button while sewing. The indicators (3 & 5) will be lit and the machine will cut the threads after the stitch or sequence has completed. Start/Stop Button Press this button to start or stop the machine without using the foot control. Press the button once to start and press it again to stop. Save Personal Stitch or Sequence button Press this button to save a stitch or sequence to the machine's memory. Delete Button For deleting stitches and letters in a sequence. Long touch to delete the whole sequence. Mirror Side to Side Button For mirroring stitches and sequences side to side. Mirror End to End Button For mirroring stitches and sequences end to end. Reverse Button with Indicator For permanent reverse, press the button before starting to sew. The reverse indicator will be lit and the machine sews in reverse until you press the button again to cancel. If you press the reverse button while sewing, the machine sews in reverse for as long as you keep the button pressed. The reverse indicator is lit when the reverse button is pressed. Reverse is also used when sewing darning stitches. Stitch Width/Stitch Positioning Buttons Increase or decrease the stitch width using the + and buttons. For straight stitches, use the + and - buttons to change the stitch position. Cursor Buttons By pressing the + and - buttons, cursor will move to right and left. Alt Button When you select a satin stitch, the density settings will be shown on the graphic display. By pressing the alt button, the elongation will be shown instead of the stitch density. Info Button Press this button to toggle the recommendations view on and off. Wheel Buttons Use these buttons to move around the graphic display. The wheel has up and down arrow buttons, left and right arrow buttons and a center button, OK, to confirm your selections. The wheel has several functions, for example selecting tabs or letters and moving between options in the settings menu. Stitch Length/Stitch Density Buttons Increase or decrease the stitch length using the + and buttons. For satin stitches, use the + and - buttons to change the density for the selected stitch. Direct Selection Buttons By pressing one of, or a combination of, the 0 to 9 buttons, you select the stitch represented by that number immediately. OK Button The wheel center button, OK, is used to confirm your selections or clear messages on your screen. Speed Control Lever The speed control lever sets the maximum sewing speed. To increase sewing speed, slide the lever upwards, to decrease sewing speed, slide the lever downwards. 29
-
 1
1 -
2
-
3
-
4
-
5
-
6
-
7
-
8
-
9
-
10
-
11
-
12
-
13
-
14
-
15
-
16
-
17
-
18
-
19
-
20
-
21
-
22
-
23
-
 24
24 -
 25
25 -
 26
26 -
 27
27 -
 28
28 -
 29
29 -
 30
30 -
 31
31 -
 32
32 -
 33
33 -
 34
34 -
35
-
36
-
37
-
38
-
39
-
40
-
41
-
42
-
43
-
44
-
45
-
46
-
47
-
48
-
49
-
50
-
51
-
52
-
53
-
54
-
55
-
56
-
57
-
58
-
59
-
60
-
61
-
62
-
63
-
64
-
65
-
66
-
67
-
68
 |
 |
