Philips 63PF9631D User manual - Page 14
First time installation, Continued
 |
UPC - 609585115583
View all Philips 63PF9631D manuals
Add to My Manuals
Save this manual to your list of manuals |
Page 14 highlights
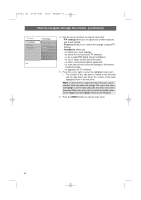
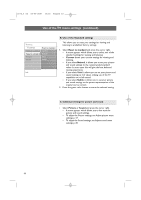
2572.3 en 22-03-2007 13:16 Pagina 12 First time installation (Continued) PHILIPS Settings assistant Please select your location before continuing: Home Shop Step 3: Settings assistant: select your TV settings By means of several split screens/full screens you are prompted to select your preferred picture and sound settings, to finally arrive at a complete setting which satisfies you. 1. Press the green color button on your remote control to enter the Settings assistant menu. 2. Select your Location with the cursor up/down and press the green color button. > If you choose Shop it will skip the Settings assistant. The TV parameters for Picture and Sound will then be set to predefined fixed settings. Press the green color button again to proceed. > If you choose Home it will display the Settings assistant. 3. Use the cursor left/right to each time select your preferred screen. 4. Press the green color button to each time confirm your selection and to jump to the following screen. > The following items will be presented sequentially. In the header it is mentioned how many screens have been completed and how many screens there are in total.The Settings assistant will step sequentially through the following settings: Picture and Sound. 5. Press the green color button twice to store all the settings and to return to the TV installation menu. Note: when you skip or stop the Settings Assistant, then the Standard settings Philips selected for you will be chosen. 6. Press the red color button to finish the First time installation procedure and to display the first stored TV channel. Note: any time you can change or reset your settings or adjust individual settings for Picture and Sound in the TV settings menu. See p. 15, Use of the TV menu settings. To control the settings of special TV functions, features and accessory equipment. See p. 22, Adjust feature menu settings. 12
-
 1
1 -
2
-
3
-
4
-
5
-
6
-
7
-
8
-
 9
9 -
 10
10 -
 11
11 -
 12
12 -
 13
13 -
 14
14 -
 15
15 -
 16
16 -
 17
17 -
 18
18 -
 19
19 -
20
-
21
-
22
-
23
-
24
-
25
-
26
-
27
-
28
-
29
-
30
-
31
-
32
-
33
-
34
-
35
-
36
-
37
-
38
-
39
-
40
-
41
-
42
-
43
-
44
-
45
-
46
-
47
-
48
-
49
-
50
-
51
-
52
-
53
-
54
-
55
-
56
-
57
-
58
-
59
-
60
-
61
-
62
-
63
-
64
-
65
-
66
-
67
-
68
-
69
-
70
 |
 |
