Philips DVDR3390 User manual - Page 31
Manual recording, One Touch Recording, automatic turn-off - dvd player recorder
 |
UPC - 609585111707
View all Philips DVDR3390 manuals
Add to My Manuals
Save this manual to your list of manuals |
Page 31 highlights
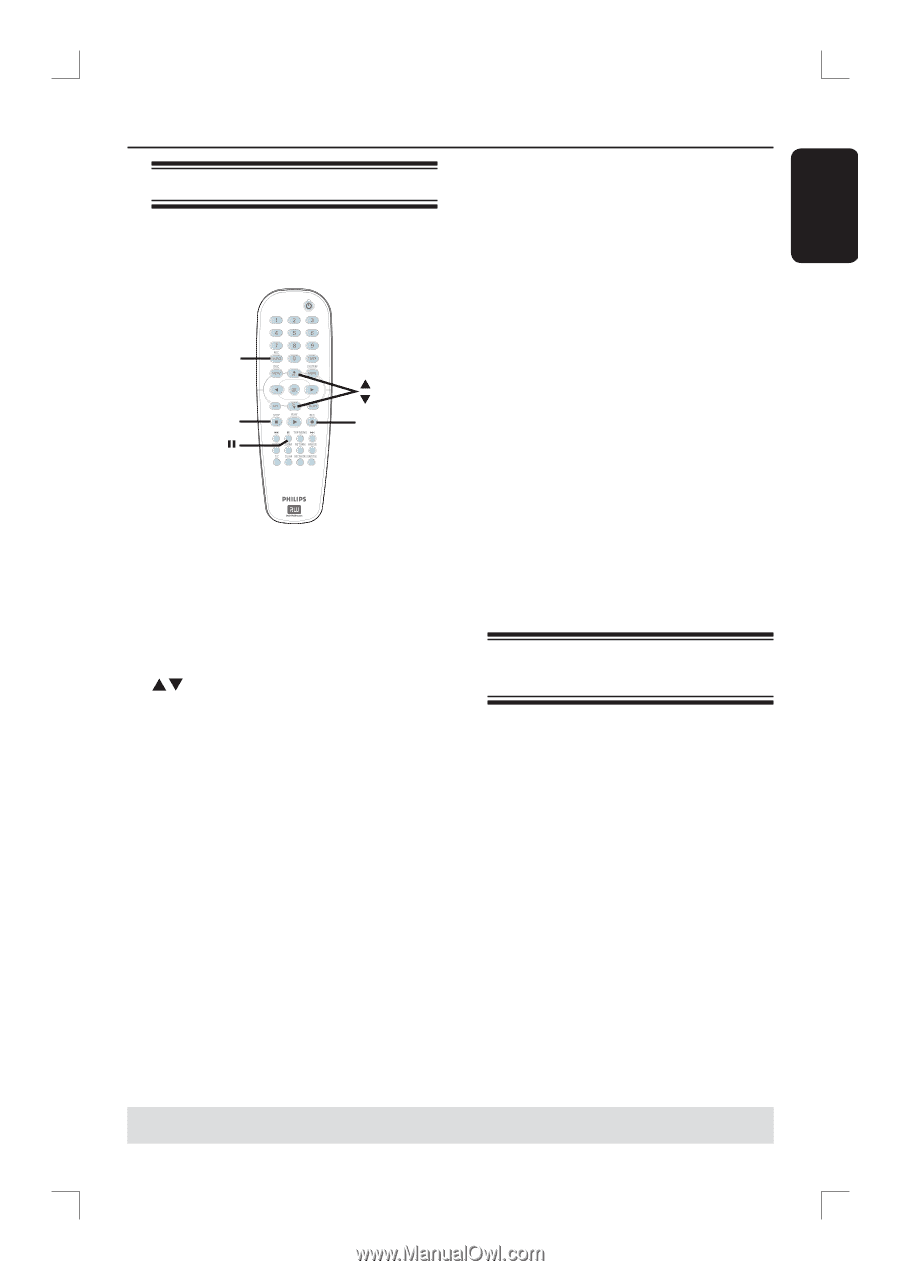
English Manual recording Use this feature to start recording immediately (e.g. to record a TV show already in progress.) REC SOURCE STOP (PAUSE) REC A Turn on the TV power. Select the correct Video In channel at the TV. B Insert a DVD±R/±RW into the recorder. C Press REC SOURCE on the remote control to select { Tuner }, then use ST keys to select the TV channel you wish to record. To record from an external device, press REC SOURCE repeatedly to select the correct input channel that matches the connected jack on the recorder. { CAM1 } Input source from the device connected to the CAM1 and AUDIO L/R jacks on the front panel. { DV } Input source from the device connected to DV IN jack on the front panel. Recording (continued) { EXT 1 } Input source from the device connected to the VIDEO (CVBS) EXT1 and AUDIO L/R INPUT jacks on the rear panel. { EXT 2 } Input source from the device connected to the S-VIDEO (Y/C) EXT2 and AUDIO L/R INPUT jacks on the rear panel. D Press REC to start recording. The recording will automatically start after the last recording on the DVD±R/±RW. E To stop the recording, press STOP . Pausing a recording A During a recording, press PAUSE Å. You can use this function to avoid recording commercials. B To resume recording, press REC . One Touch Recording automatic turn-off A Follow the steps A~C of "Manual Recording". B Press REC repeatedly to toggle between OTR 30, 60 or 90- minutes recording options. The recorder will stop recording at the designated end time and turn off automatically. Press STOP if you wish to stop the recording. TIPS: Ensure that there is enough space on the DVD±R/±RW before recording. Before you playback the DVD±R on another player, finalize the disc. See "Playing your recordings (DVD±R) on other DVD players". 31
-
 1
1 -
2
-
3
-
4
-
5
-
6
-
7
-
8
-
9
-
10
-
11
-
12
-
13
-
14
-
15
-
16
-
17
-
18
-
19
-
20
-
21
-
22
-
23
-
24
-
25
-
 26
26 -
 27
27 -
 28
28 -
 29
29 -
 30
30 -
 31
31 -
 32
32 -
 33
33 -
 34
34 -
 35
35 -
 36
36 -
37
-
38
-
39
-
40
-
41
-
42
-
43
-
44
-
45
-
46
-
47
-
48
-
49
-
50
-
51
-
52
-
53
-
54
-
55
-
56
-
57
-
58
-
59
-
60
-
61
-
62
-
63
-
64
-
65
-
66
-
67
 |
 |