Philips HTB5544D User manual - Page 37
Microsoft Windows Media Player 12, Macintosh OS X Twonky Media (v4.4.2), Play files from your PC
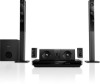 |
View all Philips HTB5544D manuals
Add to My Manuals
Save this manual to your list of manuals |
Page 37 highlights
8 Follow the onscreen instructions to add the other folders that contain your media files. Microsoft Windows Media Player 12 1 Start Windows Media Player on your PC. 2 In Windows Media Player, click the Stream tab, and then select Turn on media streaming. »» The Media streaming options screen is displayed. 3 Click Turn on media streaming. »» You return to Windows Media Player screen. 4 Click the Stream tab and select More streaming options. »» The Media streaming options screen is displayed. 5 Make sure that you see a media program in the Local network screen. »» If you don't see a media program, check that your PC firewall is not blocking the connection. 6 Select the media program and click Allowed. »» A green arrow appears next to the media program. 7 By default, Windows Media Player shares from these folders: My Music, My Pictures, and My Videos. If your files are in other folders, click the Organize tab and select Manage libraries > Music. »» The Music Library Locations screen is displayed. 8 Follow the onscreen instructions to add the other folders that contain your media files. Macintosh OS X Twonky Media (v4.4.2) 1 Visit www.twonkymedia.com to purchase the software, or download a free 30-day trial to your Macintosh. 2 Start Twonky Media on the Macintosh. 3 In the Twonky Media Server screen, select Basic Setup and First Steps. »» The First steps screen is displayed. 4 Type a name for your media server, and then click Save changes. 5 Back in the Twonky Media screen, select Basic Setup and Sharing. »» The Sharing screen is displayed. 6 Browse and select folders to share, and then select Save Changes. »» Your Macintosh rescans the folders automatically so that they are ready to share. Play files from your PC Note •• Before you play multimedia content from the computer, make sure that the home theater is connected to the home network, and the media server software is properly set up. 1 Press (Home). 2 Select [browse PC], and then press OK. »» A content browser is displayed. 3 Select a device on the network. »» The folders in the selected device are displayed. Depending on the media server, the folder names may vary. • If you cannot see the folders, check that you have enabled media sharing on the selected device so that the content is available for sharing. 4 Select a file, and then press OK. • Some media files may not play due to compatibility issues. Check the file formats supported by your home theater. 5 Press the play buttons to control play (see 'Play buttons' on page 29). EN 37 English
-
 1
1 -
2
-
3
-
4
-
5
-
6
-
7
-
8
-
9
-
10
-
11
-
12
-
13
-
14
-
15
-
16
-
17
-
18
-
19
-
20
-
21
-
22
-
23
-
24
-
25
-
26
-
27
-
28
-
29
-
30
-
31
-
 32
32 -
 33
33 -
 34
34 -
 35
35 -
 36
36 -
 37
37 -
 38
38 -
 39
39 -
 40
40 -
 41
41 -
 42
42 -
43
-
44
-
45
-
46
-
47
-
48
-
49
-
50
-
51
-
52
-
53
-
54
-
55
-
56
-
57
 |
 |
