Pioneer AVH-X8500BHS Owner's Manual - Page 41
Source, Setting the RGB Input - firmware updates
 |
View all Pioneer AVH-X8500BHS manuals
Add to My Manuals
Save this manual to your list of manuals |
Page 41 highlights
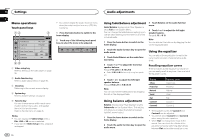
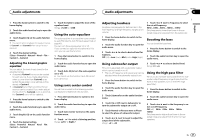
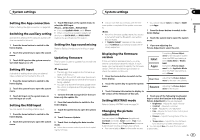
System settings System settings Section 19 English Setting the App connection Refer to Setting the App connection on page 24. Switching the auxiliary setting Activate this setting when using an auxiliary device connected to this unit. 1 Press the home button to switch to the home display. 2 Touch the system key to open the system menu. 3 Touch AUX Input on the system menu to turn AUX Input on or off. 3 Touch RGB Input on the system menu to select the RGB input. iPhone-QVGA NAVI-WVGA NAVI # If you use AppRadio Mode, set to iPhone. # When connecting a navigation system, set whichever of QVGA NAVI and WVGA NAVI matches the specifications of the system. Setting the App sound mixing Refer to Setting the App sound mixing on page 25. Updating firmware This function is used to update this unit with the latest firmware. Setting AV input Activate this setting when using an external video component connected to this unit. 1 Press the home button to switch to the home display. 2 Touch the system key to open the system menu. 3 Touch AV Input on the system menu to turn AV Input on or off. Setting the RGB Input You can switch the setting of RGB input. 1 Press the home button to switch to the home display. Important ! The only port that supports the firmware up- date is USB input 1. ! Never turn the unit off and never disconnect the USB storage device while the firmware is being updated. ! You can only start the firmware update when the vehicle is stopped and the parking brake is engaged. 1 Connect the USB storage device that contains only the update file. 2 Press the home button to switch to the home display. 3 Touch the system key to open the system menu. 4 Touch Firmware Update. 2 Touch the system key to open the system menu. 5 Touch Start to display the data transfer mode. # Follow the on-screen instructions to finish updating the firmware. # This unit will reset automatically after the firmware update is completed if the update is successful. Notes ! When the firmware update starts, the source is turned off and the Bluetooth connection disconnected. ! If "Update Failed!" appears on the screen, touch Continue to proceed and start the recovery sequence. ! You cannot adjust Color and Hue for NAVI and Apps. 1 Press the home button to switch to the home display. 2 Touch the system key to open the system menu. 3 If you are adjusting the Picture Adjustment, select the unit. Displaying the firmware version If this unit fails to operate properly, you may need to consult your dealer for repair. In such cases, you may be asked to specify the firmware version. Perform the following procedure to check the version on this unit. 1 Press the home button to switch to the home display. 2 Touch the system key to open the system menu. 3 Touch Firmware Information to display to the version of the firmware of this unit. Setting MIXTRAX mode Refer to Setting MIXTRAX mode on page 30. Changing the picture adjustment You can adjust the Brightness (brightness), Contrast (contrast), Color (color) , Hue (hue), Dimmer (dimmer), and Temperature (temperature) for each source and rear view camera. ! You cannot adjust Hue for the audio source. NAVI Apps Completing Picture Adjustment for the Navigation system when the RGB input setting is set to QVGA NAVI or WVGA NAVI. Completing Picture Adjustment for the AppRadio Mode when the RGB input setting is set to iPhone. Adjusting the Picture Adjustment for the rear view camera. Source Adjusting the Picture Adjustment for the source. 4 Touch any of the following touch panel keys to select the function to be adjusted. Picture Adjustment items are displayed. ! Brightness - Adjusts the black intensity ! Contrast - Adjusts the contrast ! Color - Adjusts the color saturation ! Hue - Adjusts the tone of color (red or green is emphasized) ! Dimmer - Adjusts the brightness of the dis- play ! Temperature - Adjusts the color tempera- ture, resulting in a better white balance # You can adjust Hue only when the color system is set to NTSC. En 41
-
 1
1 -
2
-
3
-
4
-
5
-
6
-
7
-
8
-
9
-
10
-
11
-
12
-
13
-
14
-
15
-
16
-
17
-
18
-
19
-
20
-
21
-
22
-
23
-
24
-
25
-
26
-
27
-
28
-
29
-
30
-
31
-
32
-
33
-
34
-
35
-
 36
36 -
 37
37 -
 38
38 -
 39
39 -
 40
40 -
 41
41 -
 42
42 -
 43
43 -
 44
44 -
 45
45 -
 46
46 -
47
-
48
-
49
-
50
-
51
-
52
-
53
-
54
-
55
-
56
-
57
-
58
-
59
-
60
-
61
-
62
-
63
-
64
-
65
-
66
-
67
-
68
-
69
-
70
-
71
-
72
-
73
-
74
-
75
-
76
-
77
-
78
-
79
-
80
-
81
-
82
-
83
-
84
-
85
-
86
-
87
-
88
-
89
-
90
-
91
-
92
-
93
-
94
-
95
-
96
-
97
-
98
-
99
-
100
-
101
-
102
-
103
-
104
-
105
-
106
-
107
-
108
-
109
-
110
-
111
-
112
-
113
-
114
-
115
-
116
-
117
-
118
-
119
-
120
-
121
-
122
-
123
-
124
-
125
-
126
-
127
-
128
-
129
-
130
-
131
-
132
-
133
-
134
-
135
-
136
-
137
-
138
-
139
-
140
-
141
-
142
-
143
-
144
-
145
-
146
-
147
-
148
-
149
-
150
-
151
-
152
-
153
-
154
-
155
-
156
-
157
-
158
-
159
-
160
-
161
-
162
-
163
-
164
-
165
-
166
-
167
-
168
-
169
-
170
-
171
-
172
-
173
-
174
-
175
-
176
-
177
-
178
-
179
-
180
-
181
-
182
-
183
-
184
-
185
-
186
-
187
-
188
-
189
-
190
-
191
-
192
-
193
-
194
-
195
-
196
-
197
-
198
-
199
-
200
-
201
-
202
-
203
-
204
-
205
-
206
-
207
-
208
-
209
-
210
-
211
-
212
-
213
-
214
-
215
-
216
-
217
-
218
-
219
-
220
-
221
-
222
-
223
-
224
-
225
-
226
-
227
-
228
 |
 |