Pioneer AVH-X8500BHS Owner's Manual - Page 44
Setting the video signal, System settings, Before operating the auto EQ, function, Performing auto EQ
 |
View all Pioneer AVH-X8500BHS manuals
Add to My Manuals
Save this manual to your list of manuals |
Page 44 highlights
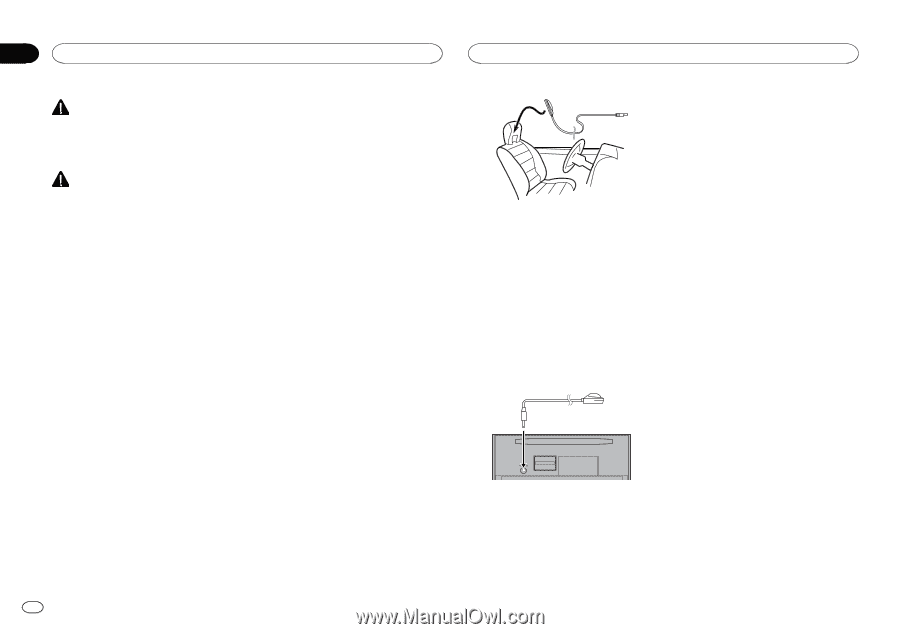
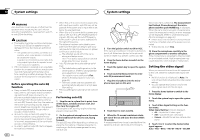
Section 19 System settings System settings WARNING As a loud tone (noise) may be emitted from the speakers when measuring the car's interior acoustic characteristics, never perform auto TA or auto EQ while driving. CAUTION ! Thoroughly check the conditions before per- forming auto EQ as the speakers may be damaged if these functions are performed when: - The speakers are incorrectly connected. (For example, when a rear speaker is connected as a subwoofer output.) - A speaker is connected to a power amp delivering output higher than the speaker's maximum input power capability. ! If the microphone is placed in an unsuitable position the measurement tone may become loud and measurement may take a long time, resulting in battery drainage. Be sure to place the microphone in the specified location. Before operating the auto EQ function ! Carry out auto EQ in as quiet a place as possible, with the car engine and air conditioning switched off. Also cut power to car phones or portable telephones in the car, or remove them from the car before carrying out auto EQ. Sounds other than the measurement tone (surrounding sounds, engine sound, telephones ringing etc.) may prevent correct measurement of the car interior acoustic characteristics. ! Be sure to carry out auto EQ using the optional microphone. Using another microphone may prevent measurement, or result in incorrect measurement of the car interior acoustic characteristics. ! In order to perform auto EQ, the front speaker must be connected. ! When this unit is connected to a power amp with input level control, auto EQ may not be possible if the power amp's input level is set below the standard level. ! When this unit is connected to a power amp with an LPF, turn this LPF off before performing auto EQ. Also set the cut-off frequency for the built-in LPF of an active subwoofer to the highest frequency. ! The distance has been calculated by computer to be the optimum delay to give accurate results for the circumstances, so please continue to use this value. - The reflected sound within the car is strong and delays occur. - The LPF on active subwoofers or external amps delay the lower sounds. ! Auto EQ changes the audio settings as follows: - The fader/balance settings return to the center position. (Refer to Using fader/balance adjustment on page 36.) - The equalizer curve switches to Flat. (Refer to Recalling equalizer curves on page 36.) - The front, center and rear speakers will automatically be adjusted to a high pass filter setting. ! Previous settings for auto EQ will be overwritten. Performing auto EQ 1 Stop the car in a place that is quiet, close all the doors, windows and sun roof, and then turn the engine off. If the engine is left running, engine noise may prevent correct auto EQ. 2 Fix the optional microphone in the center of the headrest of the driver's seat, facing forward. The auto EQ may differ depending on where you place the microphone. If desired, place the microphone on the front passenger seat to carry out auto EQ. 44 En 3 Turn the ignition switch to ON or ACC. If the car's air conditioner or heater is turned on, turn it off. Noise from the fan in the air conditioner or heater may prevent correct auto EQ. 4 Press the home button to switch to the home display. 5 Touch the system key to open the system menu. 6 Touch Auto EQ Measurement to enter auto EQ measurement mode. 7 Plug the microphone into the microphone input jack on this unit. When auto EQ is completed, The measurement has finished. Please disconnect the microphone and then push HOME key. is displayed. When the car's interior acoustic characteristics cannot be measured correctly, an error message will be displayed. (Refer to Understanding auto EQ error messages on page 60.) # It takes about nine minutes for auto EQ measurement to be completed when all the speakers are connected. # To stop auto EQ, touch Stop. 10 Store the microphone carefully in the glove compartment or another safe place. If the microphone is subjected to direct sunlight for an extended period, high temperatures may cause distortion, color change or malfunction. Setting the video signal When you connect this unit to an AV equipment to this unit, select the suitable video signal setting. ! As this function is initially set to Auto, the unit will automatically adjust the video signal setting. ! You can operate this function only for the video signal input into the AV input. 1 Press the home button to switch to the home display. 2 Touch the system key to open the system menu. 8 Touch Start to start auto EQ. 9 When the 10-second countdown starts, get out of the car and close the door within 10 seconds. A measurement tone (noise) is emitted from the speakers, and auto EQ measurement begins. 3 Touch Video Signal Setting on the function menu. Video Signal Setting items are displayed. ! AV - Adjusts the AV video signal ! AUX - Adjusts the AUX video signal ! Camera - Adjusts the rear view camera video signal 4 Touch c or d to select the desired video signal appears. Auto-PAL-NTSC-PAL-M-PAL-N-SECAM
-
 1
1 -
2
-
3
-
4
-
5
-
6
-
7
-
8
-
9
-
10
-
11
-
12
-
13
-
14
-
15
-
16
-
17
-
18
-
19
-
20
-
21
-
22
-
23
-
24
-
25
-
26
-
27
-
28
-
29
-
30
-
31
-
32
-
33
-
34
-
35
-
36
-
37
-
38
-
 39
39 -
 40
40 -
 41
41 -
 42
42 -
 43
43 -
 44
44 -
 45
45 -
 46
46 -
 47
47 -
 48
48 -
 49
49 -
50
-
51
-
52
-
53
-
54
-
55
-
56
-
57
-
58
-
59
-
60
-
61
-
62
-
63
-
64
-
65
-
66
-
67
-
68
-
69
-
70
-
71
-
72
-
73
-
74
-
75
-
76
-
77
-
78
-
79
-
80
-
81
-
82
-
83
-
84
-
85
-
86
-
87
-
88
-
89
-
90
-
91
-
92
-
93
-
94
-
95
-
96
-
97
-
98
-
99
-
100
-
101
-
102
-
103
-
104
-
105
-
106
-
107
-
108
-
109
-
110
-
111
-
112
-
113
-
114
-
115
-
116
-
117
-
118
-
119
-
120
-
121
-
122
-
123
-
124
-
125
-
126
-
127
-
128
-
129
-
130
-
131
-
132
-
133
-
134
-
135
-
136
-
137
-
138
-
139
-
140
-
141
-
142
-
143
-
144
-
145
-
146
-
147
-
148
-
149
-
150
-
151
-
152
-
153
-
154
-
155
-
156
-
157
-
158
-
159
-
160
-
161
-
162
-
163
-
164
-
165
-
166
-
167
-
168
-
169
-
170
-
171
-
172
-
173
-
174
-
175
-
176
-
177
-
178
-
179
-
180
-
181
-
182
-
183
-
184
-
185
-
186
-
187
-
188
-
189
-
190
-
191
-
192
-
193
-
194
-
195
-
196
-
197
-
198
-
199
-
200
-
201
-
202
-
203
-
204
-
205
-
206
-
207
-
208
-
209
-
210
-
211
-
212
-
213
-
214
-
215
-
216
-
217
-
218
-
219
-
220
-
221
-
222
-
223
-
224
-
225
-
226
-
227
-
228
 |
 |