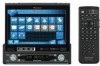
Pioneer AVHP7800DVD Owner's Manual - Page 91
Audio setup procedure
 |
UPC - 012562799179
View all Pioneer AVHP7800DVD manuals
Add to My Manuals
Save this manual to your list of manuals |
Page 91 highlights
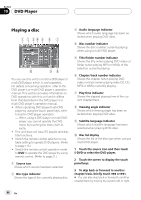
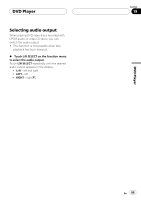
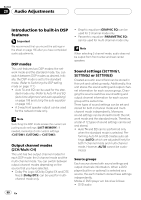
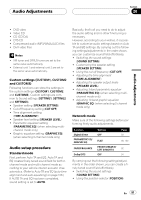
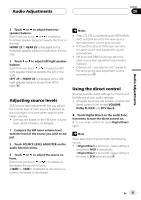
Audio Adjustments Section 20 Audio Adjustments ! DVD video ! Video CD ! CD (CD-DA) ! DTS-CD ! Compressed audio (MP3/WMA/AAC) files ! DivX video files Notes ! XM tuner and SIRIUS tuner are set to the same value automatically. ! External unit 1 and external unit 2 are set to the same value automatically. Custom settings (CUSTOM1, CUSTOM2 and CUSTOM3) Following functions can store the settings in the custom settings (CUSTOM1, CUSTOM2 and CUSTOM3). Custom settings are common to Sound settings (SETTING1, SETTING2 and SETTING3). ! Speaker setting (SPEAKER SETTING) ! Cut-off frequency setting (CUT OFF) ! Time alignment setting (TIME ALIGNMENT) ! Speaker level setting (SPEAKER LEVEL) ! Parametric equalizer setting (PARAMETRIC EQ) (when selecting multichannel mode only) ! Graphic equalizer setting (GRAPHIC EQ) (when selecting 2-channel mode only) Audio setup procedure Standard mode First, perform Auto TA and EQ. Auto TA and EQ creates finely-tuned sound field for both 2channel mode and multi-channel mode according to your vehicle interior acoustic characteristics. (Refer to Auto TA and EQ (auto-time alignment and auto-equalizing) on page 106.) If AUTO TA and EQ has been completed, sound setting is set to AUTO. Basically, that's all you need to do to adjust the audio setting and no other fine tuning is necessary. However, according to your wishes, it is possible to customize audio settings based on Auto TA and EQ settings. By carrying out the following settings/adjustments in the order shown, you can customize sound field effortlessly. ! Switching the sound settings (SOUND SETTING) ! Customizing the speaker setting (SPEAKER SETTING) ! Using the cut-off frequency (CUT OFF) ! Adjusting the time alignment (TIME ALIGNMENT) ! Adjusting the speaker output levels (SPEAKER LEVEL) ! Adjusting 3-band parametric equalizer (PARAMETRIC EQ) (when selecting multichannel mode only) ! Adjusting 13-band graphic equalizer (GRAPHIC EQ) (when selecting 2-channel mode only) Network mode Make sure of the following settings before performing finely audio adjustments. Function Digital Direct PARAMETRIC EQ/ GRAPHIC EQ FADER/BALANCE Dolby/DTS Setting OFF FLAT FRONT 0/REAR 0/ LEFT 0/RIGHT 0 OFF Page 93 98, 100 92 94 By carrying out the following settings/adjustments in the order shown, you can create a finely-tuned sound field effortlessly. ! Switching the sound settings (SOUND SETTING) ! Using the position selector (POSITION) En 91
-
 1
1 -
2
-
3
-
4
-
5
-
6
-
7
-
8
-
9
-
10
-
11
-
12
-
13
-
14
-
15
-
16
-
17
-
18
-
19
-
20
-
21
-
22
-
23
-
24
-
25
-
26
-
27
-
28
-
29
-
30
-
31
-
32
-
33
-
34
-
35
-
36
-
37
-
38
-
39
-
40
-
41
-
42
-
43
-
44
-
45
-
46
-
47
-
48
-
49
-
50
-
51
-
52
-
53
-
54
-
55
-
56
-
57
-
58
-
59
-
60
-
61
-
62
-
63
-
64
-
65
-
66
-
67
-
68
-
69
-
70
-
71
-
72
-
73
-
74
-
75
-
76
-
77
-
78
-
79
-
80
-
81
-
82
-
83
-
84
-
85
-
 86
86 -
 87
87 -
 88
88 -
 89
89 -
 90
90 -
 91
91 -
 92
92 -
 93
93 -
 94
94 -
 95
95 -
 96
96 -
97
-
98
-
99
-
100
-
101
-
102
-
103
-
104
-
105
-
106
-
107
-
108
-
109
-
110
-
111
-
112
-
113
-
114
-
115
-
116
-
117
-
118
-
119
-
120
-
121
-
122
-
123
-
124
-
125
-
126
-
127
-
128
-
129
-
130
-
131
-
132
-
133
-
134
-
135
-
136
-
137
-
138
-
139
-
140
-
141
-
142
-
143
-
144
 |
 |
