Pioneer DVR-533H-S Owner's Manual - Page 10
Before you start, Putting the batteries in the remote, control, Using the remote control, Disc / - reset
 |
View all Pioneer DVR-533H-S manuals
Add to My Manuals
Save this manual to your list of manuals |
Page 10 highlights
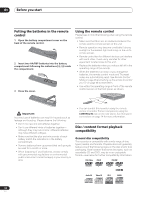
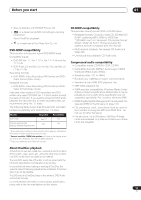
01 Before you start Putting the batteries in the remote control 1 Open the battery compartment cover on the back of the remote control. 2 Insert two AA/R6P batteries into the battery compartment following the indications ( , ) inside the compartment. 3 Close the cover. Using the remote control Please keep in mind the following when using the remote control: • Make sure that there are no obstacles between the remote and the remote sensor on the unit. • Remote operation may become unreliable if strong sunlight or fluorescent light is shining on the unit's remote sensor. • Remote controllers for different devices can interfere with each other. Avoid using remotes for other equipment located close to this unit. • Replace the batteries when you notice a fall off in the operating range of the remote. • When the batteries run down or you change the batteries, the remote control mode and TV preset codes are automatically reset. See Remote Control Mode on page 96 and Setting up the remote to control your TV on page 98 to reset them. • Use within the operating range in front of the remote control sensor on the front panel, as shown. 23ft Important Incorrect use of batteries can result in hazards such as leakage and bursting. Please observe the following: • Don't mix new and old batteries together. • Don't use different kinds of batteries together- although they may look similar, different batteries may have different voltages. • Make sure that the plus and minus ends of each battery match the indications in the battery compartment. • Remove batteries from equipment that isn't going to be used for a month or more. • When disposing of used batteries, please comply with governmental regulations or environmental public instruction's rules that apply in your country or area. • You can control this recorder using the remote sensor of another Pioneer component using the CONTROL IN jack on the rear panel. See Rear panel connections on page 14 for more information. Disc / content format playback compatibility General disc compatibility This recorder is compatible with a wide range of disc types (media) and formats. Playable discs will generally feature one of the following logos on the disc and/or disc packaging. Note however that some disc types, such as recordable CD and DVD, may be in an unplayable format-see below for further compatibility information. DVD-Video DVD-R DVD-RW Audio CD Video CD CD-R CD-RW 10 En
-
 1
1 -
2
-
3
-
4
-
 5
5 -
 6
6 -
 7
7 -
 8
8 -
 9
9 -
 10
10 -
 11
11 -
 12
12 -
 13
13 -
 14
14 -
 15
15 -
16
-
17
-
18
-
19
-
20
-
21
-
22
-
23
-
24
-
25
-
26
-
27
-
28
-
29
-
30
-
31
-
32
-
33
-
34
-
35
-
36
-
37
-
38
-
39
-
40
-
41
-
42
-
43
-
44
-
45
-
46
-
47
-
48
-
49
-
50
-
51
-
52
-
53
-
54
-
55
-
56
-
57
-
58
-
59
-
60
-
61
-
62
-
63
-
64
-
65
-
66
-
67
-
68
-
69
-
70
-
71
-
72
-
73
-
74
-
75
-
76
-
77
-
78
-
79
-
80
-
81
-
82
-
83
-
84
-
85
-
86
-
87
-
88
-
89
-
90
-
91
-
92
-
93
-
94
-
95
-
96
-
97
-
98
-
99
-
100
-
101
-
102
-
103
-
104
-
105
-
106
-
107
-
108
-
109
-
110
-
111
-
112
-
113
-
114
-
115
-
116
 |
 |
