Pioneer FH-P800BT Owner's Manual - Page 49
Switching the auxiliary setting, Switching the dimmer setting, Setting the rear output and,
 |
UPC - 012562886657
View all Pioneer FH-P800BT manuals
Add to My Manuals
Save this manual to your list of manuals |
Page 49 highlights
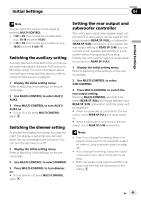
Initial Settings Section 04 Initial Settings Note You can match the clock to a time signal by pressing MULTI-CONTROL. ! If 00 to 29, the minutes are rounded down. (e.g., 10:18 becomes 10:00.) ! If 30 to 59, the minutes are rounded up. (e.g., 10:36 becomes 11:00.) Switching the auxiliary setting Auxiliary devices connected to this unit can be activated individually. Set each AUX source to ON when using. For more information about connecting or using auxiliary devices, refer to Using the AUX source on page 53. 1 Display the initial setting menu. Refer to Adjusting initial settings on the previous page. 2 Use MULTI-CONTROL to select AUX1/ AUX2. 3 Press MULTI-CONTROL to turn AUX1/ AUX2 on. # To turn AUX off, press MULTI-CONTROL again. Switching the dimmer setting To prevent the display from being too bright at night, the display is automatically dimmed when the car's headlights are turned on. You can turn the dimmer on or off. 1 Display the initial setting menu. Refer to Adjusting initial settings on the previous page. 2 Use MULTI-CONTROL to select DIMMER. 3 Press MULTI-CONTROL to turn dimmer on. # To turn dimmer off, press MULTI-CONTROL again. Setting the rear output and subwoofer controller This unit's rear output (rear speaker leads output and RCA rear output) can be used for fullrange speaker (REAR SP :FULL) or subwoofer (REAR SP :S/W) connection. If you switch the rear output setting to REAR SP :S/W, you can connect a rear speaker lead directly to a subwoofer without using an auxiliary amp. Initially, the unit is set for rear full-range speaker connection (REAR SP :FULL). 1 Display the initial setting menu. Refer to Adjusting initial settings on the previous page. 2 Use MULTI-CONTROL to select S/W CONTROL. 3 Press MULTI-CONTROL to switch the rear output setting. Pressing MULTI-CONTROL will switch between REAR SP :FULL (full-range speaker) and REAR SP :S/W (subwoofer) and that status will be displayed. # When no subwoofer is connected to the rear output, select REAR SP :FULL (full-range speaker). # When a subwoofer is connected to the rear output, select REAR SP :S/W (subwoofer). Notes ! Even if you change this setting, there is no output unless you turn the subwoofer output on (refer to Using subwoofer output on page 46). ! If you change this setting, subwoofer output in the audio menu return to the factory settings. ! Both rear speaker lead outputs and RCA rear output are switched simultaneously in this setting. En 49
-
 1
1 -
2
-
3
-
4
-
5
-
6
-
7
-
8
-
9
-
10
-
11
-
12
-
13
-
14
-
15
-
16
-
17
-
18
-
19
-
20
-
21
-
22
-
23
-
24
-
25
-
26
-
27
-
28
-
29
-
30
-
31
-
32
-
33
-
34
-
35
-
36
-
37
-
38
-
39
-
40
-
41
-
42
-
43
-
 44
44 -
 45
45 -
 46
46 -
 47
47 -
 48
48 -
 49
49 -
 50
50 -
 51
51 -
 52
52 -
 53
53 -
 54
54 -
55
-
56
-
57
-
58
-
59
-
60
-
61
-
62
-
63
-
64
-
65
-
66
-
67
-
68
-
69
-
70
-
71
-
72
-
73
-
74
-
75
-
76
-
77
-
78
-
79
-
80
 |
 |
