Pioneer PRO-800HD Other Manual - Page 20
RF In, Audio/Video Output 1, See Connecting to a Home Network, in
 |
View all Pioneer PRO-800HD manuals
Add to My Manuals
Save this manual to your list of manuals |
Page 20 highlights
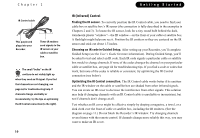
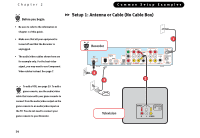
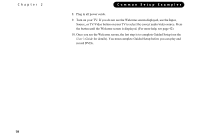
Setup 1: Antenna or Cable (No Cable Box) 1. Connect the RF Coaxial cable currently coming from the wall to the connector labeled RF In on the Pioneer DVD Recorder with TiVo. 2. Connect the Composite A/V cable from the Audio/Video Output 1 connectors on the Recorder to the Audio/Video Input connectors on the TV. 3. Connect a phone line (see page 8 for help). After you complete Guided Setup (see step 6 below), you'll be able to connect your Recorder to a home network and use a shared 2 broadband Internet connection instead of a phone line to connect to the TiVo service. See Chapter 8, "Connecting to a Home Network," in the User's Guide. 4. Plug in all power cords. 5. Turn on your TV. If you do not see the Welcome screen displayed, use the Input, Source, or TV/Video button on your TV to select the correct audio/video source. Press the button until the Welcome screen is displayed. (For more help, see page 42.) 6. Once you see the Welcome screen, the last step is to complete Guided Setup (see the User's Guide for details). You must complete Guided Setup before you can play and record DVDs. 15
-
 1
1 -
2
-
3
-
4
-
5
-
6
-
7
-
8
-
9
-
10
-
11
-
12
-
13
-
14
-
 15
15 -
 16
16 -
 17
17 -
 18
18 -
 19
19 -
 20
20 -
 21
21 -
 22
22 -
 23
23 -
 24
24 -
 25
25 -
26
-
27
-
28
-
29
-
30
-
31
-
32
-
33
-
34
-
35
-
36
-
37
-
38
-
39
-
40
-
41
-
42
-
43
-
44
-
45
-
46
-
47
-
48
-
49
-
50
-
51
-
52
-
53
-
54
-
55
-
56
-
57
-
58
-
59
-
60
-
61
-
62
-
63
-
64
-
65
 |
 |
